• Skip to primary navigation
  • Skip to main content
  • Skip to primary sidebar
Downeats logo
  • My Story
  • Recipes
  • Work With Me
  • Contact
  • Learn
    • Freebies
    • Mini Photo Course
    • Curated Resources

Recipes

A Simple Caprese Salad with Summer Heirloom Tomatoes

Jul 31, 2021 · Leave a Comment

Caprese salad with heirloom tomatoes

My 9 year old daughter does not like tomatoes. She insists that they are “too slimy”, “too cold”, “too sour”, “too sweet”, or just have “a weird texture”. This has been going on since she was a toddler. She never has taken to tomatoes- and I have tried a wide variety. Hothouse, vine, Roma, cherry, grape, heirloom- it doesn’t matter. If there is the littlest slice of fresh tomato on her plate she will always eat it with disdain. I do, however, believe in perseverance and have continued to serve tomatoes to her over the years. I’ve never avoided giving her tomatoes or fixed “a special plate just for her” at mealtimes. For example, she will eat salsa. She will eat a BLT-begrudgingly. Cooked tomatoes are almost always a win. So it probably goes without saying that this Caprese salad is not a favorite of hers.

It is, however, a favorite of mine and pretty much everyone else in our house. The only people I know that don’t appreciate it are the few vegans in my life, and even they’ll admit that a good Caprese salad is quite delicious, even if they don’t. Caprese salad is such a quick and delicious summer salad. I love making it (despite my daughters complaints) because it’s fast, simple and (sans my daughter) universally loved. It’s perfect for a light lunch, or a side salad at dinner.

Caprese salad is clearly not a New England recipe, though you can find it at restaurants and I’ve seen it served at various parties and barbecues I’ve been to. Caprese is traditionally Italian, and served simply with fresh tomatoes, fresh mozzarella, basil leaves and a little olive oil, vinegar and sea salt. I’ve read that upon it’s first creation in the early 1920’s it wasn’t a big hit. In fact, it didn’t quite catch on until it was served as a sandwich, and then it quickly spread like wildfire. Now it is common to find in many different places around the world, and I’ve seen many different presentations of it. Once you know the foundation, it’s easy to get creative and make it your own.

Personally, I think to get the best results with cooking it comes down to having the best ingredients you can find/afford. For the recipe following, I recommend grabbing the best quality tomatoes you can (perhaps at a local farm or market?), and a good quality olive oil. I prefer the mozzarella that comes in water for this salad, and sea salt over kosher salt. Maine always has the most beautiful, plentiful array of tomatoes that pop up everywhere by mid July. They can be found at every farmers market, farm stand and backyard garden you could come across. Big, juicy, colorful heirloom tomatoes are my favorite and I wait all winter for them. This salad is delicious with heirlooms, so if you can get your hands on some, I highly recommend it!

How to Make a Simple Caprese Salad

Step One Slice the tomatoes into large rounds. I like mine fairly thick, but it’s entirely preferential! You can make them into thin slivers, smaller wedge shapes, or even cubes. If you happen to be using smaller, cherry or grape tomatoes I recommend halving or quartering them.

Step Two Slice the fresh mozzarella. Alternatively, if you’re using the smaller balls of fresh mozzarella, you can half them, or leave them as-is!

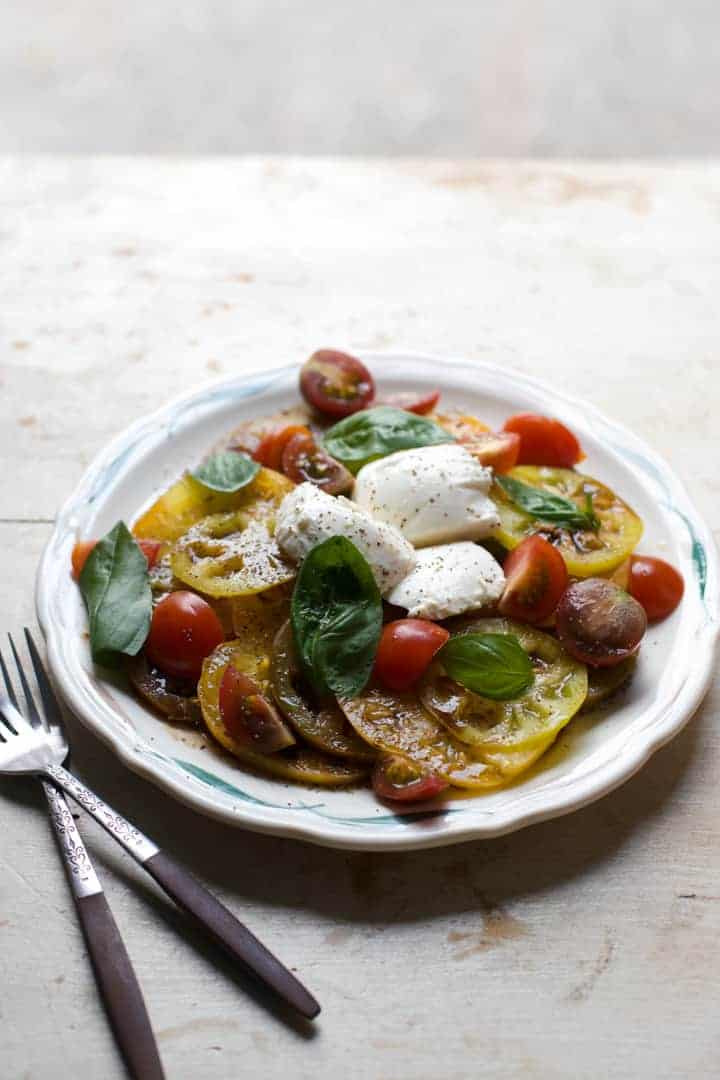
Step Three Lay the tomatoes and mozzarella on a plate, alternating between the two. So a slice of tomato, with a slice of mozzarella overlapping half of the tomato slice. Then repeat. You can also scatter the tomatoes and mozzarella evenly around the plate if you’re using smaller balls of mozzarella and grape or cherry tomatoes.

Step Four Drizzle the olive oil and vinegar evenly on top of the tomato and mozzarella. Sprinkle with a bit of sea salt and black pepper if you prefer.

Step Five Decorate with a generous amount of fresh basil leaves.

Hi! I’m Amber Rogals, a food photographer and recipe developer in New England

A bit more about me…

Hi! I’m Amber Rogals and I am a food photographer, and recipe developer in northern coastal New England. I also write and photograph regularly for my food blog, Downeats. You’ll usually find me cooking and developing recipes with seasonal foods, and gathering with loved ones to enjoy everything. I grew up on the coast of Maine and live here with my (gorgeous, amazing, hardworking) high school sweetheart and our (hilarious, talented and wonderful) three kids. I love to tell food stories through my camera lens, and inspire others to cook, eat, gather, and live slow. You can read more about me here. If you are looking for a food photographer or recipe developer please contact me here.

Food, Recipes, Salads, Sides

New England Recipes: Zucchini Carpaccio with Blueberries

Jul 29, 2021 · Leave a Comment

zucchini carpaccio with maine blueberries

When it comes to New England recipes and New England food most people think of the classics you’ll find at any harbor dwelling eatery. Things like lobster, clam chowder, baked beans, apple cider, blueberry pie… etc. These things can all be found at any little hub along the east coast north of Boston. Don’t get me wrong- I love those things. There is a time and a place for them (for arguments sake, pretty much any time is a time for blueberry pie.) However, I am a cook, and I like to utilize all of Maine’s riches. Summer in Maine is short, and it seems only fitting to get the most out of summer foods while they’re fresh and bursting. Maine is famous for lobster, blueberries, and we locals probably all have our fair share of apple recipes stashed away in our kitchens somewhere. But have you seen our heirloom tomatoes? What about our selection of mushrooms just waiting to be foraged? And do you know how large the zucchinis here get? This zucchini carpaccio is inspired by my love for zucchini, but also all things summer in Maine. And for you folk that love the traditional New England recipes -yes, it includes Maine blueberries.

If you’re unfamiliar with carpaccio, it’s traditionally a meat dish and comes from Italy. Carpaccio is commonly served in Italy as a thinly sliced raw meat or fish. It’s also generally a starter or side- not a main dish. Sometimes it will have capers, onions or sprigs of arugula decorated around it with drizzles of olive oil and lemon juice. These are all things you can add to the recipe below if you feel like improvising. I’ve seen other carpaccio’s made that are not of the meat variety- commonly mushroom, carrot, beet or a combination of veggies.

My carpaccio features zucchini- which is plentiful during the summer- and Maine blueberries. Again, it’s not one of the traditional New England recipes, but it’s certainly inspired by the flavors of New England. In fact, just about everything in this dish was grown or crafted locally- the cheese, vinegar, produce, and even the sea salt. If that doesn’t scream New England recipes, I don’t know what does. (Okay, I do know what does, but you know what I mean, right?) This carpaccio dish is perfect for a light lunch or a starter course for dinner. As long as you have a mandolin, it’s very, very easy to make. Without a mandolin, you can attempt to slice your zucchini as thin as possible with a very sharp knife, or possibly use the wide slicer of a cheese grater. For ease, consistency and perhaps less stress, I’d opt for a mandolin.

New England Recipes: Though non-traditional, zucchini carpaccio encompasses some of Maine’s favored summer flavors.

Step One Slice the zucchini into thin round slices using a mandolin. If you don’t have a mandolin you can definitely use a knife, or even the widest side of a cheese grater. The key is keeping the slices as thin as possible.

Step Two Lay the zucchini slices individually in an overlapping circle on a large plate. You can also form them in a line, or in any decorative way so that they are all showing a little bit. This way when you drizzle them with olive oil and vinegar each piece gets a little bit. Basically, you just don’t want them stacked on top of each other.

Step Three Sprinkle fresh blueberries on top of the zucchini.

Step Four Grate the ricotta salata on top of the blueberries and zucchini.

Step Five Drizzle with olive oil, vinegar, and sprinkle with a little bit of sea salt.

Zucchini Carpaccio

Print Recipe Pin Recipe
Prep Time 15 minutes mins

Ingredients
  

  • 2 Large Zucchini
  • 1/2 Cup Blueberries, preferably Maine Wild, but any kind is fine!
  • 1/4 Cup Olive Oil
  • 1/8 Cup Blueberry or Balsamic Vinegar
  • 2-3 oz Ricotta Salata
  • Sea Salt

Instructions
 

  • Using a mandolin, slice the zucchini into rounds/coin shape on the thinnest setting. If you do not have a mandolin, simply use a very sharp knife to cut the zucchini into slices as thin as possible.
  • Distribute the slices around onto a large plate, or evenly onto smaller individual plates in a decorative fashion. I like to go in circles, slightly overlapping each one, but you can place them however you prefer!
  • Sprinkle the blueberries evenly around the plate on top of the zucchini.
  • Grate the ricotta on top of the zucchini and blueberries, again distributing evenly.
  • Drizzle the oil and vinegar, and sprinkle lightly with sea salt.

A little more about me…

Hi! My name is Amber Rogals and I’m a food photographer and recipe developer in Maine. I also serve the New England area and beyond, and write and photograph regularly for my food blog, Downeats. I absolutely love cooking and developing recipes with seasonal foods, and gathering with loved ones to enjoy everything. I grew up on the coast of Maine and pretty much never left. Now I live here with my (gorgeous, amazing, hardworking) high school sweetheart and our (hilarious, talented and wonderful) three children. I love to capture shared moments, and inspire others to cook, eat, gather, and live slow. You can read more about me here. If you are looking for a food photographer, food stylist or recipe developer please contact me here.

Recipes, Salads, Sides

Blueberry Shortcake – Classic New England Style

Jul 27, 2021 · Leave a Comment

wild blueberry shortcake

When I was fourteen, one of my first jobs was raking blueberries. It may be a rite of passage into the work force for young Mainers. If you’re not raking blueberries all summer then you’re hauling lobster traps in your family boat at 5am. If you’re lucky, I guess you get to turn over tables at a local eatery that’s brimming with tourists who are willing to wait an hour for a lobster roll and a blueberry shortcake. (I did that, too.) None of these jobs are for the faint of heart, of course, though raking blueberries is particularly grueling work. Maine blueberries are the small, low-bush berries, so being bent over in a hot, shadeless field all day is inevitable if you’re going to earn any kind of living during the season. Blueberry style rake in hand you are assigned a “lane” in a field that stretches on without sympathy. For a teenager that has the summer off of school, it’s its own circle of hell-only hotter. I didn’t last long. Certainly not all summer.

Despite my naive and voluntary leap into a careful concoction of scorching sun, shadeless fields and minimum wage labor, I never lost my taste for Maine blueberries. Quite the opposite actually; I appreciate them all the more. I know the work that goes into harvesting these nutrient packed gems. Every summer I always buy up as many as I can- mainly because they’re delicious, but also because I love supporting local farmers. Traditional New England recipes generally have Maine blueberries somewhere if your rifle through. Muffins, scones, pancakes are all popular and pretty much beloved by all.

There are a few things that rarely enter my kitchen unless they are in season and wild Maine blueberries is one of them. While Fiona will eat them straight out of the container by the spoonful (okay, so do I), I love integrating them into other things. Desserts, salads, or just sprinkling them on oatmeal in the morning. Blueberry shortcake, though not as notorious as strawberry, is one of my favorites. It’s everything I love in a recipe: simple, quality ingredients, and full of delicious flavor. There are quite a few different ways to go about making blueberry shortcakes, but the traditional New England recipe always is more of a biscuit style “cake” than an actual cake. I like to make mine light, fluffy, and fairly small. If you’ve ever made biscuits before, this blueberry shortcake should be a breeze for you to follow. If not, don’t fret- it’s quite simple.

Blueberry Shortcake: Steps and Tips For A Classic New England Recipe

1) The first step is to make the shortcakes. As I mentioned above, these are far more like biscuits than cakes. Start by preheating the oven to 425˚F.

2) Measure out the flour, sugar, baking powder and salt into a medium sized bowl, and whisk them together.

3) Cut the butter into the flour using a pairing knife. It’s best in small, 1/2″ pieces, because you’ll be using your fingers to crush it up into even smaller pea-size pieces. (Alternatively, you can use a food processor and pulse the butter in until the pieces are pea-sized and evenly distributed into the dry ingredients.)

4) Using your fingertips, mix the butter into the dry mixture, crushing it into small pieces to evenly distribute it into the flour. By the end there should only be small pea-sized pieces of butter and no large chunks. (Again, you can also use a food processor for this part.)

5) Add the milk and mix with a spoon until a dough starts to form. Once it starts to come together into a dough, continue mixing with your hands until a ball of dough forms and there are no dry spots left.

6) Sprinkle flour onto a countertop and gently roll out the dough to about 1/2″-1″ thickness. Use a round cookie cutter, or the opening of a small glass or jar to cut the dough into circular shapes. Roll out the leftover dough and continue cutting rounds until there is no more dough left.

7) Put the shortcakes onto a baking sheet lined with parchment paper and bake at 425˚F for about 16-18 minutes, or until they start to lightly brown.

8) While the shortcakes are baking, make the whipped cream. I know you can easily buy whipped cream but I highly recommend making it from scratch because it’s simple and the taste and texture is so much more satisfying! Simply combine the cream, vanilla and sugar into a mixing bowl and whisk on high speed about 2-3 minutes, until the cream holds together and is fluffy. Be careful not to over whip or your whipped cream will turn into butter!

9) After the shortcakes have had time to cool to room temperature, slice one in half (horizontally). Spoon a generous dollop of whipped cream and sprinkle with blueberries. Sandwich the other half of the shortcake on top, and sprinkle with confectioners’ sugar, or another little spoonful of whipped cream and berries.

A Little About Me…

New England Food Photographer and Recipe Developer

Hello! I’m Amber Rogals and I’m a food photographer, food stylist and recipe developer in Maine. I also work throughout the New England area, capturing various food stories, products and recipes. I started my food blog, Downeats, because I love to inspire others to cook and enjoy delicious, healthy meals with their loved ones. I was raised and currently live in Maine with my (gorgeous, amazing, hardworking) high school sweetheart and our (hilarious, talented and wonderful) children. I believe in living slow and enjoying life and I love capturing shared moments. You can read more about me here. If you are looking for a food photographer or recipe developer please contact me here.

Desserts, Food, Recipes

Chocolate Meringues Recipe Made Easy

Jul 22, 2021 · Leave a Comment

Chocolate meringues

I don’t feel guilty about dessert. Do you? Lately I’ve been trying to prioritize joy in my life-both creating and finding it. Among other things, this includes preparing and eating a variety of delicious foods for myself and the family. Dessert, in moderation, is far too enjoyable to feel guilty about if you ask me. I’m also pretty sure that I love dessert too much to feel any guilt about it. So let’s talk about one of my favorite desserts: chocolate meringues. Everything about meringue is delightful. Who doesn’t want a dessert that is sweet and cloud-like? The entire process of whipping egg whites and sugar into a beautiful, thick, fluffy whip is always so satisfying. The beautiful swirl of cocoa powder makes these meringues decadently beautiful, and gooey on the inside. The scent of vanilla and sugar that wafts up from my mixing bowl is something I will never tire of. Meringue in itself is a beautiful thing, and adding a beautiful swirl of chocolate truly takes it up a notch.

To be perfectly honest, I didn’t even know what a meringue was as a child. My mom made lemon meringue pie every Christmas, but that was the extent that my meringue expertise went. I didn’t know about meringues as a standalone dessert until I was well into my mid-20’s, and it was a delightful revelation. Meringues are not a common thing in New England. You won’t find them in even the largest of cookbooks for New England recipes, or on many Maine dessert menus. I’ve read that meringues are traditionally Swiss, though I associate them with France or Italy. I suppose each culture has their own variation, each as a good as the next. Maine recipes and New England recipes place a lot more focus on heartier, comfort style desserts, like blueberry pies and apple crisps and such.

My chocolate meringues recipe is fairly simple, and doesn’t have a lot of sugar compared to other meringue recipes. I find that with some chocolate meringues the recipe can call for more sugar than necessary and they are almost too sweet to truly enjoy. Meringues do need a fair amount of sugar to get that perfect crispy outside and gooey inside, without falling into a flat sticky mess. However, I’ve tried to keep my sugar ratio just right. Additionally, these chocolate meringues use unsweetened cocoa powder, so the bitterness does even out the sugar a little bit more. They’re just sweet enough without being over the top. In addition to sugar, meringues don’t require a lot of ingredients -just five to be exact- but you do have to mindful about how you cook them. Chocolate meringues (okay, any type of meringues) are temperature sensitive, which I discovered the hard way during my first few failed attempts. I’ve tried this recipe for chocolate meringues several times and it’s come out perfect every time, so you should have no trouble with it.

A squashed chocolate swirl meringue, on a white plate, with whipped cream and a pink linen napkin.

How to Make Chocolate Meringues

I have had a few people ask me about my chocolate meringues: How do you get the swirls so nice? How do you stop them from collapsing? How long to whip the egg whites for? Meringues can be a little finicky-my first few batches were terrible. Once you know the little tricks then you, too, can have perfect meringues every time.

Step 1 First preheat the oven. These chocolate meringues are meant to have a crispy shell on the outside with a softer, almost chewy texture on the inside, so I cook them at a very low temperature: 200˚F.

Step 2 Chocolate Meringues start with egg whites, so the first step is separating your eggs. I always try to save the egg yolks for a separate cooking project- usually some type of pudding or custard. If you have the time a dollop of chocolate pudding goes very nicely on top of these meringues! Next you’ll whip your eggs until they reach “soft peaks”. This means that if you dip the whisk into the bowl of fluffy whites, that the egg whites should make a point that flops/curls over, not quite holding its shape.

Step 3 Add the sugar. Once the egg whites have reached soft peaks stage, continue whisking and add in the sugar, 1/2 cup at a time. Allow about 1 minute of mixing between each addition.

Step 4 After you’ve added the sugar, you’ll add the vanilla and cornstarch.

Step 5 The eggs whites should look a bit like marshmallow fluff, and you want to whip them for a total of 8-10 mins on medium speed. Once you’ve added the vanilla and cornstarch, allow the meringue to whip for another 5-6 minutes. You’ll know it’s done when it reaches “Stiff peaks”. This means that pulling out the whisk will result in a nice pointed tip of meringue that doesn’t flop over, or only curls over a little bit.

Step 6 Dust in the cocoa powder and fold it in gently, in just 3-4 folds.

Step 7 Scoop a generous spoonful of meringue onto a baking pan lined with parchment paper. Don’t fuss with the shape too much, but I generally aim for round with a few fun little peaks on the top. I can usually fit 9 chocolate meringues or so onto one pan.

Step 8 Bake the meringues. Set them in your preheated oven for 1 hour. After one hour is done, turn off the oven but leave the meringues in for another hour to cool of gradually inside the oven.

Step 9 Serve with a dollop of whipped cream, chocolate pudding or mousse, or a drizzle of caramel syrup!

Quick tips for making chocolate meringues

  1. A lot of recipes I read about say that the eggs should be room temperature. This does allow the whites to get a bit fluffier, however, I’ve also made meringues with eggs right out of the fridge and they were still fluffy and delicious. Refrigerated eggs are not a deal breaker if you’ve forgotten to take them out ahead of time!
  2. Be sure that when you fold in the cocoa powder you only fold 3-4 times. Over mixing will cause the cocoa powder to fully mix into the meringue and the you won’t have those pretty swirls on your chocolate meringues (though don’t worry, they’ll still taste just as good!)
  3. Baking at the right temp and for the right time is key to making good meringues. It’s easy to overcook meringues- they dry out and then burn- so baking at a low temperature like 200˚F is for an hour is pretty much perfect. It’s also incredibly important to let them cool off in the oven. Exposing them to a drastic change in temperature will make them collapse and you’ll have flat, sticky chocolate meringues instead of crispy, gooey, fluffy meringues.

Chocolate Meringues

These sweet, light, fluffy chocolate swirl meringues are crispy on the outside and soft and chewy on the inside!
Print Recipe Pin Recipe
Prep Time 20 minutes mins
Cook Time 2 hours hrs
Servings 8 Meringues

Ingredients
  

  • 4 Egg Whites
  • 1 1/2 Cups Sugar
  • 1 Tsp Vanilla
  • 1 Tbsp Unsweetened Cocoa Powder
  • 1 Tsp Cornstarch

Instructions
 

  • Preheat the oven to 200˚F.
  • In a large mixing bowl, or stand mixer with whisk attachment, begin whipping your egg whites on medium speed.
  • Once the egg whites reach "soft peaks" add in the sugar half a cup at a time, leaving about 1 minute between each addition.
  • Allow the sugar to whip into the egg whites about 3-4 minutes and then add the cornstarch and vanilla.
  • Whip another 4-5 minutes, until the meringue reaches the "stiff peaks" stage. You should be able to dip the whisk in and when you pull it out the meringue creates a nice, pointed tip that doesn't flop over too much.
  • Sift in the cocoa powder and fold it in with a rubber spatula or large spoon only 3-4 times. Try not to fold or mix too much if you want to keep the beautiful "swirl" look.
  • Line a sheet pan with parchment paper and spoon large dollops, about 2-2 1/2" around, onto the sheet pan. Use the spoon to create fun "peaks" or manipulate the cocoa powder swirls for aesthetic if you desire, but remember not to work with it too much. Depending on how large your pans on you may need to use two pans.
  • Bake the meringues for 1 hour at 200˚F. If you tap them they should feel like a hard, crispy shell. (If they feel sticky, give them another 5-10 minutes and check them again)
  • After 1 hour turn off the oven, but leave the meringues in the oven so they can cool off very gradually. Pulling them out immediately and exposing them to cooler temperature can cause them to deflate and implode into themselves.
  • Serve with fresh whipped cream or a drizzle of caramel syrup, or you can eat them as-is!
  • Store them in an airtight container for up to one week.

About Me

My name is Amber Rogals! I’m a food photographer, food stylist and recipe developer in Maine. I also work throughout the New England area and beyond! I am the writer behind this food blog, Downeats, and I’m incredibly passionate about cooking, seasonal foods, and gathering with loved ones to enjoy it all. I live near the coast of Maine with my (gorgeous, amazing, hardworking) high school sweetheart and our (hilarious, talented and wonderful) three children. My goal is inspiring others to live slow, and enjoy life. You can read more about me here. If you are looking for a food photographer, food stylist or recipe developer please contact me here.

Desserts, Featured Main, Recipes, Uncategorized

Easy Family Dinner Ideas: Pasta with Asparagus and Feta

Jul 22, 2021 · Leave a Comment

pasta flat lay with asparagus, tomatoes, and feta and sea salt

As a mom of (almost) four, I like to keep things simple. In fact, outside of being a mom, I truly think it’s become a character trait of mine to value simplicity. Simple doesn’t always have to mean plain, boring or mediocre. You can cut fresh asparagus from the garden, and roast it with a little butter and olive oil for 10-15 minutes. Serve them with a squeeze of lemon juice and sea salt and it will be divine. It is as equally simple as it is delicious. If you’re ever looking for true New England recipes, go for them simplest of them: steamed lobster with nothing but melted butter. Blueberry pie with a homemade crust. Basic home fries consist of little more than a handful of Maine potatoes, quality olive oil and a sprinkle of sea salt. There is truth and beauty (and much culinary pleasure) in simplicity, if you look for it. I always try to keep a few easy family dinner ideas in my back pocket at all times. This means simple dishes that I can usually throw together on a whim, yet still feel confident that I’m giving my family something healthy and delicious. If the meal can include something that is in season, even better. Here, I’m making a simple pasta with asparagus dish.

Asparagus season is kind of like the Maine kick off into summer. It comes just as the weather is starting to get warm and the daylight really lingers into the late evening. The best New England recipes are often the seasonal ones. Tourists flee here from all over during the summer months to enjoy Maine at its peak; fresh produce and seafood aplenty. In the spring, it’s a lot asparagus, rhubarb, radishes and herbs. This is soon followed by even more asparagus, strawberries, and garlic scapes. Tomatoes come when summer is in full swing. By that time Maine is so lush with deliciousness you can find inspiration for a few easy family dinner ideas by simply browsing the Portland Farmers Market on a busy Saturday. Until then, (or in case you can’t make the trek to Portland), pasta with asparagus and feta is one of my favorite back-pocket meals:

An Easy Family Dinner Idea? Pasta with asparagus…

pasta with asparagus, tomatoes, and feta

This is an easy dish: pasta with asparagus, shallots, tomatoes and feta. You can absolutely substitute shallots with onions if you don’t have them on hand or can not get them. You can also blanch the asparagus ahead if want to make things even easier come dinner time.

This is quite an easy dinner to put together, and there aren’t too many steps. A few of the steps you can even do ahead of time if it works better for you in managing your day and having to get dinner on the table. This has certainly became a known go-to meal in our house, and has also helped my kids warm up to asparagus (except Amelia, who still only eats one spear of it, though she doesn’t think of it as “disgusting” anymore… Progress, I suppose!)

How to Make Pasta with Asparagus, Shallots and Feta

Step 1 Prepare all of your veggies as needed. Peel and chop the shallots. Cut the woody ends (about the thickest 1/3) off of the asparagus. Cut your cherry tomatoes in half.

Step 2 Blanch the asparagus. I know “blanch” sounds like a fancy term, but it’s really simple. Boil it for 2-3 minutes, and then quickly strain and immediately set the asparagus in an ice cold bowl of water. This will stop it from overcooking. Once the asparagus has had a few minutes to cool off, take it out of the water and set aside.

Step 3 Set a large pot of water to boil for the pasta, with a generous spoonful of salt. Boil the pasta to al dente. Drizzle it with a little olive oil so it doesn’t stick together, then cover and set aside.

Step 4 Pour a few lugs of olive oil into a large pan and set at medium-low heat. Toss in the shallots and allow to cook until opaque- about 3-4 minutes- stirring every minute or so.

Step 4 Add in the tomatoes, and allow them to cook for another 3-4 minutes. They should start to get soft and breakdown a little bit.

Step 5 Add the asparagus and let everything saute together for an additional 2-3 minutes, the olive oil and juices from the tomatoes should start to create a small pool of sauce in the pan.

Step 6 Add the cooked pasta and mix everything together, letting it cook a minute or two longer. As it cooks, squeeze the lemon juice in, sprinkle with sea salt and pepper to taste.

Step 7 Once everything is hot and combined evenly, turn off the stove and mix in the feta, crumbling it up if it’s in a large block. Mix well, so the feta is evenly disbursed. Allow the pasta to sit just 1-2 minutes longer to allow the feta to melt or soften as it warms. Then serve!

A Little About Me

Amber Rogals

Maine food photographer, food stylist, & recipe developer

My name is Amber Rogals! I’m a food photographer, food stylist and recipe developer in Portland, Maine. I also work throughout Maine, and the New England area. I started my food blog, Downeats, as I love to inspire others to cook and enjoy delicious, healthy meals with their loved ones. I grew up and live in Maine with my (gorgeous, amazing, hardworking) high school sweetheart and our (hilarious, talented and wonderful) kiddos. I believe in living slow, enjoying life and love capturing those moments. You can read more about me here. If you are looking for a food photographer, food stylist or recipe developer please contact me here.

Uncategorized

How to Make Fish Cakes with Fresh Haddock

Jul 21, 2021 · Leave a Comment

fish cake with haddock over salad greens

Fish cakes were a pillar of my childhood diet. My first introduction to them was as a young child, at the cafe my grandparents owned. My Opa was the chef and is well trained in culinary arts. He grew up in Germany, but much of his food are crowd pleasing New England recipes, with a lot of locally sourced ingredients. It’s safe to say that lobster bisque, fiddlehead pasta, clam chowder and blueberry pie were also all pillars of my childhood. Fish cakes were something my sister and I always ordered- usually with real New England style home fries on the side with ketchup. Being a restaurant staple, I was also lucky enough that it was easy enough for my grandma to prepare fish cakes for us outside of their cafe. Weekends and holidays spent at grandma’s included as much as we could eat.

Fish cakes aren’t anything new. In fact, I’ve heard that they date back thousands of years, though I’m sure the recipes have evolved over the centuries. I’ve seen many variations. A lot of New England recipes for fish cakes include potatoes, which sounds delicious, although my version does not. Salmon cakes or salmon “burgers” seem quite common outside of New England, and I’ve dabbled with those a bit. They’re delicious, and I may be biased, but not quite as good. Most popular fish cake recipes today are made with cod, but in Maine fish cakes are usually made with haddock.

Fish Cakes with Fresh Haddock

The first time I made these for my kids they were impressed. Roman doesn’t discriminate against many foods, so I wasn’t surprised when he asked if there was seconds before he’d finished his firsts. Amelia is nit-picky in ways that I can never accurately predict – bits of herbs that are the wrong shade of green, unfamiliar textures, new flavors, etc. It takes her at least five or so introductions to a new food before she starts to warm up to it. Her verdict on these? Delicious, but she prefers them with tartar sauce. I’ve had a few people ask me how to make fish cakes so writing up a recipe for all to see seemed necessary.

How to Make Fish Cakes

Step 1 Roast the haddock. I roast mine in a cast iron skillet, but any roasting pan will do. Squeeze a lemon evenly over the fish and sprinkle with salt. Cover it loosely with tin foil and roast at 350˚F for about 15 minutes. The fish should flake apart easily with a fork. Set the haddock aside and allow it to cool.

Step 2 While your haddock is roasting, you can begin sauteing your vegetables. In a large pan, melt the butter over medium-low and toss in the onions. Allow them to saute until translucent, about 3-4 minutes. Add the celery and saute for another 5-6 minutes, stirring every so often. Add the heavy cream and allow it to simmer for another 5 minutes, then turn off the heat.

Step 3 Put the fish into a large mixing bowl and flake apart into small-ish pieces with a fork. Add the celery/onion/cream mixture, breadcrumbs, egg, salt, pepper and parsley. Mix well until everything is evenly distributed and a thick mixture comes together. (Store in an airtight container in the fridge for up to 2 days if you’re not using it immediately.)

Step 4 To cook, heat oil in a large pan over medium heat. Once it’s hot, add a large spoonful of fish cake mixture, using the spoon to flatten it on the top and push it together around the sides to form a thick pancake shape. Cook approximately 5 minutes, then flip and cook another 5 minutes on the opposite side, until golden brown. Continue until you’ve used up all of them mixture.

Step 5 These are best served immediately.

Tips on how to make fish cakes if you’ve never made them

  1. Depending on the size of your eggs the fish cake mixture could come out a little too wet or too dry and not hold together well. If this happens it will turn into a mess when you scoop it into the pan to start frying. If your mixture is too dry, I recommend adding a little splash of cream about 1 tablespoon at a time until the mixture holds together well enough to form a cake like shape. If the mixture seems too wet, add 1 tablespoon of breadcrumbs at a time to get that same consistency.
  2. I enjoy these fish cakes over greens with a lemon vinaigrette, but my daughter Amelia enjoys them with tartar sauce and my toddler prefers them with ketchup. My son, Roman is happy to have them with a small bed of greens and just lemon juice.
  3. In this fish cakes recipe I keep it simple and only use parsley, but if you find yourself fresh out you can use dill, chives, or even tarragon.

Amber Rogals- Food Photographer, Food Stylist and Recipe Developer in Maine, New England and Beyond

A bit about me…

Hi! I’m Amber Rogals and I am a food photographer, and recipe developer living and working in Maine. I also serve the New England area and beyond, and write and photograph regularly for my food blog, Downeats. I absolutely love cooking and developing recipes with seasonal foods, and gathering with loved ones to enjoy everything. I grew up on the coast of Maine and pretty much never left. I currently live here in Maine with my (gorgeous, amazing, hardworking) high school sweetheart and our (hilarious, talented and wonderful) three kids. I love capturing shared moments, and inspiring others to cook, eat, gather, and live slow. You can read more about me here. If you are looking for a food photographer, food stylist or recipe developer please contact me here.

Uncategorized

Easy Waffles with Strawberries and Whipped Cream

Jul 6, 2021 · Leave a Comment

waffles with fresh strawberries and whipped cream

It was the 90’s- when things like tamagotchis and Wet n’ Wild lip gloss were too cool for school. My Opa was a chef, and he and grandma owned a sit-down cafe in a small coastal town not far from where we lived. It was the darling of the town, which really isn’t saying much, I guess, but that’s only because of the town. Not a greasy-spoon kind of diner, but a quality-casual affair. Fresh squeezed OJ and locally sourced ingredients were a standard. There was no imitation maple syrup, and the breads were baked from scratch downstairs. It was a real family place: my mom worked there on and off while I was growing up, my uncles worked there in the kitchen. Lots of family drama in between Lobster Benedict and Crab Cakes, of course, but never something I lingered long over as a kid. Waffles with strawberries and cream was always on the menu, and (naturally) on my plate. Life was good.

When I was old enough I worked there, too. In the mornings pouring piping hot coffee every few minutes while helping locals with the NYT crossword puzzle. I was never much help except for the coffee. At dinner, I served multi-course meals, starting with bread dipped in a seasoned olive oil and ending with something like caramel custard. Lots of classic, Maine entrees in between. I always managed to dodge the bullet of opening a wine bottle in front of guests and, unknowingly, I started to learn what food should taste like. I learned that people prefer more crab meat in their crab cakes than breadcrumbs, and that the best foods are made simply with quality ingredients. I learned how to set a dinner table and a mood. I learned about hospitality. About beautiful plating. About creating a dining experience.

I often try to surprise my kids so they can come downstairs to the smell of waffles, but before I even get the batter into the waffle iron, they’ve usually heard my mixer whipping eggs whites and they know exactly what I’m up to. Then they rush in to set the table and watch me with childlike impatience. In June and July, when the strawberries are bursting from their patches we sit out on the patio and eat them slowly, scattered-a-plenty over fresh waffles. The ants are always foraging for leftovers and we usually offer them generous morsels. Sometimes the kids bicker between bites, and sometimes Fiona only eats the strawberries. It’s not perfect, but it also kind of is.

A Few Quick Tips for Making Waffles with Strawberries:

  1. Whipping the egg whites just right is of the utmost importance in this recipe. It’ll give your waffles that extra bit of light, fluffiness. Take great care not to over or under whip them. They should form stiff peaks.
  2. This recipe is all about waffles with strawberries, but if you can’t get (or don’t like…) strawberries then you can obviously substitute for another type of fruit or berry that you do like. Peeled sliced oranges, blueberries, raspberries, banana slices or kiwis are all delicious, too!
  3. I know that store-bought, canned whipped cream is easy and convenient, but I highly recommend you make your own from scratch! It makes such a huge difference in flavor and texture, and it only takes a few very simple ingredients!

breakfast, Recipes

How to Make French Chocolate Mousse: A Simple Recipe

Mar 22, 2021 · Leave a Comment

I suppose I’ve been handling the near year-long pandemic much like everyone else: isolated, doing ridiculous things with couch cushions to entertain the children, and anteing up my cooking skills. For one reason or another, I haven’t been able to get my mind off of chocolate. It’s probably my own fault. I buy it in all forms during large grocery runs, motivated by both the panic-infused idea that I’ll end up running out and then, of course, my infatuation with the stuff. In a somewhat beguiled frenzy, I toss about through the kitchen for inspiration, piling the wide variety of chocolate I have front and center. Chocolate chips (both semi- and bittersweet), cocoa powder, Green & Blacks, Tony’s and some Icelandic for afternoon munching, random bags of mini chocolate chips, and several baking bars at various percentage rates. All things perfect for decadent dishes like oatmeal chocolate chip cookies, chocolate mousse, or chocolate butter cake.

I’ve decided on chocolate mousse. The ingredients are few, the process is quick (and equally as satisfying), and it’s perfectly delicious. The more that I think about it, chocolate mousse is actually entirely decadent- taste, texture, smell, not to mention how much you can dress it up. It’s my second favorite dessert, next to tiramisu. If you love light, fluffy, sweet treats, this is exactly that. It’s also fairly simple to make and doesn’t use a lot of ingredients. There is a bit of patience involved in making chocolate mousse, but trust me, it’s well worth it.

Perfect Chocolate Mousse

I often make this in the fall and winter months, and serve it in little dessert glasses. It's delicious served with raspberries and a fresh mint leaf, or crushed pistachios and a dollop of whipped cream.
Print Recipe Pin Recipe
Prep Time 20 minutes mins
Cook Time 20 minutes mins

Ingredients
  

  • 6 Eggs
  • 1/2 Cup Sugar (Divided into two 1/4 cups)
  • 8 Ounces Semi-sweet Chocolate (60% Works best)
  • 6 Tbsp Butter
  • 1/2 Tsp Salt
  • 1 Tsp Vanilla Extract

Instructions
 

  • Using the double boiler method, melt the chocolate and butter together. Be sure not to let any moisture/water/steam into your chocolate as it will cease and ruin the batch. Once the chocolate and butter have melted, remove from the heat, and stir gently using a rubber spatula. Set aside and allow to cool.
  • In two mixing bowls, separate the eggs- whites in one bowl, yolks in the other bowl. The egg yolks should be in a larger bowl, because you will eventually add all of your ingredients into it.
  • Add 1/4 cup of sugar to the bowl with the eggs yolks and whip on medium speed about 5-7 minutes, until light yellow and a bit fluffy.
  • Using a clean, dry whisk attachment, now whip the egg whites. Once they have reached soft peaks slowly add in the sugar, then the salt and vanilla. Whip until stiff peaks form, and take care not to over whip them.
  • Pour the cooled chocolate mix into the egg yolk/sugar mixture (It will probably still be warm, which is okay. As long as it's not hot.) Using a rubber spatula, gently fold in to fully combine, until there are no yellow streaks. Once fully combined, fold in the egg whites until there are no white sections and everything is combined.
  • Divide the mousse into small, 4-6 ounce serving dishes, and allow to chill in the fridge for at least a few hours before serving. You can also put all of the mousse into a larger tupperware container, and refrigerate for at least a few hours, and then spoon into bowls, on tart shells, or however you please. Serving with fresh whip cream is highly recommended!

Notes

This rich, fluffy dessert is best made the morning of or the day before. It will keep in the fridge for about 3-4 days. 

Perfect Chocolate Mousse Tips:

  • One of the most important factors in getting your chocolate mousse right is to not let any amount of moisture get into your melted chocolate. Not one drop! This will cause your chocolate to seize, and change into a yucky, dry, texture, impossible for making silky chocolate mousse. Be very aware of steam getting into your melted chocolate when using your double boiler.
  • Do not over (or under) whip your eggs. They should be at soft peaks when you add the sugar, and just at stiff peaks after you add the sugar. Over whipped eggs will make it hard to fold in your eggs and the texture will not be as light and fluffy.
  • Just like most dishes are only as good as the quality of your ingredients, your quality of chocolate matters when making chocolate mousse. I highly recommend getting the best quality that you can!

Desserts, Recipes

How to Make Crispy Roasted Brussels Sprouts

Mar 2, 2021 · Leave a Comment

roasted brussels sprouts

Fall in Maine is a brisk autumn whirlwind of fiery color and, if you’re a local, an affectionate dose of chilly nostalgia that silently warns you to prepare for the long winter. On the most beautiful of days, thick, gray clouds blot out the sun and the warm hues of the dying foliage just barely peak through an eerie fog. The fog and rain bleed the colors together like a fresh watercolor painting. Those are the days I consider myself lucky to be able to turn on the oven and roast a nourishing bit of the local market harvest. Fall has long come and gone, but I’m still making some of the yummy late fall and early winter harvest veggies that inspire me. These crispy roasted Brussels sprouts are pretty much on my menu weekly.

Brussels sprouts are long time favorite of mine, and even though nothing comes remotely close to eating them roasted crispy, and sea salty. Occasionally a bit of sticky-sweet glaze at the very end is pure perfection. Yum. Making crispy roasted Brussels sprouts certainly isn’t tricky-but I have a simple recipe and a few tricks that will help you get it right every time.

Crispy Roasted Brussels Sprouts with Miso Honey Glaze

Brussels Sprouts are best eaten crispy, salty and warm. Enjoy!
Print Recipe Pin Recipe
Prep Time 15 minutes mins
Cook Time 20 minutes mins

Ingredients
  

Brussels Sprouts

  • 1 lb Brussels sprouts
  • 2 tbsp Olive oil
  • 1 tsp Sea salt
  • Black pepper, to taste (Optional)

Miso Honey Glaze

  • 2 Tsp Sesame oil
  • 2 Tsp Miso (I use red, but white is good, too!)
  • 2 Tsp Honey
  • 1 Tsp Rice vinegar

Instructions
 

Prepare the Glaze

  • I like to make the glaze before doing anything else, so that it warms up to room temperature. Simply combine all the ingredients in a bowl and whisk together until fully combined. Set aside for later.

Roast the Brussels sprouts

  • Preheat your oven to 425˚.
  • Cut the ends off of the Brussels sprouts and peel away any outside leaves that look a bit distressed. Cut each Brussel sprout in half. If some of the Brussels sprouts are on the smaller side you can leave them whole instead of cutting them.
  • Place all of your freshly cut Brussels sprouts into a large bowl. Add the olive oil and salt, and mix until all of the Brussels sprouts are evenly coated.
  • Spread the Brussels sprouts evenly on a baking sheet covered with parchment paper. Try to make sure the Brussels sprouts aren't touching each other, or piled on top of one another, otherwise they will steam and be soft, instead of crispy. Use two pans or cook in two batches if you need to.
  • Roast the Brussels sprouts in the oven at 425˚ for approximately 20 minutes, rotating the pan after ten minutes.
  • Once you've taken them out of the oven, quickly pour them into a bowl large enough for mixing them around. Drizzle the glaze all over the Brussels sprouts and mix well to coat them completely. They should be nicely covered, but not sitting in a puddle of glaze. If you need to heat them back up after tossing in the glaze, then just toss them back in the oven at 425˚ for 3-4 minutes. Top with an extra sprinkle of sea salt.

Tips for Getting Crispy Roasted Brussels Sprouts

brussels sprouts photography
  1. Do not overcrowd your pan. None of the Brussels sprouts in your pan should be touching- if they are, they will start steam cook instead of roast. This will make them soft instead of crispy!
  2. Don’t cook anything else in the oven at the same time. Again, your risk accidentally steaming your Brussels sprouts if you’re cooking something else in the oven that may have a fair bit of moisture in it.
  3. Salt them at the end. Yes, salt immediately after taking them out of the oven. Use quality sea salt if you have it. (I use this box religiously as a topping salt)
  4. Use high heat. If you want your Brussels sprouts (or any other veggie you’re roasting) to not only come out crispy, but to also have that “charred” roasted flavor, you need to make sure you preheat your oven and that you’re cooking on high heat. The recipe I’ve outlined above has your oven at 425˚.
  5. Preheat your roasting pan, too! Yes, really. If you want truly crispy Brussels sprouts layers on the outside, and tender on the inside your roasting pan should be preheated. Once you’ve tossed your Brussels sprouts in olive oil, you’ll (quickly and carefully) put them on your hot roasting pan, and that will ensure that the outsides get enough heat to be roasted to crispy perfection.

Recipes, Sides

Simple Family Dinner Ideas: Pasta with Puttanesca Sauce

Feb 18, 2021 · Leave a Comment

puttanesca with spaghetti

Okay, don’t be intimidated. Before I made puttanesca, my only experience with anchovies was caesar dressing, and Ryan’s sporadic wit that our takeout night includes an extra topping of them. I’d heard that they’re small, salty and oily- and not being much of an adventurous cook for the better part of my 20’s, they never made it to me pantry, let alone into a weeknight family dinner.

About a year ago I became determined to make puttanesca when, one winter weeknight, I was short of family dinner ideas. Wanting to expand my go-to recipe repertoire, I started flipping through some older cookbooks and-voila! There was a delicious looking image of noodles, covered in a chunky, tomato sauce and dappled with capers and chili flakes. I quickly jotted down the ingredients for my next big grocery shop, and anchovies have been a pantry staple in my kitchen ever since.

pasta puttanesca

The ability to make easy family dinners are an invaluable part of my life sometimes- regardless of whether it’s the weekend or a random weeknight. It’s a rare occasion that we’re not all at the table together, but big meals can also take a lot of time. Nourishing, delicious food doesn’t have to be complicated. In fact, with a large family, family dinners are best kept simple. Simple and delicious. This puttanesca sauce is exactly that.

Weeknight Puttanesca Sauce

My son, Roman, absolutely loves puttanesca! I probably make this once a week, always with him in mind! It's simple, quick and delicious. I encourage you to serve it alongside a light salad.
Print Recipe Pin Recipe
Prep Time 15 minutes mins
Cook Time 15 minutes mins

Ingredients
  

  • 5 Cloves Garlic
  • 1 Tbsp Capers
  • 1 2 oz. Can Anchovy fillets
  • 1/3 Cup Kalamata Olives (No pits)
  • 1/2 tsp Chili flakes (less if you don't like spice)
  • 1 28 oz Whole, peeled tomatoes
  • 3-4 Tbsp Olive Oil
  • 1 lb Linguini or your choice of pasta

Instructions
 

  • Chop your garlic cloves quite fine, and set aside.
  • In a pot or a larger saucepan, heat 2 tablespoons of the olive oil in a pan on low heat.
  • Add the garlic, chili flakes, and capers to the heated oil. It should sizzle lightly, or start to sizzle within a few minutes. Be sure to stir this every few minutes so that you don't burn the garlic or chili flakes.
  • While these cook, roughly chop your olives, and then add them to the mix, still keeping everything on low heat and stirring every couple minutes.
  • Finely chop your anchovy fillets. If you've never used anchovies before, don't be intimidated. Your food will not taste fishy- anchovies just add an extra (amazing!) boost of flavor to the sauce. Once your anchovies are chopped down quite small, add them to the pot and give everything a good stir.
  • Pour the entire can of tomatoes into a food processor or blender, and pulse very quickly, for about a total of 5 seconds. You don't want the tomatoes to turn into puree- puttanesca should be more chunky and less saucy, with larger bits of tomato.
  • Add the tomatoes into the pot, along with the reserved anchovy oil and an extra splash of olive oil. Season with (a little bit) of salt to taste, and a few good shakes of black pepper. Gently stir to incorporate everything, and then allow the sauce to simmer gently for about 10-15 minutes.
  • Meanwhile, boil a pot of water on the stove for your choice of pasta. I prefer linguini or fettuccini, but you can use whatever you'd like. Once the water is boiling, cook until al dente, and strain. Toss gently with olive oil.
  • Serve the pasta with a scoop of puttanesca on top, and garnish with parmesan and fresh parsley.

Is Pasta Puttanesca Spicy?

Traditionally, yes, pasta puttanesca is spicy, but you can make it however you’d like! If you’re not a big fan of spicy food, feel free to just add half of the amount of chili flakes in the recipe, or none at all! Pasta puttanesca tastes just as good (in my opinion) when it’s not as spicy.

Is my pasta puttanesca actually going to taste like anchovies? I don’t want to ruin our family dinner!

Nope. You don’t use a lot of anchovies in puttanesca to begin with, and what you do use is cut up very tiny. They add a significant punch of flavor and saltiness that make it taste so delicious. I was also a bit skeptical the first time I made pasta puttanesca and had to add anchovies, but it’s completely worth it!

Does it matter what kind of pasta I use?

It doesn’t really matter, but I do prefer to use some sort of longer, flat pasta like linguini or fettuccini because it seems to pair better with puttanesca sauce.

Any other family dinner ideas that go with pasta puttanesca?

I almost always serve pasta puttanesca as a main dish on it’s own, but we generally start with a salad. Usually something really light, like mixed greens and a few other vegetables with a balsamic dressing. A light pureed vegetable soup would also go really well, though! Sometimes I also serve garlic bread after or with the puttanesca.

Dinners, Recipes, Uncategorized

A Raspberry Scone Recipe for my Children

Feb 3, 2021 · Leave a Comment

Fiona is still baby-snoring next to me as I craftily inch out of bed, avoiding the creaky spots on the hardwood and bumbling around for my waffle-y long Johns. Just shy of 6am, and dark, I can’t be bothered to waste more minutes scrolling through Instagram when sweet, warm, buttery pastries are on my mind. Raspberry Scones? Cinnamon rolls? Buttermilk biscuits? So many options, so little time.

I always wanted to be the mom whose kids wake up to the scent of warm, wafting deliciousness first thing in the morning. Hmmm… What will it be? Finally a time to try my hand at croissants? Blueberry muffins? The battle is rarely knowing how to make, but what to make. Inspiration comes sometimes too easily and I often find myself frustratingly torn between things like whether to make a hollandaise sauce or a crepe batter. The final verdict? My classic raspberry scone recipe- crafted for my kiddos. Perfect.

Humbly put, these scones are not fancy, nor do they have a creatively complex combination of flavors (Ginger/raspberry/rosemary? No.) This raspberry scone recipe was actually inspired from a small cafe that my older two and I used to frequent long before they were lovingly referred to as my “older two”. This place was very dear to my heart for a long time, and when I think of my older two as little toddlers, I often think of all the times we spent together at this little cafe. It’s startling how much one little blip in time can leave such a lasting impression, no? I digress, though- let’s get to the scones.

Fluffy Raspberry Scones

These scones are so yummy, soft and sweet! They are best eaten just out of the oven.
Print Recipe Pin Recipe

Ingredients
  

  • 2 Cups Flour
  • 1/2 Cup Sugar
  • 3 tsp Baking powder
  • 1/2 tsp Salt
  • 1/2 Cup Butter
  • 2/3 Cup Milk
  • 1 Cup Frozen raspberries

For the Glaze

  • 2 Tbsp Milk
  • 1 Cup Confectioners' sugar
  • 1/2 Tsp Vanilla extract

Instructions
 

  • Preheat your oven to 425˚.
  • Measure the flour into a large mixing bowl. Using a knife, cut the butter into the flour. Use your fingers to crumble up the butter into small, pea-size like pieces, so they are evenly distributed throughout the flour. (You can also do this using a food processor and pulsing).
  • Add the sugar, salt and baking soda and mix gently with your hands or a spoon until thoroughly combined.
  • Add the milk and mix with a spoon until everything comes together into a thick dough. If it's a little too sticky to handle (it sticks all over your hands) you can sprinkle about a tablespoon of flour onto the dough and a bit extra onto your hands.
  • Scoop the dough out onto a lightly floured surface. Using a rolling pin, roll the dough a couple of times so it has a flat surface. Please keep in mind that for this step add small amounts of flour just as needed. As you start incorporating raspberries, they will start melting and/or getting crushed, making the dough wet and a little more sticky. So add flour as needed, but in small amounts.
    Sprinkle about 1/3 of the raspberries onto the surface. Then fold the dough in half, onto itself (so the raspberries are on the inside) Roll it once or twice again so it is flat and sprinkle another 1/3 of the raspberries onto the surface. Repeat one more time, folding the dough over itself so that the raspberries are on the inside. Roll a third time with the rolling pin and sprinkle the last third of raspberries. Fold the dough over itself one last time.
  • Lift the dough off the counter to sprinkle a bit more flour underneath it to ensure it doesn't stick as you start to roll and cut out your scones. Lightly sprinkle flour on top of the dough, as well.
  • Using your rolling pin roll out the dough to about 3/4"-1" thickness. If your dough is rolled into a circle you can cut it into triangle pieces, much like you would a pie or cake. If it it more of a rectangle, cut the dough into smaller rectangles or squares.
  • As you cut them, place them onto a baking pan that has been lined with parchment paper. Make sure they have at least 1" between them.
  • Bake for 20-22 minutes at 350˚. Allow the scones to cool for a few minutes and serve warm.
  • While the scones are baking, in a smaller bowl mix together the confectioners sugar, milk and vanilla extract. Mix well, until a glaze forms.
  • Remove the scones from the oven when they are lightly browned. Allow them to cool for 5-10 minutes and then lightly brush the glaze onto the scones.

Okay, Amber, so what’s so great about this scone recipe?

This cafe had the best scones I’ve ever eaten. Simple, delicious flavor, and such a wonderful texture. The texture really did it for me, which was beautifully browned on the outside, brushed with the most subtle layer of icing. Inside was soft and biscuit like, but sweet, with delicious pockets of raspberry goodness everywhere. Spoiler: I don’t have their raspberry scone recipe. But my raspberry scone recipe is inspired by their raspberry scone recipe, and it’s pretty dang close. My kids love it and hover around the oven for the twenty minutes it takes them to cook. This is definitely an heirloom recipe. This will be one of the recipes I hand down to my children when they’re older.

Ingredients for Raspberry Scones

One of the reasons I try keep my recipes as simple as possible is because I want them to be accessible. While sometimes a quick run to the market or a specific ingredient out of the ordinary may present itself, it’s not as often. The ingredients needed for this raspberry scone recipe are similar and probably things that you have on hand already, with the except of (possibly) raspberries. I never use fresh raspberries for this scone recipe- only frozen. Raspberries are too expensive a commodity to be cooking with. When they are fresh and in season, I can’t bear to cook them.

Aside from frozen raspberries this scone recipe also calls for:
Butter
Flour
Sugar
Salt
Milk
Baking Powder
Vanilla

And for a very light sugar glaze:
Milk
Vanilla
Confectioners Sugar

Tips for perfect raspberry scones

There are definitely a few easy mistakes to be had, the main one being working with warm or room temperature butter. Do not do this. Cold butter is everything here. It will give your scones a crispy outside and contribute to the fluffy inside.

Another tip? Mix gently, particularly once you get the raspberries in there. I find these scones best when they have sections that have raspberries and sections with just scone. I am not a fan of evenly distributed raspberries throughout, so be sure to gently “fold in” when it comes to adding the liquids and the raspberries.

My raspberry scone recipe

I hope you love this raspberry scone recipe as much as we do in the house. It’s the perfect morning treat. I like to wake up early before my kids so they wake up to the smell of them baking in the oven (is that too cliche?) They’re also a perfect addition to brunch, or brining to friends, neighbors or playdates. Let me know what you think of them.

Uncategorized

Potato Pancakes Recipe with Garlic Sour Cream

Feb 1, 2021 · Leave a Comment

Winter is here. The mornings are dark and cold, but not nearly as somber as you picture for a bitter winter morning in Maine. I snooze through my alarm. Once. Twice. Okay, seriously, time to get up. It’s still dark and silent, the time where morning and night blend together. I love the quiet world, and the quiet mind it gently fosters. I love the pastel glow of light in our kitchen as the sun peeks up above the train tracks behind our house. The sun takes even longer than I do to get up, and the kids even longer than that. It gives me time. Me time. Slow, silent yoga. Hot masala tea with maple syrup, and meditation. Waffle batter for when the kids wake up, if there’s time. (Maple syrup goes quick in our house.) Our maybe … potato pancakes?

I’m always cooking some form of potatoes in the winter months. Potatoes, I feel, are universally loved and they always seem to be rolling around somewhere in my kitchen. Sea salted starchy potatoes are satisfying; both emotionally comforting and undeniably delicious. It’s even a bit nourishing if you are topping it all off with a bit of chives, dill or another favorite dainty green. Roman, Amelia and Fiona love these little savory potato pancakes and almost always reach for seconds. I often top their portions with sour cream or creme fraiche, and a sprinkle of chives or dill- whatever is hanging in my fridge.

These potato pancakes are generally appreciated at any time of day. At breakfast, with an over-easy egg on top is just perfect. At lunch or dinner it’s great alongside a hearty salad and a bit of protein. Enjoy it however you’d like.

Potato Pancakes Recipe with Garlic Sour Cream

Healthy, delicious and acceptable during any meal time, these savory potato pancakes are a family favorite in our house.
Print Recipe

Potato Pancake Basics

What potatoes should I use for Potato Pancakes?

You could use probably any kind of potato you have on hand, but I like to use russet potatoes for this potato pancake recipe. I’ve found that they crisp up a bit better than Yukon Gold. Russet potatoes have a much higher starch content. This is perfect for your potato pancakes to get that deliciously crispy outside but a softer inside texture. You could probably use Red Potatoes or New potatoes for the pancakes, and they’d turn out just as delicious.

Can I make the potato pancake batter ahead? Does it keep well overnight?

You can make this pancake batter ahead of time and leave it in the fridge, but it will probably change color because potatoes do oxidize. I have also found that when I leave it water is drawn out of the potatoes (probably from the salt) and the pancake batter becomes a bit watery. I think that this potato pancake recipe is best when cooked immediately, or within an hour or so of making it. However, if it’s far more convenient or you have a lot of leftover and wish to save it, I’m sure the potato pancakes will taste just as delicious if you leave the batter to sit a while. I do not recommend you freeze it.

Do the potato pancakes keep well overnight?

Yes! These potato pancakes do keep well overnight. Simply put them in an airtight container or on a plate with saran wrap until you’re ready to reheat them. I have found it’s best to reheat them in the oven and not by re-frying them on the stovetop. Preheat the oven to 350˚, and put the potato pancakes on a sheet pan. Once the oven is hot, heat them for about 8-10 minutes, depending on how thick your pancakes are.

What goes well with potato pancakes?

My kids love them with sour cream! My above recipe includes a garlic sour cream with herbs, but we also love creme fraiche in our house and you can substitute it for sour cream if you prefer. If you have a younger child (or maybe you prefer this yourself), ketchup might be good. If you’re feeling a bit more motivated, I think it’d be delicious with a hollandaise sauce.

In terms of other dishes, potato pancakes are a great side to so many things, and any time of day. They are just as good in the morning with eggs and a side of fruit as they are at dinnertime with salad and roast chicken.

Can I make these potato pancakes gluten-free?

Yes, absolutely! Simply substitute the flour used in the recipe for your favorite gluten-free flour. I like this one by Bobs’ Red Mill.

Uncategorized

Easy Baguette Recipe to Make at Home

Nov 17, 2020 · Leave a Comment

I’ve never been to France, have you? I have often dreamed of going and bringing my children to explore the food, pick up on the language and enjoy the scenic views of the countryside. Until then, I have devoted myself to creating the perfect baguette recipe here at home. It hasn’t been without much patience, precious hours and a fair amount of good flour, though.

Easy Baguette Recipe + Little bit of practice = deliciously easy baguettes for you.

I have to say, once you start to understand bread dough, and get into a routine, making a baguette truly is easy. I’ve tried to make this as easy a baguette recipe to follow as I possibly can, but know that it might take a little bit of practice and a few trial and error batches before you get it just right. (However, your trial and error recipes will still likely be delicious!)

While Paris is rather notorious for bakeries loaded with wondrously crusty baguettes, they do, of course, go great alongside many of the foods you are already cooking at home, too. So you’ll find it delightfully easy to dip a generous hunk of this baguette into a winter beef stew, a haddock chowder, or whatever soup recipe you can conjure up in your kitchen. It’s equally as good alongside a root vegetable salad, or on it’s own with a butter, jam, or any kind of cheese you can find at your local market.

Ingredients needed for baguette or any basic artisan bread.

The ingredients needed for a basic bread is simple: you need flour, water, yeast and salt. Sometimes people will also use sugar, but I do not. If you prefer, you can use a teaspoon or so when you add the yeast. My favorite flour to use for making a simple, easy baguette is King Arthur organic flour. For yeast, I always use active dry yeast, like this brand, and a basic kosher salt is fine. If you have all of those ingredients, you’re ready to make some bread!

My Easy Baguette Recipe

A couple of important tips for when you’re follow my easy baguette recipe:

  1. When you pull the dough out of the bowl to knead it for a second time, you can easily just use a 4-fold technique. This is where you fold the dough in half, press down, and then fold again in another direction. Do this a total of four times, in all four directions (fold towards you, fold right, fold away from you, fold left) See the image below.

2. Make sure you steam the oven when you begin to preheat the oven. This is such a simple step, but changed my loaves so much! It really gives your baguettes that crusty outside layer. Simply put a small pan about halfway full of water on the bottom rack of the oven when you begin preheating the oven. As the water heats up, it will create steam in the oven, giving your baguettes a delicious crusty outside layer. Yes, you can keep this pan of water in your oven throughout the entire baking process.

A quick final note on my “easy baguette recipe”: Enjoy the process, and have patience. Bread making is 90% patience and 10% work. Be patient waiting for the dough to rise, and be patient if it doesn’t come out as expected the first time around. It takes a little practice, but being able to have fresh bread every day with just 10-20 minutes of active effort is more than worth it!

Bread, Featured Main, Recipes, Uncategorized

  • « Go to Previous Page
  • Page 1
  • Page 2

Primary Sidebar

Welcome!

Amber Rogals with daughter

Downeats is a journal that shares food stories and recipes, and photography. It is devoted to home cooking, gathering with loved ones, living slow and imperfectly. The name Downeats is a foodie play on the Downeast region of the coast of Maine- so everything is New England inspired.

Learn More >>

Slow Living & Family Recipes
Once a week emails to support your home cooking and slow living lifestyle. Want to join the community?
Welcome! I'm so excited for you to join our community. Keep an eye on your inbox :)
  • Instagram
  • Pinterest

Recently

  • French Crepes Recipe (Easy and Classic Crêpes!)
  • Buckwheat Flour Banana Bread
  • Gluten free Potato Soup
  • Gluten Free Shortcrust Pastry (No Xanthan Gum)
  • Banana Buckwheat Pancakes (Gluten Free)

Archives

  • May 2023
  • January 2023
  • November 2022
  • September 2022
  • May 2022
  • April 2022
  • March 2022
  • November 2021
  • October 2021
  • August 2021
  • July 2021
  • March 2021
  • February 2021
  • November 2020
Here’s a question: Why does carrot cake always s Here’s a question: Why does carrot cake always seems to make an appearance in the spring? It has always mystified me seeing bloggers often post about carrot cake recipes come March or April. Doesn’t carrot cake seem like it would fit in so much better with the fall season? 

Carrots aren’t seasonally harvested in the spring, and also- they’re orange so I feel they would fit in so well with autumn, no? Not only that but the classic carrot cake is usually made with typical fall “warming spices” like cinnamon and ginger and allspice. I’m not complaining- I’ll take carrot cake any time of the year- it’s just something that I’ve always wondered about. What cake do you feel really represents spring?

If I had to choose, I think something light and vibrant like a citrus cake, with a little whipped cream or dusted sugar. Or perhaps a simple butter cake with a flower essence added, like rose or lavender?

In any case, these carrot cupcakes are delicious and are made with spices from @gneissspice and the most perfectly whipped cream cheese frosting. Nothing fancy. Just simple and delicious. My recipe is getting sent out to my #substack subscribers this afternoon as my Sunday’s Cake Column. Tap the link in my bio to get it!

#carrotcake #carrotcakerecipe #cardamom #cakerecipe #baking #cakerecipe #bakersgonnabake #f52community #maine #dessertfirst #cakes #cakeinspiration #yummy #dessertreel #foodreel #recipeoftheday #recipeshare #carrotcakecupcakes
In April, Maine is always in this spring limbo, wh In April, Maine is always in this spring limbo, where we are no longer coveting the rich, wintery squashes and comforting roasts, but the spring darlings are only just starting to peek out of the ground. This time of year I rely on eggs and herbs quite a bit, with omelettes and quiche as my go-to. I made a beautiful (and so delicious!) quiche recently that the kids really enjoyed: asparagus, ricotta and leek.

I’ll be sending out the recipe to my community later this afternoon, so tap the link in my bio and hop on the list if you’re interested!

#recipeshare #recipeoftheday #quiche #recipes #eggrecipes #quicherecipe #frenchcooking #maine #maineeats #familycooking #familydinnerideas #asparagus #f52community #foodie
My number one tip for productivity? Keep a fairly My number one tip for productivity? Keep a fairly solid routine, with a couple rituals peppered in, as well.

We’ve been back from NYC for a few days now and I’m just starting to get back into routines and rituals. I have a fairly solid routine which includes daily exercise, work and photography, late afternoon coffee/tea (or more recently this cacao maca latte from @isles_co ) journaling, and family dinner.

NYC was amazing (I may or may not be secretly plotting to one day move there), and it’s nice to have a break from the usual, but it’s also nice to get back into the swing of things.

For me routines and rituals:

-keep me focused
-help me stay organized
-reduce stress
-remind me to slow down
-maximize productivity

What’s one thing that helps you make the most of your time?? 👇
This year for Valentines Day I bought myself a few This year for Valentines Day I bought myself a few bars of newly discovered chocolate and 🤩🤩🤩 

I’ve always been on the side of supporting local, organic, sustainable, but I now find myself actively seeking out brands that are bringing more good into the world. Sometimes it feels like the world is spiraling out of control, and supporting the brands that are doing good makes me feel good and grounded. I like discovering brands that have a strong belief system, a good story, and a moral compass (like, who doesn’t, am I right??) when you do the research, sometimes you discover those brands are just a stones throw away, like @goodsamfoods 

Also, this is my first stop motion! What do you think? It’s just a tiny start. As I start to slowly shift (or rather, grow) into more of a marketing agency model, there will still be photography shared here, but more creative projects and behind the scenes. Video, foodie collabs, marketing chatter, etc. etc. Oh, and I rebranded. I hope you enjoy this new iteration 🥑 

#dogoodfeelgood #dobetter #sustainability #chocolate #chocolatelover #stopmotion
Anyone else missing summer right about now? 🙋‍♀️

Looking through these fun images and reminiscing about warmer weather, graze boards on the patio, veggie potato salad, hot sand, and all my favorite frozen treats. ☀️ 

In the meantime? It’s the perfect time to be busy with work- which I am. New projects, diving further into social media management and marketing, and lots more video going on BTS. More to come 🥑 

#summer #summervibes #foodphotography #yum
Sourdough is basically my life now 🔥 #bakery # Sourdough is basically my life now 🔥

#bakery #bakerylife #sourdough #sourdoughbread #crumb #crumbshot #sourdoughlove #bakersgonnabake #baking #bakinglove #bakebakebake #bakefromscratch #fromscratch #madewithlove #maine
Instagram post 17994221297273346 Instagram post 17994221297273346
Life this week: Lots of simple joys. Rainy days, Life this week:

Lots of simple joys. Rainy days, sopping boots, silly faces. Chocolate meringues. Peeling potatoes. Warm cuddles, new books, Yuyu Hakusho, and resolutions, of course.

Are you subscribed to Downeats? I sent out three new recipes this morning:

Chocolate Meringues
Potato Leek soup
Kale & Brussels salad

Link in bio if you want them 😊

#kalesalad #meringues #momlife #mommyhood #familytime #familygoals #lazyweekend #yum #foodie #substack #maine #newengland #potatoleeksoup #recipeshare #recipeoftheday #recipes #familycooking #dinnerideas

Copyright © 2025