• Skip to primary navigation
  • Skip to main content
  • Skip to primary sidebar
Downeats logo
  • My Story
  • Recipes
  • Work With Me
  • Contact
  • Learn
    • Freebies
    • Mini Photo Course
    • Curated Resources

Recipes

French Crepes Recipe (Easy and Classic Crêpes!)

May 30, 2023 · Leave a Comment

French Crêpes

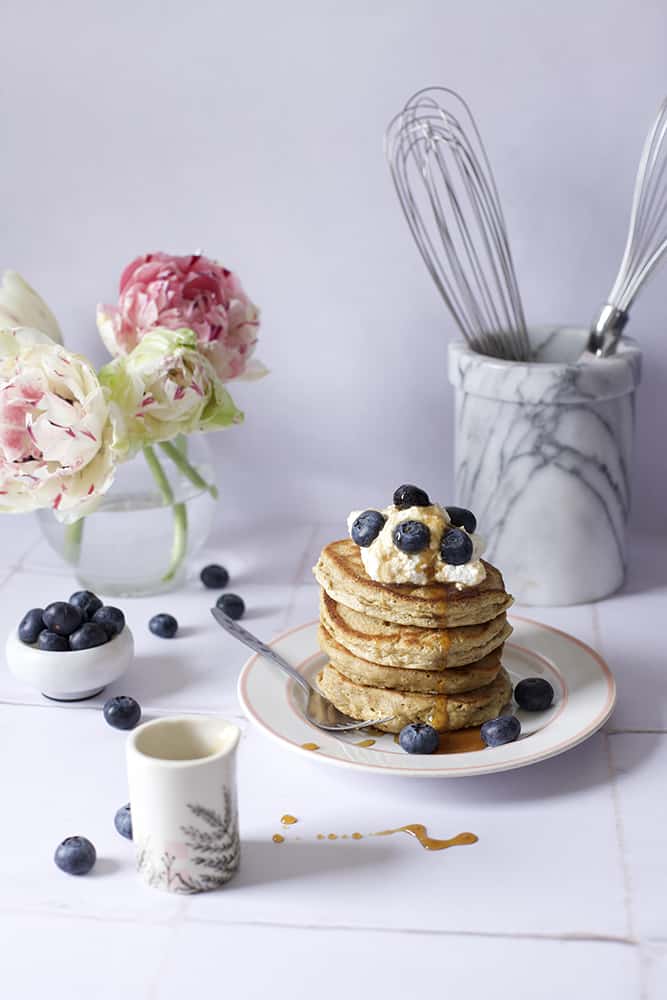
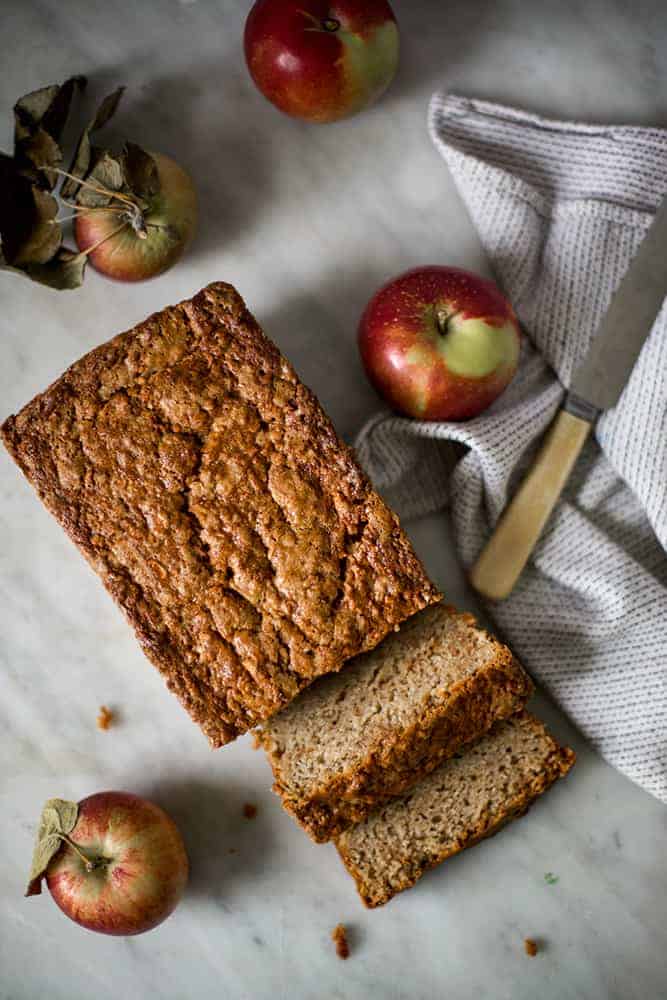
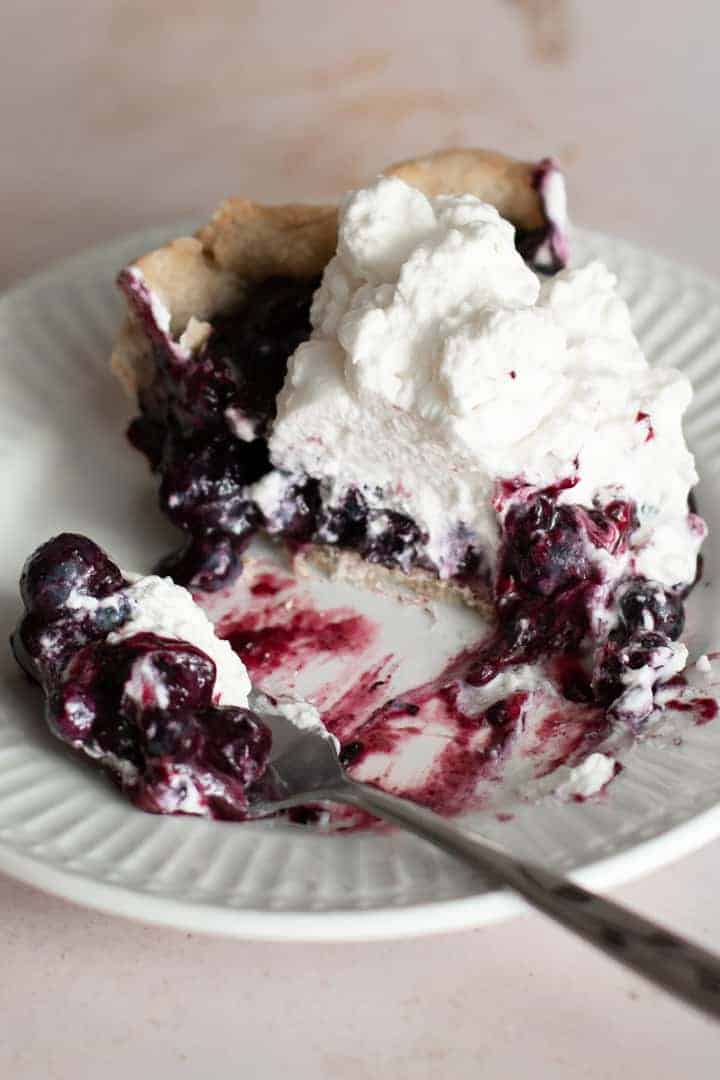
June is finally here, along with all the trappings of spring. Flourishing lilac blossoms, farmers markets and several extra hours of sunlight. Saturday was the first day of the outdoor Farmers Market. In the early spring the farm stands don’t have many vegetables yet, but are filled with lovely sprouting plants, herbs, eggs and honey. I was able to get my hands on some vibrant looking rhubarb, which I later cooked into a perfectly tart compote. I always forget how much I love rhubarb until spring rolls around and I fall in love with it all over again. Am I the only one that insists on keeping some kind of jam or fruit compote in the house at all times? It’s so handy to top things with (oatmeal, pancakes, ice cream, cake, etc). This past weekend we used it to top crepes, with a few dollops of whipped cream. If you know me at all, you know I’m a francophile at heart. Making French crêpes is one of my favorite things, so I thought I would share my own French crepe recipe with you! They’re incredibly simple to make and you only need a few basic ingredients.

What are French Crepes?

French crêpes are traditional, thin pancakes that are commonly eaten in France. Historically, I’ve read that they originated in the Brittany region of France as a flatbread that was traditionally eaten throughout the day. Today they are quite popular, and there are many variations. In fact, French people even have a holiday that is dedicated to eating crepes- La Chandeleur or le jour des crêpes! This is traditionally a religious holiday, but in France it is celebrated by dining on a much-loved food.

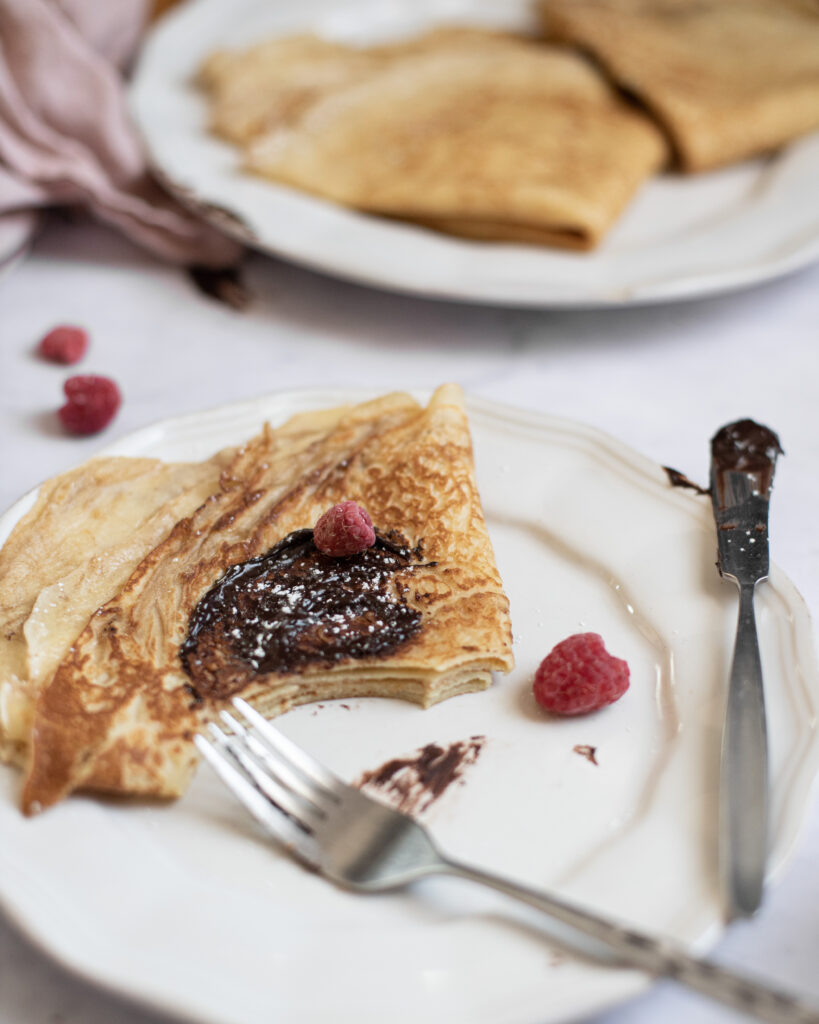
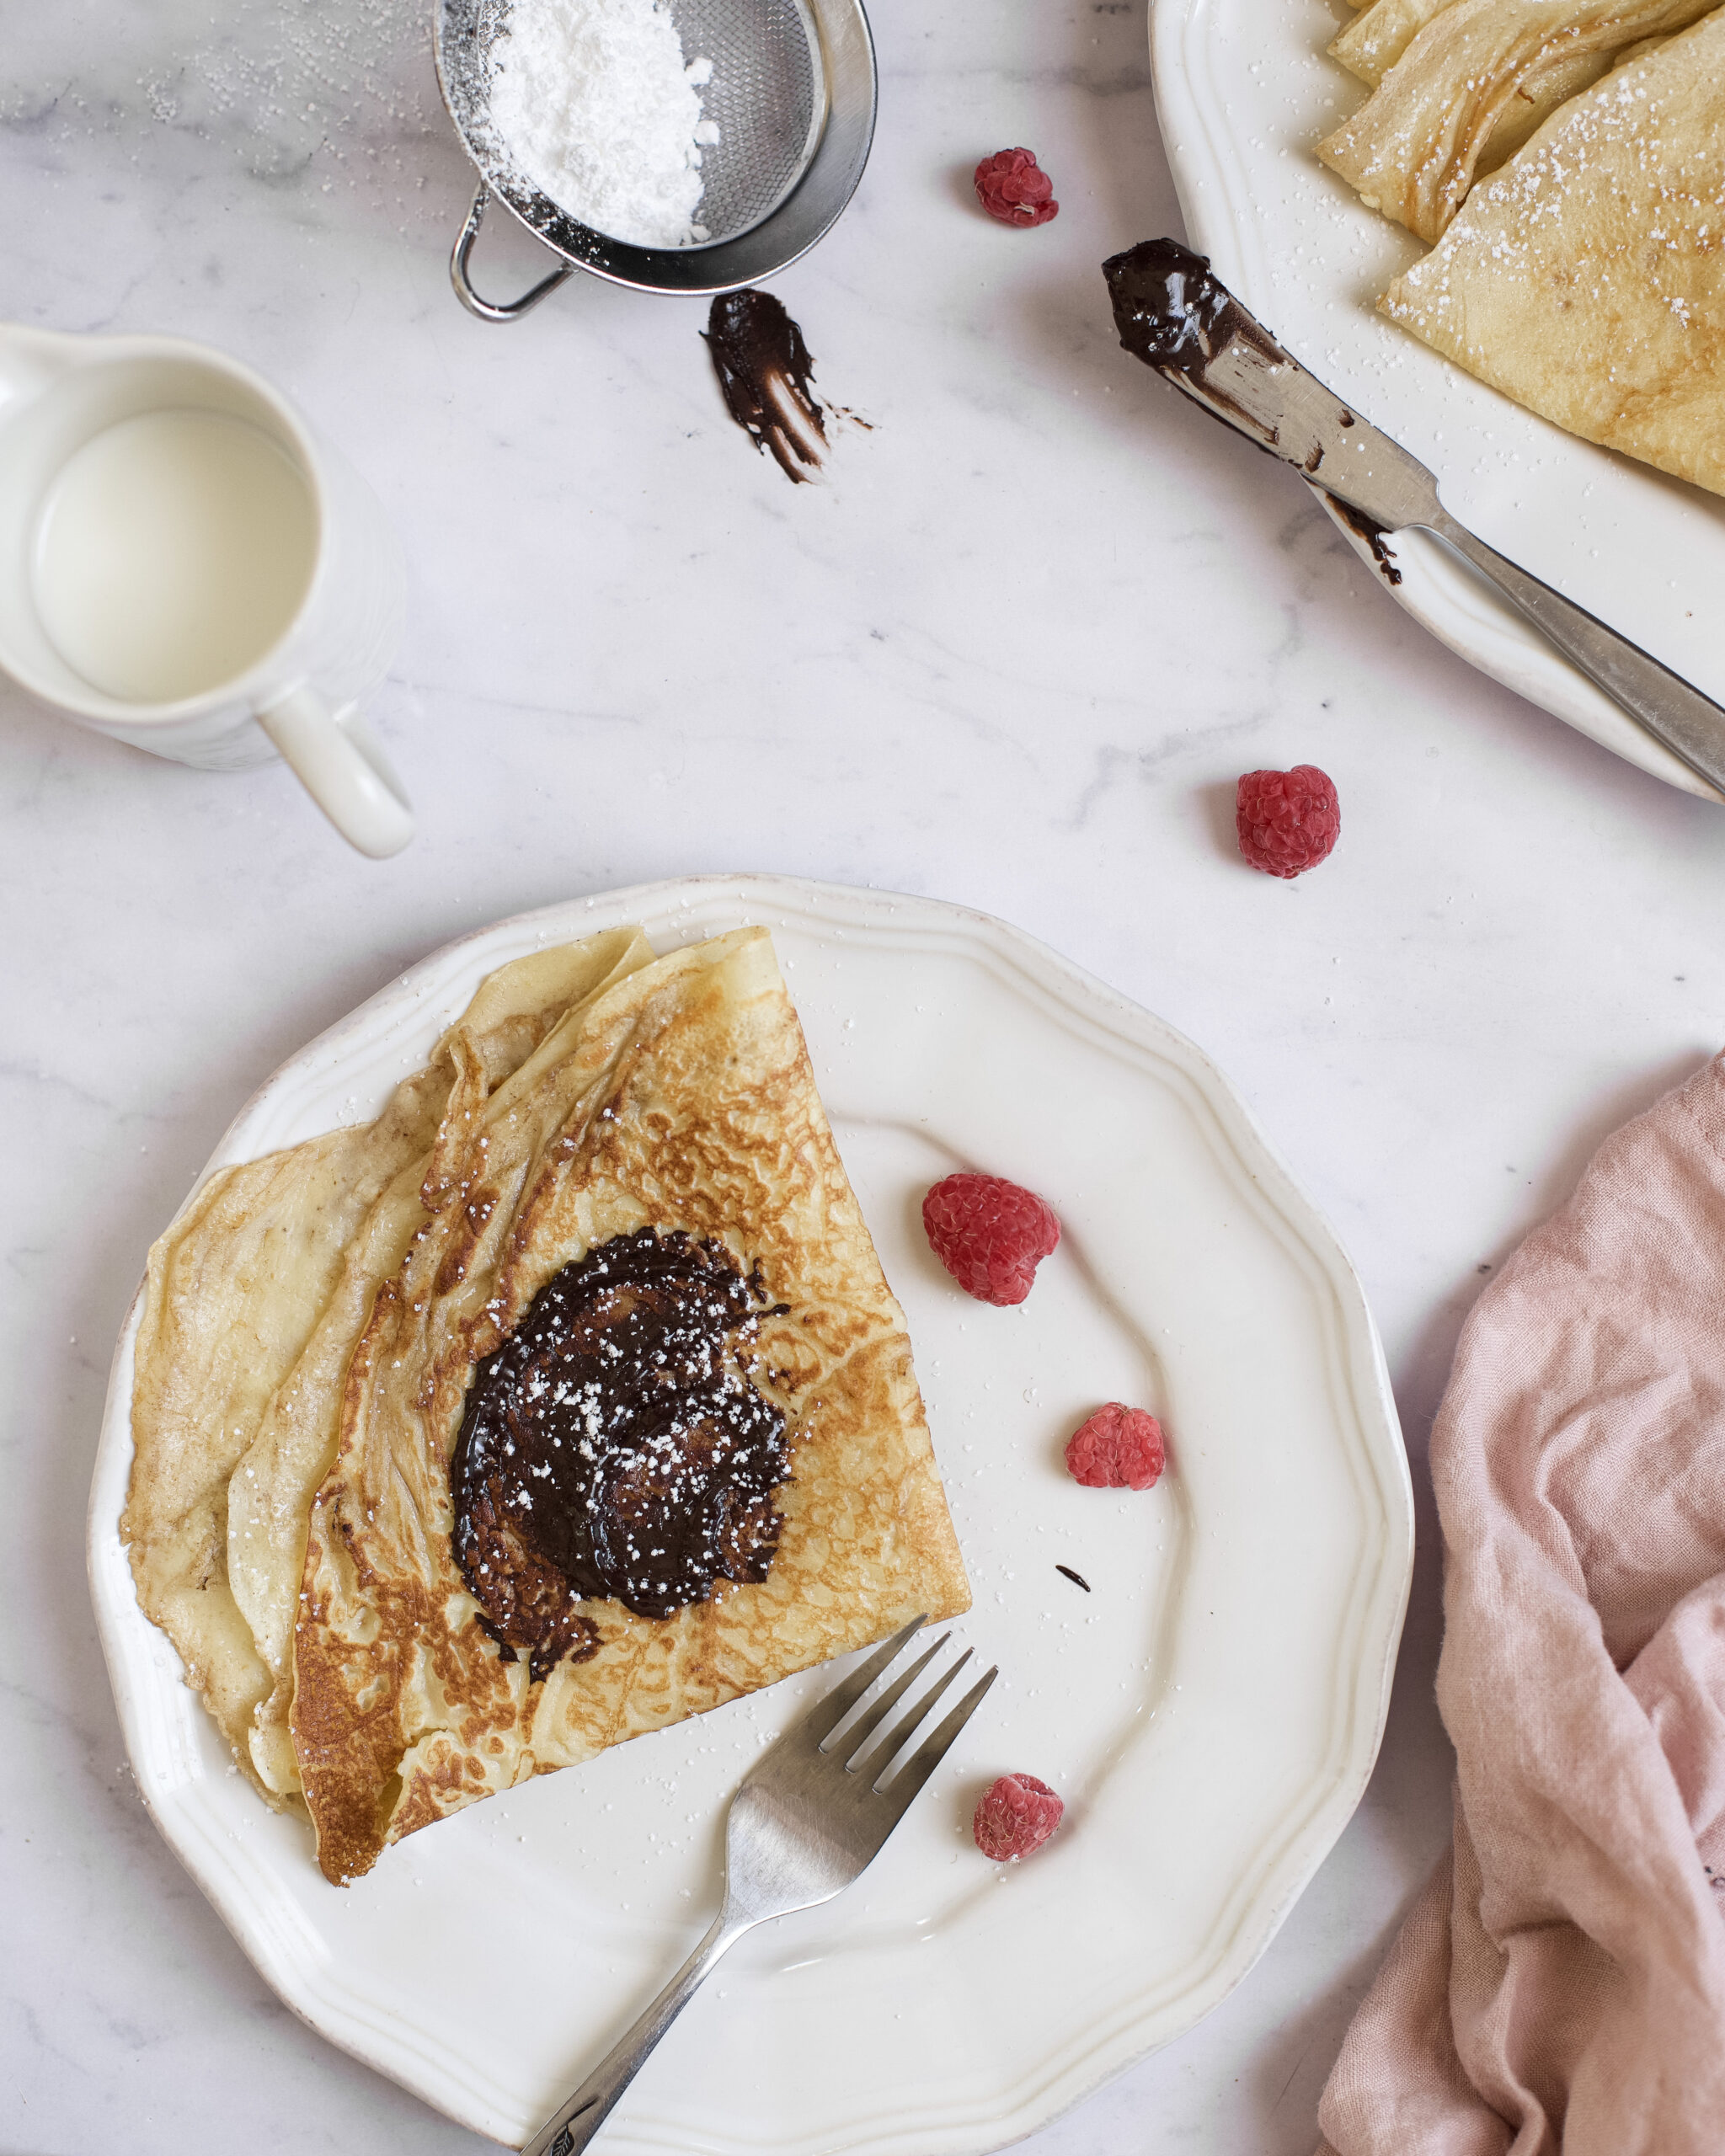
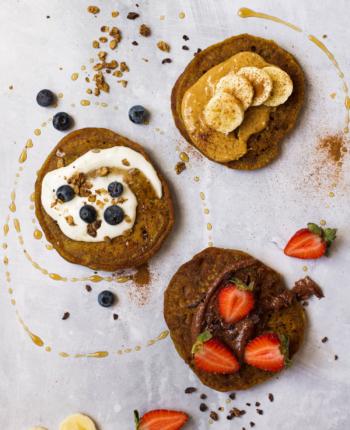
Unlike American pancakes (which are best eaten big and fluffy, if you ask me!) crepes are very thin and flat. Often they have sweet or savory fillings spread on top and then are either rolled or folded. My kids love crepes filled with strawberry jam and dusted with powdered sugar. We have also filled them with chocolate hazelnut spread, various fruit compotes, or sometimes yogurt and honey. In France, crepes are often eaten at lunch or even for dinner- not breakfast. When I make them for my kids at home, it’s almost always for breakfast, but sometimes for their afternoon snack.

Sweet Crepes

Sweet crêpes can also be called dessert crepes or crêpes sucrées. These are the crepes that I most often make and that my kids love! The fillings would often include jam, chocolate ganache or hazelnut spread. Other popular sweet fillings for crepes would be yogurt or whipped cream with fresh fruit, or butter with a dusting of powdered sugar. Crepes Suzette are are crepes that are made with a caramelized sugar, butter and orange zest sauce (they’re absolutely delicious and a French classic!). Another variation of traditional French crepes would be buckwheat crepes- where you would use partial or all buckwheat flour instead of only all-purpose flour.

Savory crêpes

Savory crepes have all kinds of delicious savory fillings in them. Meats and cheese are quite popular- such as ham and Swiss, or bacon and cheddar. Vegetables and herbs are also common in savory crepes, anything from fresh spinach or mushrooms, to chopped parsley or caramelized onions. Some people like to eat crepes with eggs. Another common (though less common) filling is seafood. Shrimp, crabmeat or even bay scallops make for delicious savory crepes! I am often reminded of omelettes when I think of savory crepes because the fillings and fillings combinations are quite similar. If I’m honest, savory crepes are delicious and I don’t make them nearly enough!

French Crepes Recipe

French crepes are actually quite simple to make and crepe batter is similar to the batter used for American pancakes. The main differences between the two are the leavening agent and the quantity of milk used. Crepes are made thin by pouring a bit of batter into the center of the pan and then tilting the pan around in a circular motion to spread the batter evenly across the entire surface of the pan. This is why the crêpe batter is made with more milk than classic American pancakes- you need to have a thin batter so that it spreads easily. With that said, the ingredients you need are simple ingredients that you probably already have on hand:

  • ​All Purpose Flour
  • Eggs
  • Whole Milk
  • Salt

I am definitely one of those home cooks or “mama chefs” that doesn’t measure things! A simple crepe recipe in our house always includes the ingredients listed above, but varies depending on how many people I’m making it for, if I want to have leftover batter, etc. Usually I try to aim for each person to have two crepes each. I have my own go-to classic french crepes recipe, and I make it at least once a week in our household. If this is your first time making crepes, I would start with my simple crepe recipe instead of doing the more traditional variations such as buckwheat crepes or crepes suzette (click for those recipes)! After one or two tries you’ll get the motion and timing down for making perfect crepes and then move onto delicious variations!

Here is my most barebones, basic crepe recipe which makes about 8-10 large crepes:

  • 1 1/2 Cups Unbleached, All-Purpose Flour
  • 4 Large Eggs
  • 2 1/4 Cups Whole Milk
  • 1/2 Tsp Salt
  • Butter (for cooking)
  • Any desired favorite toppings (such as fresh fruit, whipped cream, compote, jam or chocolate sauce)

1) Measure the flour and salt into a large bowl.

2) Crack all of the eggs into the flour and gently mix using a whisk, breaking up the eggs yolks. The flour will start to clump and stick to the whisk- that’s okay.

3) Measure out the milk but do not add it all at once, as this will cause small lumps of flour to form that will become impossible to break up no matter how much you mix! This results in lumpy crepe batter. To make a smooth batter simply add the milk in 1/4 Cup increments, mixing between each addition. Once it starts to form a thick paste and there are no (or almost no) lumps of flour, add in the remaining milk and mix well. (Please see my tip below, too!) By the time all the milk has been added you should have a fairly thin batter.

4) Set an 8-inch or 10-inch pan onto the stove and set to medium heat. Give the pan a few minutes to heat up, and then drop a small pat of butter into the pan. The pan should be hot enough that the butter will make a sizzling sound and begin to melt right away. Use a butter knife to spread the butter around the pan as it melts, coating the surface evenly. I like the to let the melted butter brown a bit because it adds a nice color and subtle caramel-y flavor to the crepes, but this is optional!

5) Pour a couple large ladle full (about 1/3-1/2 cup worth) of batter into the center of the pan. Before the batter cooks, use the handle of the pan to lift the pan off of the burner and tilt it around in a circular motion so that the batter spreads evenly across the entire surface of the pan. Once it has spread, set the pan back onto the burner and allow the crepe to cook for about 1 1/2 minutes. You’ll see the edges and surface begin to look like they are cooked and no longer a liquid batter. Use a spatula to flip the crepe and cook on the other side about 15-20 seconds. The crepe should be soft and “floppy”- not at all stiff or crispy! If it is stiff and crispy then you’ve cooked it for too long and you need to either cook it for less time, or turn the heat down a little bit.

​6) Repeat step 4 and 5 (starting at melting more butter in the pan) with the remaining batter until you’ve it all. If you find you have enough crepes and still have leftover batter you can leave it in the fridge and reuse within a couple days.

7) To dress the cooked crepes, lay one flat on a plate and sprinkle, spread or drizzle in your favorite fillings. Then you can either roll or fold the crepe with the fillings inside. Dust with powdered sugar if you want!

Simple French Crepes Recipe

Classic and simple recipe for French crepes. This is the recipe my kids are growing up on!
Print Recipe Pin Recipe
Prep Time 15 minutes mins
Cook Time 15 minutes mins
Course Breakfast, Dessert, Main Course, Snack
Cuisine French
Servings 10 crepes

Ingredients
  

  • 1 1/2 Cups Unbleached, all-purpose flour
  • 1/2 Tsp Salt
  • 4 Large eggs
  • 2 1/4 Cups Whole milk
  • Butter (for cooking)
  • Any desired toppings such as fresh fruit, whipped cream, jam, chocolate sauce, etc.

Instructions
 

  • Measure the flour and salt into a large bowl.
  • Crack all of the eggs into the flour and gently mix using a whisk, breaking up the eggs yolks. The flour will start to clump and stick to the whisk- that's okay.
  • Measure out the milk but do not add it all at once, as this will cause small lumps of flour to form that will become impossible to break up no matter how much you mix! This results in lumpy crepe batter. To make a smooth batter simply add the milk in 1/4 cup increments, mixing between each addition. Once it starts to form a thick paste and there are no (or almost no) lumps of flour, add in the remaining milk and mix well. By the time all the milk has been added you should have a fairly thin batter.
  • Set an 8-inch or 10-inch pan onto the stove and set to medium heat. Give the pan a few minutes to heat up, and then drop a small pat of butter into the pan. The pan should be hot enough that the butter will make a sizzling sound and begin to melt right away. Use a butter knife to spread the butter around the pan as it melts, coating the surface evenly. I like the to let the melted butter brown a bit because it adds a nice color and subtle caramel-y flavor to the crepes, but this is optional!
  • Pour a couple large ladles full (about 1/3-1/2 cup worth) of batter into the center of the pan. Before the batter cooks, use the handle of the pan to lift the pan off of the burner and tilt it around in a circular motion so that the batter spreads evenly across the entire surface of the pan. Once it has spread, set the pan back onto the burner and allow the crepe to cook for about 1 1/2 minutes. You'll see the edges and surface begin to look like they are cooked and no longer a liquid batter. Use a spatula to flip the crepe and cook on the other side about 15-20 seconds. The crepe should be soft and "floppy"- not at all stiff or crispy! If it is stiff and crispy then you've cooked it for too long and you need to either cook it for less time, or turn the heat down a little bit.
  • Repeat step 4 and 5 (starting at melting more butter in the pan) with the remaining batter until you've it all. If you find you have enough crepes and still have leftover batter you can leave it in the fridge and reuse within a couple days.
  • To dress the cooked crepes, lay one flat on a plate and sprinkle, spread or drizzle in your favorite fillings. Then you can either roll or fold the crepe with the fillings inside. Dust with powdered sugar if you want!

Notes

A tip for perfect batter

Here is a quick, pro tip for avoiding lumpy crepe batter: For best results, add and mix in the milk a little bit at a time so that the flour milk and eggs for a thick "paste". This helps break up all the little lumps of flour. Once you have a smooth (though very thick), pasty batter then add the remaining milk! Personally, I add the milk about 1/4 cup at a time for the first cup, mixing in between additions, until there are no lumps of flour. Then I add the remaining milk all at once to thin out the batter. This will ensure perfect french crepes!

A tip for cooking

I have never used a crepe pan or a nonstick pan. I use a 10" stainless steel pan and have never had a problem with crepes sticking as long as I melt butter in the pan for each crepe. Another thing to note is that if you are using a smaller (or larger) pan, the amount of crepe batter you use and cooking time might vary a little bit! Obviously to cover the surface of a 6" pan you will need less batter than for a 10" pan.
Keyword pancakes


A tip for perfect batter

Here is a quick, pro tip for avoiding lumpy crepe batter: For best results, add and mix in the milk a little bit at a time so that the flour milk and eggs for a thick “paste”. This helps break up all the little lumps of flour. Once you have a smooth (though very thick), pasty batter then add the remaining milk! Personally, I add the milk about 1/4 cup at a time for the first cup, mixing in between additions, until there are no lumps of flour. Then I add the remaining milk all at once to thin out the batter. This will ensure perfect french crepes!

A tip for cooking

I have never used a crepe pan or a nonstick pan. I use a 10″ stainless steel pan and have never had a problem with crepes sticking as long as I melt butter in the pan for each crepe. Another thing to note is that if you are using a smaller (or larger) pan, the amount of crepe batter you use and cooking time might vary a little bit! Obviously to cover the surface of a 6″ pan you will need less batter than for a 10″ pan.

breakfast, Cooking with Kids, Recipes

Buckwheat Flour Banana Bread

Jan 16, 2023 · Leave a Comment

Hand holding a plate that has a slice of buckwheat flour banana bread

A hand holding a plate with a slice of buckwheat flour banana bread with melted butter.

Is there anyone that doesn’t love the warm smell of banana bread filling the house on a cold winter day? Like most people, I tend to bake a lot more in the winter months and banana bread has become a part of my regular repertoire. I love to do variations of it: chocolate chip banana bread, spiced banana bread, brown sugar swirl, etc. If you’re interested in a more dessert type banana bread, check out my gluten free banana cake recipe here. It’s made with cream cheese frosting and hazelnut spread! Since I’ve become a lot more comfortable with gluten free baking, I also have tried a variety of different flours. I’ve found that the best gluten free banana bread is made with some blend of almond flour. I often blend it with brown rice flour or sorghum, but I’ve most recently started using buckwheat flour, which is really delicious. It adds a hearty, wholesome taste but isn’t so overpowering with the almond flour. It’s so yummy and satisfying on a cold winter morning. If I plan ahead, sometimes I will make two loaves and save one for the morning. A thick slice of warmed banana bread with a small pat of salted butter is such a treat in the morning (and goes so well with coffee!) This buckwheat flour banana bread has such a unique flavor! Give it a try.

If you aren’t familiar with buckwheat flour: Buckwheat is naturally gluten free and is not actually wheat, or even a grain. The flour is made from the seed of a flowering plant. The hulled seeds (buckwheat groats) can be cooked and eaten like oatmeal or in porridge, or can be ground into flour and used for baking. There are two different types of buckwheat flours you can bake with: dark and light. Dark is most commonly found and is made with unhulled buckwheat. The light buckwheat flour is made with hulled buckwheat and is more mild in flavor. Overall buckwheat has an earthy taste. I usually use light buckwheat flour, only because that is what I can get from farms local to me, and I try to buy locally whenever I can. For this buckwheat flour banana bread recipe (And for most recipes that include buckwheat) you can use whichever buckwheat flour you have on hand.

Buckwheat flour banana bread on a plate with melted butter

Buckwheat Flour Banana Bread Ingredients

This buckwheat flour banana bread is naturally gluten free and is sweet, wholesome and delicious. This simple recipe is one that my kids love to help with- measuring, mixing, cracking eggs, etc. My older two could probably make this without assistance! The ingredients are fairly standard:

Wet Ingredients
Ripe bananas
Sugar
Vanilla
Eggs
Olive Oil or another vegetable oil

Dry Ingredients

Buckwheat flour (light or dark is fine)
Almond Flour (I use Bobs Red Mill)
Baking Soda
Salt
Ground cinnamon
Ground cardamom

Making this gluten free banana bread is pretty much like making any other type of banana bread or quick bread. There are no additional starches or gums added to this recipe. Simply mix the wet ingredients and dry ingredients separately. Then you’ll combine them by gently mixing the dry ingredients into the wet. After about an hour or so of baking, it’s ready!

Buckwheat flour banana bread

This buckwheat flour banana bread is naturally gluten free and is sweet, wholesome and delicious. This recipe is simple and perfect for littler ones that love to help out in the kitchen!
Print Recipe Pin Recipe
Prep Time 20 minutes mins
Cook Time 1 hour hr 15 minutes mins
Course Breakfast, Dessert, Snack
Cuisine American, French
Servings 1 Loaf
Calories 130 kcal

Ingredients
  

Dry Ingredients

  • 1 1/2 Cups Almond flour
  • 1/2 Cup Buckwheat flour
  • 1/2 Tsp Baking soda
  • 1 Tsp Ground cinnamon
  • 1/2 Tsp Cardamom
  • 1/2 Tsp Salt

Wet Ingredients

  • 3 Ripe bananas
  • 1/2 Cup Olive oil, or another mild flavor vegetable oil
  • 2 Eggs
  • 1 Tsp Vanilla
  • 3/4 Cup Dark brown sugar

Instructions
 

  • Preheat the oven to 350˚F and grease and lightly flour a 9x5" loaf pan.
  • In a large bowl, use a fork to mash the bananas until they are in a rough puree.
  • Add the remaining wet ingredients to banana puree: olive oil, eggs, sugar, and vanilla, and mix well. Set aside for a few minutes.
  • In another smaller bowl, combine the dry ingredients: almond flour, buckwheat flour, baking soda, salt and spices. Whisk until everything is mixed together. Please note that almond flour does tend to clump together. To avoid lumps of almond flour in the final batter, I use my fingers to sift through the dry ingredients and break up and lumps. Alternatively, you can use a sifter when measuring the almond flour.
  • Pour the dry ingredients into the wet ingredients bowl all at once, and fold or gently mix until everything is fully combined.
  • Using a rubber spatula, pour the batter into the pan.
  • Bake the banana bread at 350˚F for 1 hour and 15 minutes, or until an inserted toothpick comes out clean. Be sure to turn the banana bread in the oven halfway through baking so that it bakes evenly on all sides.
  • Allow the banana bread to cool in the pan for about 20 minutes. When the pan is cool enough to handle, use a butter knife to cut around the edges, against the inside of the pan in case any parts of the banana bread have stuck. This helps it come out of the pan more easily.
  • Tip the loaf pan upside down and gently tap each edge of the pan against the countertop to get the banana bread out. It should come out fairly easily.
  • Allow the banana bread to cool another 15 minutes before cutting into slices.
Keyword bananas, bread, gluten free, quickbread

Baking with Kids, Featured, Recipes

Gluten free Potato Soup

Nov 24, 2022 · Leave a Comment

Bowl of gluten free potato soup

Bowl of gluten free potato soup

Confessions of a tired mom: Since I now have a budding career as a food photographer/stylist/writer/recipe developer my time and energy for actually making dinners has been dwindling. I find it ironic that I can make food look beautiful and mouthwatering, but struggle to get dinner on the table some nights because I’m too busy making it look good. I still muster time and energy, but there are some days where I understand why convenience foods were invented. On those nights, I try to make easier meals (because I’m tired) that I know all my kids love and won’t complain about (again, because I’m tired). One of my go-to recipes? A gluten free potato soup. (Honestly, I always thought potato soup was usually gluten free, but there are a lot that use flour! I’ve seen several recipes floating around that begin the recipe with a roux, which is melted butter and flour, used to thicken the soup. This recipe only uses a few basic ingredients, and is 100% gluten free.) If you’ve ever had, made or heard of potato leek soup, this is also a very basic version of that. If you don’t have leeks you can substitute shallots or onions.

This potato soup is the soup. It’s creamy, filling and delicious, which makes it a classic comfort food in the cold months. Maine has a lot of cold months, so potato soup was on my table a lot as a kid and I loved every spoonful. One of the reasons I love potato soup is it’s versatility- it can be made very herbaceous since potatoes don’t have a very dominating flavor. I love using thyme, rosemary, parsley or sage. You can also keep it simple and just sprinkle some salt, pepper and your herb of choice. If you’re feeling fancy then serve it with a splash of cream, spoonful of creme fraiche, or dollop of whipped cream. I love serving this soup alongside salad greens, with shredded carrots, cabbage and a balsamic dressing.

bowl of gluten free potato soup garnished with parsley

Gluten Free Potato Soup Ingredients

I’m calling it: if you could only make one soup for the rest of your life, I would recommend this gluten free potato soup.

Potatoes

Leeks or onions

Chicken or vegetable broth

Salt and pepper

Fresh or dried herbs, such as thyme, rosemary, sage, or parsley

bowl of gluten free potato soup garnished with parsley

Gluten Free Potato Soup

You'll love this nourishing and easy gluten free potato leek soup. It's so comforting and delicious!
Print Recipe Pin Recipe
Prep Time 20 minutes mins
Cook Time 40 minutes mins
Total Time 1 hour hr
Course Soup
Cuisine French
Servings 6 People

Ingredients
  

  • 2 lbs Potatoes (I use russet)
  • 2 Leeks
  • 28 oz (4 Cups) Chicken or vegetable broth
  • Olive oil (for the pan)
  • Salt + Pepper (to taste)
  • 2-3 Tsp Thyme, Parsley, Rosemary or a combination, fresh or dried

Instructions
 

  • Start by chopping and rinsing the leeks. Cut the ends and dark green stems off (so you want only light green and white portion). Slice them in half the long way, and then chop into thin slices the horizontal way. Place all of the slices into a large bowl of cold water, and swish them around to remove any dirt. Grab them out of the water using your hands, squeeze off any excess water, and set them in a bowl.
  • Set a large pot to low heat on the stove and add a couple lugs of olive oil, and let the oil warm up for just a minute.
  • Add the sliced leeks to the pot. They will sizzle loudly since they will still be wet, and that's fine! Just stir them around and then let them cook until slightly wilted, about 5-7 minutes while stirring every so often.
  • Meanwhile, prep your potatoes: Peel and chop the potatoes into 1" inch cubes, and set cubes in a colander as you chop. Rinse them with cold water and set aside.
  • Once the leeks are slightly translucent and wilted, add the potatoes into the pot.
  • Allow the potatoes and leeks to cook together for 3-4 minutes, then pour in the broth.
  • Turn the heat of the stove up to high heat so that the soup comes to a boil. As it does, foam will appear on the surface of the broth. Use a spoon to scoop off the foam and discard. Boil the leeks and potatoes until the potatoes are quite soft, about 6-8 minutes.
  • Once you can easily poke through a piece of potato with a fork, turn off the heat.
  • To puree the soup you can use a blender, or a stick blender. If using a stick blender, then plug in and blend away until the soup is pureed to your likely. I like to leave a few chunky bits of potato, but if you prefer yours creamy and smooth then that's fine too! If you're using a blender or food processor, pour the soup into the blender (you may need to do this in two batches depending on the size of your blender) and pulse several times until smooth or mostly smooth. Pour the soup back into the pot.
  • Once the soup is blended, set the stove back to low heat to simmer, and add salt, pepper, and herbs. Potatoes are very bland without salt, so I start with a generous 2 tsps and add more as needed. You may need even more if you're using a low sodium broth. Allow the soup to simmer for another 5-10 minutes before serving.
Keyword Carrots, vegetables, roasted, potato, vegetarian

Recipes, Soups

Gluten Free Shortcrust Pastry (No Xanthan Gum)

Nov 16, 2022 · Leave a Comment

Fall is the official start of pie season in our house. Do you associate pie with fall? I have always associated the two because of Thanksgiving. While I love having the classic, summery pies on my roster- strawberry rhubarb, cherry and (of course) Maine blueberry- I’m not much of an oven cooker in the summer. It’s just too hot! Suffice to say, pie crust isn’t happening in my kitchen that often from May-August. Now that the weather has cooled and the mornings are darker and cooler, turning on the oven is something I intuitively yearn for. It doesn’t actually heat the house, but the tick of our oven and the smell of deliciousness adds a cozy warmth to the atmosphere. (I’ve never been to Scandinavia but I wonder if this is what they refer to as hygge?) Since it’s officially pie season and it’s my first fall as a person with celiac, I’ve been perfecting my gluten free shortcrust pastry.

Problems with Gluten Free Pie Crust

In mid summer I attempted my first gluten free shortcrust pastry which resulted in lots of crumbs and tears. It’s no secret that shifting to a gluten free life has been an incredibly difficult transition for me. I still miss the stretch of gluten dough, and am storing the shattered pieces of my bakery owning dreams in a little box in my top drawer. My first gluten free shortcrust pastry trial was terrible. The biggest problem I had was when it came time to roll out the dough and then lift it into a pie pan. First of all, after I began to roll out the dough it would begin to crack and crumble. It was impossible to roll out and then flip over and roll again. Anytime I attempted to lift the partially rolled out slab, it would break into pieces. Without gluten, there is little to no strengthening qualities that bonds the dough together to stop this from happening. While I could piece it back together on the counterop, it proved impossible to put back together whilst in the pie pan. This was when the tears started to flow out of uncontrollable frustration and resentment and anger and unfairness and… you know. Everything. I threw that crust away and tried again the next day with better results.

My second pie crust came out better, but still not great. I used a blend of brown rice flour and tapioca starch, with a small percentage of almond flour (a mistake, in hindsight). I also used an egg as a liquid and binder. Having emotionally prepared myself for previous gluten free pastry problems, I paid closer attention to ratio, texture and temperature. This time I was actually able to lift the rolled out dough up and into the pan with only a little bit of breakage. I had a bit of trouble shaping pretty, pleated edges (they came out a bit jagged and uneven), but the dough itself held together. It also baked and browned fine, however, the texture was very delicate and it crumbled at the slightest touch. Cutting it into slices was not ideal, and the crust would immediately dissolve in your mouth with every bite. Not terrible, but not what I was going for.

Following what I considered to be two failed trials, I decided to research and came across a helpful bit of information. If you’ve been baking gluten free for some time, you’ve probably come across xanthan gum. Xanthan gum is an ingredient used in small amounts to add strength and minor elasticity to dough where gluten is not present. It gives gluten free dough more structure. Because of the chemical process that xanthan gum goes through, and because I’m still in the healing stages of my celiac diagnosis, I’ve been avoiding it. This has been good for my gut, but obviously challenging for my baking journey. While researching about it, I read that xanthan gum is a polysaccharide. A quick Google search gave me a variety of other foods that contain high amounts of polysaccharides: Chia seeds and potato starch-both commonly used in gluten free doughs. Fun fact: dates work too! I was excited to see dates, because they have a naturally sweet flavor and I knew they would work perfectly when blended up into a shortcrust pastry. I immediately got to work and made the best gluten free shortcrust pastry I’ve made thus far. I had little to no trouble rolling this out, or lifting it into the pie pan. (However, see note about rolling on parchment paper!) This gluten free shortcrust pastry is easy to work with, delicious, and has a great texture after baking. For this recipe I’ll be using potato starch to give the shortcrust pastry the extra structure it needs.

Gluten Free Shortcrust Pastry Ingredients

Brown Rice Flour– This brand is hands down a game changer. It is the only brand I can fine that is “superfine”, which means it doesn’t leave your baked goods with a grainy texture.

Tapioca starch– Since this is a gluten free shortcrust pastry, I use a little bit of tapioca starch to give the pastry a bit of texture and “bounce”, instead of just crumbling and dissolving in your mouth.

Butter– My gluten free shortcrust pastry is based on the classic 3-2-1 ratio, so butter is necessary. I have not tried this recipe with a vegan butter, though I assume it will work just as well!

Egg– I prefer to use eggs as part of my liquid because it acts as a binder and the fat from the egg yolk makes for a richer crust.

Potato starch– Again, since there is no gluten in this shortcrust pastry we need something to give it a bit more stretch to avoid the frustratingly cracking and fragility of the dough. Polysaccharides give non-gluten pastries a lot more structure. Potato starch is high in polysaccharides and is easy to find in the baking aisle with many gluten free flours. Xanthan gum is a common polysaccharide used in many gluten free products, though as I mentioned above I’m not currently using xanthan gum in my cooking.

Sugar– Not necessary, but I like to add just 1-2 tablespoons to my shortcrust pastry dough if I know I’ll be using it for a dessert.

Salt– Necessary, just a pinch, but makes a big difference in flavor.

Gluten Free Shortcrust Pastry

This gluten free shortcrust pastry is delicious, easy to handle and holds together nicely.
Print Recipe Pin Recipe
Course Dessert
Cuisine French
Servings 2 Pie Crusts (2 open, or 1 top and bottom crust)

Ingredients
  

  • 1 1/2 Cups Brown rice flour
  • 1/4 Cup Tapioca Starch
  • 1/2 Cup Potato Starch
  • 1/2 Tsp Salt
  • 8 oz Butter (1 cup, or 2 sticks)
  • 1 Egg
  • 3-4 Tbsp Cold water
  • 1-2 Tbsp Sugar (optional)

Instructions
 

To Make the Shortcrust Pastry Dough

  • In a large bowl, or food processor, measure out the brown rice flour, tapioca starch, potato starch, salt, and sugar.
  • Using a knife, cut the butter in small-ish pieces into the flour.
  • If you're using a food processor, pulse about 20-30 seconds until the butter is coarsely chopped into pea-sized pieces. Alternatively, without a food processor, you can use your fingers to break up the butter into small, pea-sized pieces. The end result should be course and crumbly, without any large pieces of butter.
  • Use a spoon to mix in the egg and cold water. Once the mixture begins to form together, use your hands to help it come together into a ball of dough, with no dry spots. The dough should not be dry or crumbly at all, and should resemble the texture of play-doh.
  • Divide the dough into two even pieces and form a ball with each. Then press and flatten each ball into a round, disc shape.
  • Wrap each ball in plastic wrap or a recycled plastic bag and place in the fridge for a minimum of two hours before use.

To use the dough

  • Remove the pastry dough from the fridge and allow it to sit on the counter about 20 minutes to warm up. I have found that dough temperature is key to successfully rolling out gluten free crust. You want it to be pliable, but not so warm that it's "melting" in your hands or on the countertop. I find that if it's too cold when you roll it out, it cracks more.
  • Roll the dough out on top of a sheet of baking parchment because it makes the dough much easier to lift off the counter without breaking. Dust a generous amount of brown rice flour onto a large piece of parchment paper, and place the pastry dough on it, then sprinkle additional flour on top of the pastry dough. I like to use a lot of flour, because if the dough sticks to the countertop it will tear very easily when you try to flip into into a pie dish. Using a lot of flour prevents this.
  • Use a rolling pin to roll out the dough. I like to roll it following the direction of the numbers on a clock, so it stays as round and even as possible. If the dough begins to crack along the edges or in the middle, gently press it back together. If the dough begins to stick to the rolling pin, dust with more flour.
  • To get the pastry crust into a pie dish, lift the entire parchment paper and flip upside down onto the pie dish. Peel the parchment paper away, and gently lift the hangover edges of the dough so that they sit nicely into the bottom of the pan. Some edges may break off. Press the dough (gently) into the pan all around so it fits nicely, and break off any excess dough around the edges. Use your fingers to press and shape the dough into your pan.
  • You can use the pie crust immediately, or place in the freezer for later use.
Keyword gluten free, pastry

Baking with Kids, Desserts, Recipes

Banana Buckwheat Pancakes (Gluten Free)

Nov 12, 2022 · Leave a Comment

On Saturday I brought Roman and Amelia to go see a lecture at Colby College on comic book illustration by Lincoln Pierce, the illustrator/author of Big Nate. It was a bit of a hike north, so we had to leave early, and there wasn’t time for our usual weekend family breakfast.  Instead, we settled for earl grey tea (me) and muffins (them) on the way. The talk lasted about an hour and the kids, of course, wanted their Big Nate books signed afterwards. I was happy to buy the kids each a new book for the ride home, in which they hopped back in line to get their new books signed, as well. Everyone had a great time. Amelia, who wants to be a graphic novelist, was absolutely smitten with the whole thing. I’m most certain I saw stars in her eyes. We were all hungry again when it came time to leave and the kids wanted to stop for sandwiches. I was keen to get back, since Ryan was home with the Littles. Perhaps I could make a late breakfast after we got home? A brunch? As we settled into the car, we agreed on buckwheat banana pancakes upon our return home.

Since Roman and Amelia are homeschooled, and Fiona only does two days a week at school, there aren’t many mornings where we are rushing out the door. Weekends are especially slow, but intentional, in our household. Are you a lazy weekend person or a productive weekend person? Or are you one while wishing you were the other? While I do relish in weekend productivity, lazy weekends are my favorite weekends. I love having zero commitments. Getting up early (but slowly) and taking my time to make a family breakfast is one of my favorite weekend ventures. These buckwheat banana pancakes are a perfect addition to whatever weekend plans you have- whether an early breakfast or a late brunch.

These pancakes are gluten free, of course, but also vegan friendly if you have multiple guests coming to visit with varying diets. For a long time I struggled with my gluten-free recipes being dry, crumbly and dense. These pancakes were one of the first revelations I had into gluten free being really good. They are quite moist and airy. The banana make them naturally sweet, so they’re delicious on their own, but even better with peanut butter or maple syrup. Buckwheat has been my go-to gluten free flour lately because I can get it from local Maine farmers, but I also love the flavor. Since the banana in these pancakes acts as a binder, you don’t need to use eggs.

Buckwheat Banana Pancakes

Bananas– For one batch you need about 3 medium bananas or 4 small bananas. This recipe calls for mashed bananas, not sliced, so ripe, brown-speckled bananas are preferable!

Buckwheat flour– Buckwheat has been my choice of gluten free flour lately. I use the light buckwheat flour from this farm since it’s local to me, but any kind works and is delicious! There are light (processed without hull) and dark (processed with hull) buckwheat flours and the color will vary depending on the type of flour you use.

Baking Soda– This leavening helps give the pancakes an airy lift so that they are not dense.

Almond Milk (or your choice of milk)- You can use almond, oat, soy, cows milk- it’s your choice! Anything will work here.

Salt- Brings out the flavor of everything

Vanilla (optional, but recommended)- For flavor

A couple of tips when making these:

-If you’re using a cast iron skillet, be sure to preheat it for a while. You want the pan you’re using to be nice and hot when you start cooking- not heating up as you start cooking. A hot pan helps prevent the pancakes from sticking to the pan.

– Be sure to add a little bit of butter or olive oil between each round of pancakes you’re cooking, again, to prevent them from sticking.

– It probably goes without saying, but these are so delicious with a few chocolate chips sprinkled in! Add to the batter just before cooking if you want to try it!

Buckwheat Banana Pancakes (Gluten Free)

Banana pancakes are incredibly simple and such a treat in the morning!
Print Recipe Pin Recipe
Course Breakfast
Cuisine American
Servings 10 Pancakes

Ingredients
  

  • 3 Medium Bananas
  • 1 1/2 Cups Buckwheat flour
  • 1/2 Tsp Baking Soda
  • 1 Cup Milk (your choice of milk is fine)
  • 1 Tsp Vanilla
  • 1/2 Tsp Salt
  • Butter or oil for cooking

Instructions
 

  • In a smaller mixing bowl whisk together the flour, baking soda and salt and set aside.
  • In a larger mixing bowl, use a fork to mash the bananas into a puree.
  • Add the milk and the vanilla to the banana puree and until completely combined.
  • Whisk the flour mixture into the wet mixture until there are no dry spots.
  • Set a large cast iron skillet or pan over low-medium heat.
  • Add a tablespoon of oil to keep the pancakes from sticking. Using a ladle or large spoon, spoon a few tablespoons worth of batter into the pan to form one pancake. Depending on your pan size you should be able to fit about three pancakes. Allow them to cook until they look like they are cooked around the edges- about 3-4 minutes. Flip them over and allow them to cook on the other side another 2-3 minutes. Repeat this step until you've used up all the batter.
Keyword gluten free, morning, vegan

breakfast, Food, Morning, Recipes

Pumpkin Carrot Soup

Sep 20, 2022 · Leave a Comment

pumpkin soup with baguette

Last Thursday evening we arrived fashionably late for open house at Fiona’s school. Yes, my little babe is off to school. Eek, I promised myself I wouldn’t cry. It’s only pre-kindergarten. It’s only two days a week. Breathe. My heart aches with grief and beams with pride all at the same time, but I am excited for her because she is excited. Do you have kids starting school this year? Can you relate? I could only marvel as she explored her classroom, introduced herself to new classmates, and found her name tag and cubby by herself. She is understandably timid with her new teachers, but I suspect in a couple weeks she’ll warm up. She was certainly not shy when it came to exploring the darling playground they have just outside. Her school’s philosophy is very nature oriented, so the playground follows suit. Most of the playground is canopied within a bungalow of trees. It’s humble and sweet: a spider swing, a climbing wall, and a tire trail. There are tomato and cucumber plants (which I didn’t notice until Fiona pointed them out to me), an herb garden, and plenty of space to run around. She was sad when it came time to leave and to cheer her up we stopped at our local market and I let her pick out a small treat. We also picked up our first pumpkin of the season (I do think she was more excited about the pumpkin than the treat!) I knew I had to make pumpkin carrot soup.

toddler with french bob holding a pumpkin

Fall is closing in on us and I’m not mad about it. I can feel it in the early morning hours. The sun no longer greets us at 5am, but peeks above the horizon closer to 6, casting a warmth against the early morning chill. I like dark, cold mornings- the house is cozy and peaceful. While my biggest inspiration is the changing of the seasons, fall has a special place in my heart. It is pumpkins. It is school supplies. It’s halloween and homemade caramel. Apple picking and cider pressing. Fiery, crinkly leaves. Sweaters. It’s the cozy season. How do you feel about fall? What’s your favorite part? I do all of the fall things, and fall foods are usually at the top of the list. I know my kids are especially excited to visit the apple orchard this year. Apples are always in large supply in our house during September and October and I’m anxious to try out new recipes. I don’t entirely have a handle on gluten free baking, but I’m getting better and the discouragement is starting to wane a little. I’m looking forward to mastering gluten free pastry, so lots of tarts and pot pies will be making an appearance this season. The morning after picking up our pumpkin, I got straight to work on roasting it. The smell filled the house with an aroma of warmth that lingered in our stairwell into the late morning. Roman and Amelia were as excited as pre-teens can be about a pumpkin, though I think it was an unwelcome reminder that they, too, would be starting school soon. They are homeschooled and we have a big year planned. Soon we’ll be back to morning chess games, regular library visits and music lessons. Summer in Maine is coming to a close, and we will have pumpkin carrot soup to comfort us. Like I said, I’m not mad about it.


It’s been a few seasons since I’ve made this soup, but it came out as delicious as I remember. I love that a simple pumpkin can inspire a beautiful soup, which can then turn into a warm, bubbly, memorable evening with family… which then shapes lifelong memories. This is why I love to cook. I bought a baguette for the kids to pair with the soup, and had gluten free bread myself. I’m still working on mastering gluten free baguettes. It’s a recipe I’ve been toying around with and haven’t yet perfected or made enough times to be confident about it. Over pumpkin soup, bread, and a light salad, we played Cards Against Humanity (the family version) and listened to Madeleine Peyroux. It was a fun evening. For this recipe you can use homemade pumpkin puree if you prefer to roast your own pumpkin, but the recipe is perfectly delicious with canned puree. Do you prefer to roast your own pumpkins or buy canned? I grew up on canned pumpkin and it never occurred to me I could even roast my own until I was in my late 20’s. What a revelation! Now I prefer to roast them, but keep canned pumpkin in the cabinet just in case. For this pumpkin carrot soup recipe, I would normally use a splash of cream, however, I omitted the cream because Isla is too young to have cream. If you have no problems with dairy, I suggest adding a 1/4-1/2 cup of cream into the soup just after pureeing it. Alternatively, coconut milk can be used and is also delicious.

Pumpkin Carrot Soup

A thick pumpkin and carrot soup recipe that is simple, delicious and the perfect comfort food for fall!
Print Recipe Pin Recipe
Prep Time 1 hour hr
Cook Time 30 minutes mins
Course Soup
Cuisine American, French
Servings 6 people

Ingredients
  

  • 4 tbsp Olive oil
  • 2 large Onions
  • 1/2 head Garlic (about 4-5 cloves)
  • 6-8 Medium Carrots diced
  • 4 Cups (about 2 cans) Freshly roasted or canned pumpkin puree
  • 4 cups Chicken or vegetable stock
  • 1/2 cup Heavy cream (optional)
  • 1/4 cup apple cider (optional, but delicious)
  • pinch nutmeg
  • salt and pepper (to taste)

Instructions
 

If you want to roast your own pumpkin

  • Preheat the oven to 425˚F.
  • Cut a pumpkin in half, don't bother to scoop out the seeds.
  • Place both pumpkin halves in a large roasting pan and drizzle the inside and outside skin with olive oil.
  • Place the pumpkin halves face down (so you can't see the seeds) in the roasting pan.
  • Roast for approximately one hour, or until they feel soft and a fork pokes through them quite easily.
  • Allow them to cool, then use a spoon to scoop out the seeds and discard them.
  • Scoop out the pumpkin and use a blender or food processor to blend it into a smooth puree. Use immediately, or store in the fridge for later use up to 5 days.

Pumpkin Carrot Soup

  • Chop the onion and garlic and saute in a large pot over low heat for 10 minutes. We want these to caramelize, so stir every so often and let them brown slightly but not burn, about 5-6 minutes.
  • Add the diced carrots and stir into the onions and garlic. Saute another 5-6 minutes.
  • Pour in the stock and then turn the heat up and allow it to come to a boil. Boil the vegetables for about 4-5 minutes, allowing the carrots to soften.
  • Next we will puree the soup so it has a beautiful, smooth consistency. Turn off the heat and allow the soup to cool for 10-15 minutes. Then pour the contents of the soup into the blender. Blend on high for about 30 seconds, or until everything is smoothly pureed. Alternatively, you can use a stick blender to puree everything smoothly. Return the entire stock/vegetable puree back into the pot and turn on low/simmer.
  • Add two teaspoons of salt, or more as needed. Add a small pinch of pepper (I prefer to use white pepper here because it blends in visually), a small pinch of nutmeg, and the apple cider. Lastly add the heavy cream and stir well. Allow to simmer another 10-15 minutes, and serve hot. You can also store this in the fridge for about 5 days, or up to 2 months in the freezer.
Keyword Fall, pumpkin, soup

Light Conversation:

–Do you have kids starting school this year? Is it bittersweet for you, too?

-How do you feel about fall? What’s your favorite part of it?

-Do you prefer to roast your own pumpkin or buy canned puree?

Featured, Featured Main, Recipes, Soups

Toppings for Smoothie Bowls

May 20, 2022 · Leave a Comment

Two smoothie bowls with toppings

Now that the weather is getting warmer, smoothie bowls have become almost a daily meal for us. Usually we have the for breakfast or as a mid-day (large) snack! I’ve seen an incredible amount of recipes online for making smoothie bowls, however, this article is going to cover toppings for smoothie bowls! Smoothie bowls are fine and great but toppings for smoothies bowls are what make them really fun and even more delicious!

The kind of smoothie bowl you’re making is probably going to have some weight in what kind of toppings you want on it. Certain toppings do pair better with others. Also, take into consideration what kind of nutrients you’re trying to get out of it and what you actually feel like eating. For example, I personally love a chocolate smoothie bowl with toppings of banana slices, almond butter, and dried cherries. I probably would do something different for toppings if I had a more tropical flavored bowl such as mango/pineapple. If you’re wanting a bit more protein, you can add more protein heavy toppings, such as puffed quinoa, walnuts, and/or muesli. There are many possibilities and variations-it really depends on what you want!  With that said here are some great ideas for toppings for smoothie bowls:

Banana smoothie bowl with kiwis, strawberry and granola

Toppings for Smoothie Bowls:

  1. Granola (This is my go to, but I also love this one!)
  2. Chocolate chips
  3. Sliced bananas
  4. Fresh or frozen blueberries
  5. Chia seeds
  6. Crushed peanuts
  7. Sliced almonds
  8. Puffed quinoa
  9. Sliced kiwis
  10. Strawberries
  11. Blueberries
  12. Pumpkin seeds
  13. Walnuts
  14. Dried cherries
  15. Muesli
  16. Puffed rice
  17. Sunflower seeds
  18. Cashews
  19. Caramel drizzle
  20. Date syrup (I like this brand)
  21. Coconut whipped topping
  22. Cacao nibs
  23. Almond butter
  24. Chocolate sauce/melted chocolate drizzled
  25. Raspberries
  26. Mint leaves
  27. Peanut Butter
  28. Hazelnut and Cacao spread (love this one!)
  29. Shaved coconut
  30. Edible flowers

These are just some of the things that I thought of quickly and that I use semi-regularly. Things like yogurt, protein bites/truffles, or matcha powder. What toppings for smoothie bowls sound good to you?

Cooking with Kids, Recipes

Affirmations for moms

May 4, 2022 · Leave a Comment

Affirmations for moms by Amber Rogals

I’m not going to lie- affirmations for moms has helped me immensely. When you become a mom, it’s a whole different world than you’ve ever known- am I right? You sacrifice so many things- sleep, your body, your time, for some people their careers and relationships, too. I don’t know any moms that say it isn’t worth it, but I think we can all agree it’s hard. Here are some of the things I’ve experienced first handedly as a mom:

-Close relatives and strangers giving unsolicited parenting advice.
-Tantrums in grocery stores
-Feeling guilty about going out or having “time to myself”
-Losing my cool, yelling at my children, and then sobbing later because I feel bad about it
-Holding a grudge against my partner because he “doesn’t seem to value or recognize all that I do”.
-Given up on hobbies and/or career opportunities
-Completely lost my sense of self

And these are just a few! If you’re a mom, surely you can relate, right? I didn’t start using affirmations until recently, but they have helped me so much in my life. If I had even considered looking for affirmations for moms when I first became a parent, I can’t help but think they would have helped reinforce things that I wanted to be, but didn’t feel I had the strength. Now I use affirmations all the time (affirmations for reinvention is my current morning listen, but affirmations for moms, partners, or self growth are all things I incorporate into my life regularly) They’re like a little secret weapon I can use whenever I am doubting myself.


20 Powerful Affirmations for Moms

I may not be perfect but I am the perfect mother for my children.

I am learning to approach chaos with patience and an open heart.

Being a patient and loving mother is my priority right now.

I am so grateful for the time I get to spend with my kids.

I am teaching my children love and patience by showing them love and patience.

With or without outside recognition, the work I do as a mother has true value.

When I have to choose between being stressed about small things, or making lasting memories, I choose to make lasting memories.

I can not adequately take care of anyone else if I am not taking care of myself, too.

Self care allows me to give 100% to the people and things that I value the most.

I can have wonderful traits as a mother and still be learning at the same time.

I am a mother, but I am also my own person.

I choose to prioritize love and compassion for my kids and for myself.

When things get stressful, I can can take the time I need to feel calm.

I know this is temporary, so I am choosing to make the best of it.

I am practicing love, patience, and boundaries.

Just because it works for them, doesn’t mean it’s the best thing for our family.

I have the power to choose what the best decisions are for my children.

When I do my best, I’m teaching my kids to do their best.

I am a compassionate, patient and loving mother.

When I enforce boundaries for my children, I am also teaching them how to build and respect their own.


I like to choose one or two affirmations for the week and repeat them to myself throughout the day. Usually first thing in the morning and always before bed. You can say them as little or as often as you’d like, but I feel they are more effective when repeated a lot. I definitely encourage you to get comfortable saying them outloud- even if it’s just a whisper.

Do you feel like any of these affirmations resonated with you?

Inspiration, Lifestyle, Mom Life

Vanilla Cakelet Recipe

May 2, 2022 · Leave a Comment

Vanilla cakelet recipe

Vanilla cakelet recipe 
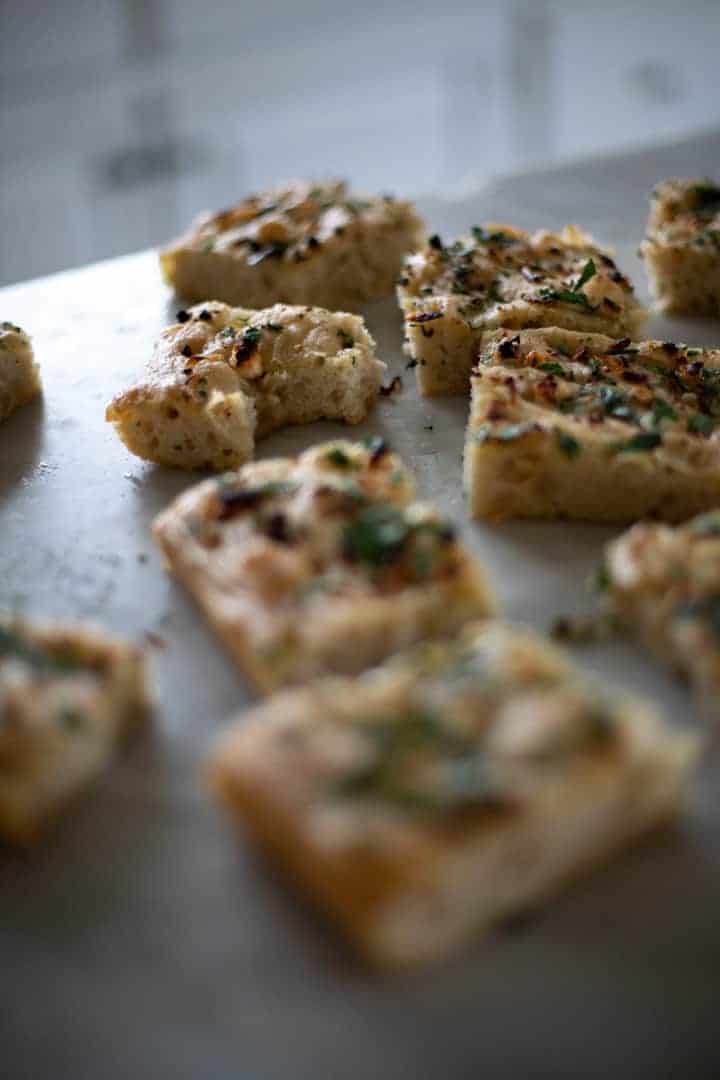
Before I was diagnosed with celiac, I spent years dreaming about opening my own little bakery. I would call it Downeats or Little Maine Kitchen or something like that. There would be delicious rounds of focaccia topped with things like cheese and parmesan, caramalized shallots and parsley, and olives and oregano. Sea salt on everything, of course. The sweets menu would be luxury but casual pastries, like chocolate and scorched meringue tarts, rose and pistachio shortbread, and dainty vanilla cakelets. Of course there would be plenty of sourdough boules and baguettes to choose between. It would be a smashing success and we would live happily ever after, baking away our mornings and eating bread and cakes under the sunset. Baking is a nice way to start the day, no? While daydreaming up my bakery ideas a couple weeks ago, it got me thinking of these vanilla cakelets that I used to make. They’re great for any season, really, but I particularly love them in the spring- perhaps because they remind me of Easter. This vanilla cakelet recipe creates the cutest, sweetest looking cakes I’ve ever seen.

What are Vanilla Cakelets?

What is a cakelet? I’m not sure you’d find it in Merriam-Webster, but I like to think of it as a tiny cake- about the serving size of a Little Debbie snack cake. (Of course, a homemade vanilla cakelet recipe will be far more delicious than anything Little Debbie can dish out) What really makes these little sweet treats go from vanilla cakes to “vanilla cakelets” is the fact that they are so small. I use a normal 9″ round cake pan, and then when the cake cools I use a glass jar or a cookie cutter to cut out littler cakes. Nordicware has great cakelet pans for tiny bundt style cakes, or other fun shapes, but I honestly feel like just using cookie cutters and cutting out shapes is fun, albeit a bit messy. Generally when you google cakelets you’ll find an array of unfrosted, plain vanilla cakes, similar to a teacake. 
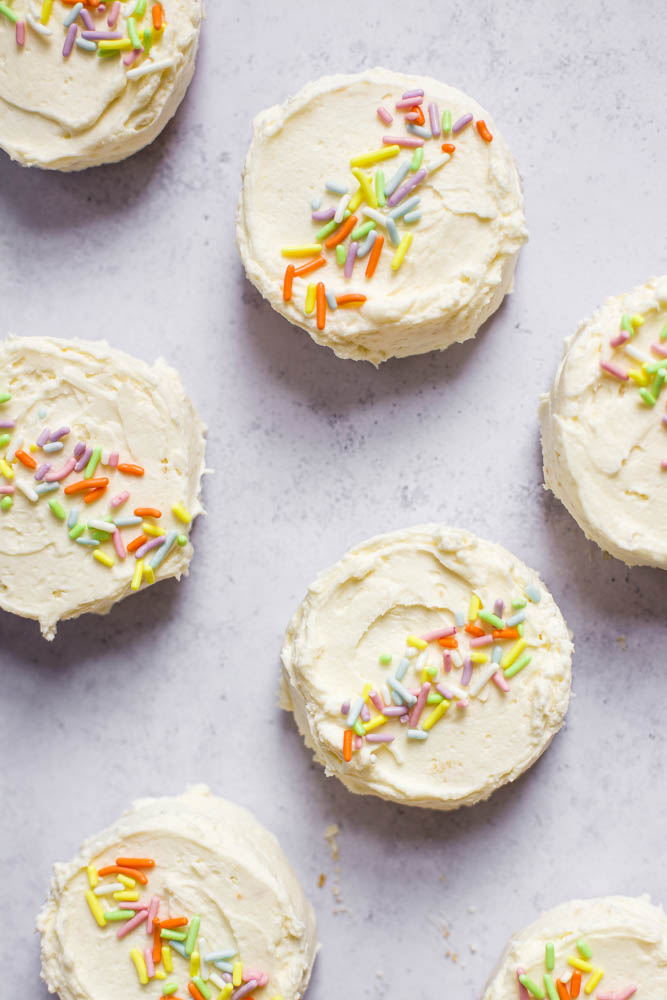
You can choose to top or coat them with frosting, whipped cream, fruit compote, or just dust them with powdered sugar. For this recipe, I’ve made my favorite vanilla cream cheese frosting, but if you don’t have the extra time or don’t want the extra sugar you can absolutely leave it out. Additionally, trying to coat them entirely with frosting is also a bit messy (though they turn out so cute!), so if you opt for just frosting the top that’s fine, too. I’ve made a couple of helpful tips below for frosting the cakes.

Vanilla Cakelet Recipe Tips and Notes

Since I was just diagnosed with celiac a couple weeks ago, I made my vanilla cakelets gluten-free, and I have included the gluten-free version below. It’s very easy to adapt this recipe to whatever your preference is! When cutting out the shapes of the cakelets, it can get very crumbly and messy, so have a big, clean counter space ready ahead of time. Additionally, feel free to save the leftover cake scraps for any fun cake crumb dessert projects (or you can just eat the scraps which is what the kids and I always do!) If you choose to frost the cakes: My number one tip is to first divide your frosting into two separate bowls. Since the first layer of frosting on any cake usually gets messy with crumbs and doesn’t look very pretty, we don’t want all of our frosting full of cake crumbs. Designate one bowl of frosting to be the “No crumbs” bowl, and another bowl to be the “crumb layer” bowl. Frost the cakes from the crumb layer bowl, and expect that they’ll look messy and covered with crumbs. Once they are all frosted, put them in the refrigerator for at least an hour. This will cause the frosting to chill and harden slightly, so that when you put on the second layer of frosting it will cover up the first (messy) layer. Then you will have nice looking cakes that aren’t covered in cake crumbs. Cakelet on a plate


Vanilla cakelet recipe

Vanilla Cakelet Recipe

These vanilla cakelets are fun, sweet and the ideal serving size! This is a perfect weekend baking project if you have kids at home that love to help in the kitchen.
Print Recipe Pin Recipe
Prep Time 30 minutes mins
Cook Time 30 minutes mins
Decorating 30 minutes mins
Course Dessert
Cuisine American
Servings 15 Cakelets (Depending on the size)
Calories 120 kcal

Ingredients
  

For the Cakes

  • 12 Tbsp Butter
  • 1 Cup Sugar
  • 2 Tsp Vanilla extract
  • 3 Eggs
  • 1/4 Cup Milk (slightly warmed)
  • 1 3/4 Cups All Purpose Flour OR Brown Rice Flour if baking the gluten free version
  • 1/4 Cup Tapioca Starch (gluten free version only)
  • 1 Tsp Baking Powder
  • 1/2 Tsp Salt

For the Cream Cheese Frosting

  • 8 Oz Cream Cheese, softened
  • 4 Oz Butter, softened
  • 2 Cups Confectioners' Sugar
  • 2 Tsp Vanilla Extract
  • Sprinkles (optional)

Instructions
 

Make the Vanilla Cakelets

  • Preheat the oven to 350˚F and lightly oil your cake pans and dust them with flour to prevent the cake from sticking.
  • In a medium sized mixing bowl whisk together the flour, salt baking powder (and tapioca starch if you're making the gluten free version).
  • In a mixing bowl with a stand-attachment or using an electric mixer, cream together the butter and the sugar about 2 minutes. Add in the eggs one at a time, mixing well between each addition. Mix in the vanilla and milk until thoroughly combined.
  • Pour the dry ingredients into the wet ingredients mixture. Using a rubber spatula, gently mix in the dry ingredients until just combined and there are no dry spots. Be careful not to over mix!
  • Pour the mixture into your cake pan and bake until slightly browned on the top and a toothpick comes out clean- about 30 minutes.
  • After baking, allow the cake to cool for about 15 minutes, and then carefully remove it from the pan. Allow it to cool completely by putting it in the fridge for about 30 minutes.
  • When the cake has cooled place it on a clean, flat surface. To form the cakelets, use a small glass jar or a round cookie cutter, or your cookie cutter of choice to cut shapes out of the cake. Continue until you've used up all of the cake and can't make any more shapes. The amount of cakelets depends on the size of your cookie cutter. I use a rather small glass jar, so I get about 15 little cakelets.
  • Frost the cakes with two layers of cream cheese frosting, refrigerating the cakes for at least an hour between each layer of frosting (see notes/tips above). Alternatively, top the cakes with whipped cream, berries, citrus curd or powdered sugar just before serving.

Make the Cream Cheese Frosting

  • Combine the ingredients in a large mixing bowl and whisk on high speed until light and fluffy, about 5-7 minutes. Best used at room temperature, but refrigerate if you're not using it within an hour or two.
Keyword cake, sweets, treats, vanilla

Desserts, Featured, Recipes

Strawberry and Goat Cheese Salad

Apr 23, 2022 · Leave a Comment

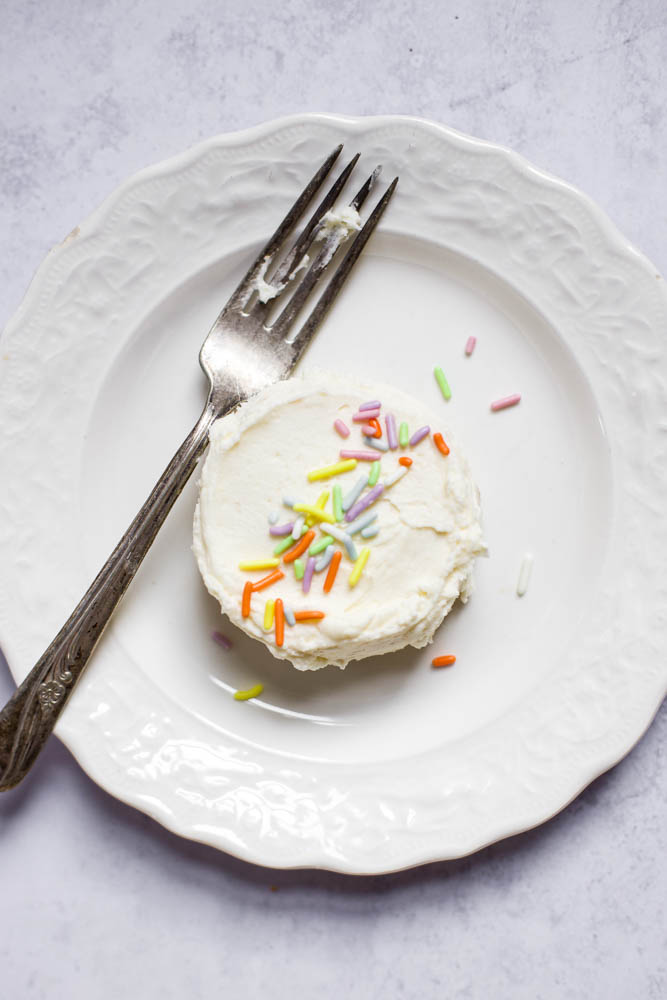
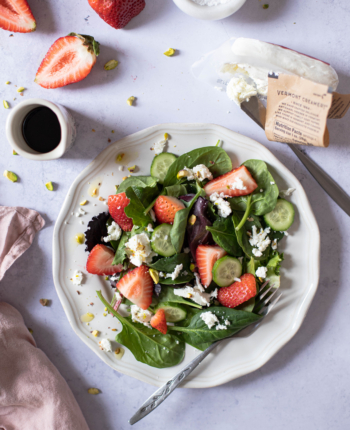
On Wednesday morning, I decided to take the kids for a morning walk after a particularly chaotic bit of breakfast. We all needed the fresh air and the sun was finally making an appearance after a few days of inevitable April rain showers. As we made our way onto the porch, Amelia spied a few tulip bulbs finally popping up out of our little flower garden. We all crowded around the garden in a delicate mixture of relief and gratitude. For us it means that spring is finally here. While fall is my favorite season, spring certainly gets my creativity and productivity juices flowing. Warm weather in Maine is notoriously short-lived, so there is always this feeling of urgency to always make the most of the daylight, the warmth and the fresh produce when it finally makes it’s appearance! Strawberries aren’t growing yet but are finally on the horizon, so I was inspired to make this strawberry and goat cheese salad during dinner.

Strawberry and Goat Cheese Salad

The kids were a bit hesitant at the mention of a “strawberry and goat cheese salad”. Strawberries? In a salad? Amelia, who is almost always my salad helper, jumped at the opportunity to at least make them look beautiful, sprinkling and placing things just so. Outside of this salad looking beautiful, though, strawberry, goat cheese and balsamic vinegar are a deliciously combination. In the summer it’s perfectly light, seasonal and a good blend of sweet and savory. I like to add pistachios, as you’ll see in the recipe below, but candied walnuts are equally amazing. If you’re looking for a fun and creative summer salad, you’ll probably love this.


Ingredients Needed

This salad is both very flexible and simple to make. In the summer months I like to try to keep a bag or box of fresh baby spinach handy because it’s in season and I try to eat it a lot. I’ve added a few other things you can use for this salad if you have on hand that you want to use, or if you want to substitute the cucumbers for something else. For this salad, you’ll need:

Fresh baby spinach
Goat cheese
Cucumbers
Fresh strawberries
Pistachios, candied walnuts, or pecans (optional)
Any additional spring/summer vegetables you prefer- Things that pair nicely are asparagus, peas, bell peppers, avocados, basil or mint

And for dressing the salad you’ll need:
Balsamic vinegar
Olive oil (a good quality one preferably)
Dijon Mustard
Sea salt
Dried herbs, such as oregano or tarragon (optional)


strawberry and goat cheese salad

Strawberry and Goat Cheese Salad

This salad is one of my favorites during the spring and summer months!
Print Recipe Pin Recipe
Prep Time 15 minutes mins
Course Salad
Cuisine American
Servings 6 People

Ingredients
  

For the Salad

  • 1 Small box (5 oz) Fresh baby spinach
  • 1 lb Strawberries, de-stemmed and cut into bite sized pieces
  • 1 Cucumber, thinly sliced into rounds
  • 2 Oz Chevre/Goat cheese
  • 1/4 Cup Pistachios, roughly chopped (optional)
  • Sea Salt (to taste)

For the Balsamic Dressing

  • 1/2 Cup Olive oil
  • 1/4 Cup Balsamic vinegar
  • 1 Tbsp Dijon mustard
  • 1 Tsp Honey or maple syrup
  • 1 Tbsp Dried Tarragon, Basil, or Parsley

Instructions
 

Make the balsamic dressing

  • In a medium bowl whisk together the vinegar and dried herbs of choice. Allow them to sit for about 5-10 minutes.
  • Add the oil, mustard and honey or maple syrup and whisk until it comes together and the oil and vinegar don't look "separated". Set aside until you're ready to use, or store in the refrigerator in an airtight container for later use.

Assemble the Salad

  • Put all of the spinach in a large bowl.
  • Evenly sprinkle the strawberries, cucumber slices and pistachios on top of the spinach.
  • Dollop the goat cheese onto the salad using a spoon, in about teaspoon sized portions.
  • Pour about 3-5 tablespoons of balsamic dressing on top of the salad and toss until everything is evenly coated.
  • Serve evenly onto plates and sprinkle with sea salt just before serving.
Keyword chevre, strawberries

Featured, Recipes, Salads

Raspberry and White Chocolate Loaf Cake

Apr 8, 2022 · Leave a Comment

raspberry and white chocolate loaf cake

Last Sunday night Amelia came down with a yucky (though thankfully short lived) stomach bug. I thought we’d made it through the season sans-sickness, but alas. It made the rounds through our entire house Tuesday, Wednesday, Thursday, Friday, and Saturday hitting each of us one at a time. I’m not sure what’s worse- the entire family getting sick at once, or one person right after another. It’s a lot of laundry and makeshift meals (chicken broth with soft carrots and noodles). Now that we’ve come out of it on the other side, I’m making up for lost baking time by making this delicious raspberry and white chocolate loaf cake. Interested?

White chocolate isn’t something I use in my kitchen very often. In fact, I’m not sure I’ve ever used it at all. I have been wanting to do a simple cake with raspberries and… something. I actually thought about this for quite some time. Vanilla? Cardamom? Dark chocolate? I finally settled on the idea of a raspberry and white chocolate loaf cake. If you know me at all, you’ll know that I’m admittedly a food snob and don’t consider white chocolate to be real chocolate. (It’s not, okay?) Of course, that doesn’t mean it isn’t good. There’s a time and a place for it, and this raspberry and white chocolate loaf cake is pretty much it. Maybe even exclusively. (Got a killer white chocolate recipe? Prove me wrong and share it in the comments. Or email it to me.)

raspberry and white chocolate loaf cake

Raspberry and White Chocolate Loaf Cake Ingredients

All Purpose Flour– If you want to go gluten free, you can substitute substitute your favorite gluten free flour, or brown rice flour.

Baking Powder– This helps keep the cake light.

Granulated Sugar– Obviously this is to add sweetness to the cake. I don’t add too much sugar in this recipe, because white chocolate chips add quite a bit of sweetness on their own.

Milk– You only need a little and it adds a little bit of moistness to the cake. You could also substitute the same amount of creme fraiche or sour cream.

Eggs– We’ll use three eggs for this recipe.

Vanilla– You know I don’t bake without vanilla! This adds a nice, subtle hint of flavor.

Salt– Necessary, of course, so our cake doesn’t turn out bland.

Raspberries– I like to use frozen, because they are less expensive, and easier to keep on hand. If you are making this seasonally, definitely use fresh!

White chocolate chips– The first time I made this raspberry and white chocolate loaf cake, I actually used Ghiradelli white chocolate wafers, which I don’t recommend. White chocolate melts very easily and the larger chips leave bigger pools of oil when the cake is hot. The second time I used the regular white chocolate baking chips (these) and they worked much better.

Raspberry and White Chocolate Loaf Cake

The tartness of the raspberries paired with the sweetness of white chocolate is perfection!
Print Recipe Pin Recipe
Prep Time 20 minutes mins
Cook Time 1 hour hr
Course Dessert
Cuisine American
Servings 8 Slices
Calories 270 kcal

Ingredients
  

  • 1 1/2 Cups Flour
  • 1 Tsp Baking Powder
  • 1/2 Tsp Salt
  • 12 Tbsp Butter (1 1/2 Sticks), Softened
  • 3/4 Cup Sugar
  • 3 Eggs
  • 1 Tsp Vanilla
  • 1/4 Cup Milk (Lukewarm)
  • 1 Cup White chocolate baking chips
  • 1 Cup Fresh or frozen raspberries

Instructions
 

Make the cake

  • Preheat the oven to 350˚F and brush oil on a 9" x 5" loaf pan. Dust it lightly with flour after oiling it, and tap out any excess flour.
  • Since the milk should be lukewarm when added to the batter, begin by warming up the milk slightly. Pour it in a small saucepan and turn it on low heat for about 1 minute- just enough to warm it up. Then turn off the heat and set the milk aside.
  • In a small mixing bowl, whisk together the dry ingredients: flour, baking powder and salt.
  • In a larger mixing bowl with a batter attachment or using a handheld mixer, cream together the butter and the sugar until fluffy and evenly combined, about 2-3 minutes.
  • Add the eggs to the butter and sugar mixture, one at a time, mixing well before each addition.
  • Add both the vanilla and milk and mix another minute or so.
  • Finally, add the dry ingredient mixture and mix until everything is just combined (do not over mix!)
  • Gently fold in the raspberries and white chocolate chips at the same time until they're evenly distributed throughout the cake batter.
  • Gently scoop the batter into the cake pan, making sure that it is even along all sides of the pan.
  • Set the cake in the oven to bake for about one hour- or until golden brown, and a toothpick comes out clean.
  • Allow the cake to cool for about 15-20 minutes before removing it from the pan. After removing it from the cake pan allow it to cool another 45 minutes-1 hour before cutting and serving.
Keyword cake, raspberry, simple, white chocolate

Baking with Kids, Desserts, Recipes

Oat Flour Pancakes Recipe

Apr 1, 2022 · Leave a Comment

oat flour pancakes with blueberries and whipped cream
pouring maple syrup on oat flour pancakes

Oat flour pancakes have become quite commonplace in our house since I’ve integrated a lot more non-gluten grains into our household. Mealtimes are quite a ritual in our house, and even though breakfast isn’t as big of an affair, we still usually reserve 1-2 mornings a week to have a family breakfast together. Pancakes, crepes, or waffles have always been in my repertoire. These oat flour pancakes are a newer recipe of mine, but becoming a fast favorite of the kids.

I’ve made these oat flour pancakes several different times, the first few times being with a slight variation. Now I’ve finally settled on the recipe and they pretty much always coming out delicious. The kids absolutely love them (though, let’s be honest, the kids will love anything that’s covered in maple syrup!). Personally, I like to serve these with fresh berries, whipped cream and maple syrup.

oat flour pancakes with blueberries and maple syrup

Oat Flour Pancakes Ingredients

Oat Flour– If you’ve never used oat flour, it does tend to absorb liquid a bit more than wheat flour does. This holds true for most gluten-free flours that I’ve used thus far. The texture of these are also a little bit more grainy than wheat pancakes, but they also have a delicious, wholesome, oat like flavor. I almost always keep this brand handy because it’s certified gluten free (it’s also great for pie crust, and gluten free oatmeal cookies). I like to use this brand of oat flour, because it’s specifically gluten free and I do feel that Bob’s Red Mill are tried and true products.

Eggs– Because oat flour is a bit heavier than wheat flour, oat flour pancakes can end up being a little bit dense, which isn’t ideal. To combat that, I separate the eggs, adding the yolks directly to the pancake batter and then whipping the egg whites to stiff peaks and folding them in at the end. It is one extra step, but it’s so worth it.

Milk– I like to use whole, local milk, but you can absolutely use oat milk or almond milk for these pancakes, too!

Sugar– Just a little bit, and it’s optional.

Salt– A pinch, for flavor.

Vanilla– Vanilla complements the oat flour flavor really nicely, and just works in pancakes.

Toppings– You can top these pancakes with anything you’d like- fresh fruit, whipped cream, maple syrup, peanut butter, honey- it’s up to you!

oat flour pancakes
oat flour pancakes with blueberries and whipped cream

Oat Flour Pancakes

These oat flour pancakes are gluten free, and absolutely delicious!
Print Recipe Pin Recipe
Prep Time 15 minutes mins
Cook Time 15 minutes mins
Course Breakfast
Cuisine American
Servings 4

Ingredients
  

  • 2 Cups Gluten Free Oat Flour
  • 1 Cup Milk (Feel free to use your choice of milk)
  • 3 Eggs, Separated
  • 1 Tsp Vanilla
  • 1 Tbsp Sugar
  • 2 Tsp Baking Powder
  • 1/2 Tsp Baking Soda
  • 1/2 Tsp Salt
  • Butter, non-dairy butter or vegetable oil (for cooking)

Instructions
 

  • In a large mixing bowl combine the oat flour, baking powder, baking soda, salt and sugar and whisk until everything is thoroughly combined.
  • Using a second mixing bowl, separate the eggs- place the egg yolks into the bowl with the dry ingredients, and the whites into the additional bowl.
  • Mix the eggs yolks into the dry ingredients until they clump together, then whisk in the milk in 3-4 separate additions, mixing well between each addition. Adding the milk a little at a time, instead of all at once, helps prevent lumps of flour in your batter.
  • Using a handheld or stand mixer, whip the egg whites until stiff peaks form, about 3-4 minutes on high speed.
  • Gently fold the egg whites into the batter, taking care to not over mix. Once the egg whites are fully incorporated into the batter, set a large pan or skillet over medium low heat.
  • Once the pan has heated, add a pat of butter (non-dairy if you prefer) or splash of olive oil to the pan to prevent the pancakes from sticking. Let the butter melt and warm up for a minute.
  • Add a large spoonful of batter to the pan and let it spread out to form a pancake. The batter will be thick and move quite slowly. Repeat this step with however many pancakes will fit in your pan (generally I can cook 3-4 at a time, but it depends on the size of your pan, and how large you make your pancakes.)
  • Allow the pancakes to cook for about 3 or so minutes, until golden brown on the bottom. The edges and top looking a bit dry are a good indicator it's time to flip them!
  • Flip the pancakes and allow them to cook on the opposite side, another 3 or so minutes.
  • Serve warm with maple syrup, whipped cream, fresh fruit and your favorite toppings!
Keyword gluten free, morning, oat flour

breakfast, Cooking with Kids, Recipes

Gluten Free Banana Cake

Mar 30, 2022 · Leave a Comment

Slice of gluten free banana cake on a plate

February and March are the months I turn to the not-so-seasonal desserts for inspiration. By the time March rolls around, we’ve surely baked, blended and snacked our way through any frozen berries we had saved from the previous summer. One thing I like to make as an afternoon treat is banana cake. I usually make it once a week, and it lasts only a couple of days. Sometimes with a cream cheese frosting, sometimes without. The few weeks I’ve been playing around with gluten-free grains, particularly oat flour, brown rice flour and buckwheat. I do love buckwheat, but for this gluten free banana cake I decided on a blend of rice flour and a little tapioca starch. If you’ve been looking for the perfect gluten free banana cake, you’ll probably love this recipe. It’s simple, delicious, and fairly quick to make!

I have found that banana cake and banana bread are often interchangeable- usually a quick bread and made in a loaf pan. I thought it would be fun to make this gluten free banana cake more like a traditional layer cake. It’s a little more special, and it’s also quite fun to assemble! In between the layers, I used a chocolate hazelnut spread (this one from Artisana), but you can use cream cheese frosting if you prefer. If you have a dairy allergy, or prefer not to use cream cheese frosting, this banana cake is nice with just the chocolate/hazelnut spread in between the layers and a light dusting of confectioners’ sugar on top!

slice of gluten free banana cake on a plate

Gluten Free Banana Cake Ingredients

If you are gluten-free you most likely have these ingredients at home. If not, they are easy enough to find at your local grocery store or you can order them.

Brown Rice Flour– Brown rice flour has been my trusted baking flour since cutting out gluten. It definitely has a more wholesome flavor than the all-purpose gluten flour that I usually bake with, and pairs great with a sweet frosting.

Tapioca Starch– Tapioca starch comes from cassava root, which is a root vegetable similar to a potato or sweet potato. The starch is used in things your probably familiar with-tapioca pudding, or the bubbles in bubble tea! It is commonly used in gluten-free products and gives a texture that is a little bit chewy, resembling gluten.

Baking Powder– This helps the batter to rise.

Baking Soda– Again, helps the batter to rise, preventing a dense cake.

Bananas– In a gluten free banana cake, this is a necessity. I used 3-4 ripe bananas.

Eggs– Eggs give the cake a good structure.

Sugar– The first time I made this I used only granulated sugar, and it was delicious, but you’ll notice that I now also include brown sugar. The combination just works. (Of course, if you don’t have brown sugar on hand you can substitute the brown for additional granulated sugar)

Brown Sugar– Dark or light, but I like dark.

Vanilla– Just a touch of vanilla extra, for flavor. Also, used in the cream cheese frosting!

Salt– Just a pinch, to prevent the cake from being too bland.

Butter– One stick, for the cream cheese frosting (optional)

Cream Cheese– Again, for the cream cheese frosting. One package will do (optional)

Confectioners’ Sugar– For the cream cheese frosting, but if you choose to not do frosting, it’s nice to serve a dusting of sugar on top!

Chocolate Hazelnut Spread– I used a chocolate hazelnut spread for in between the layers of cake. You can also use cream cheese frosting instead, but I think chocolate and banana and hazelnut go so well together! I prefer to use this brand.

hands serving a slice gluten free banana cake

Gluten Free Banana Cake

This banana cake is sweet and delicious! I like to serve it as a layered cake with chocolate hazelnut spread between the layers, and cream cheese frosting on top!
Print Recipe Pin Recipe
Prep Time 20 minutes mins
Cook Time 1 hour hr
Cooling Time 1 hour hr
Course Dessert
Cuisine American
Servings 8 people
Calories 140 kcal

Ingredients
  

For the Banana Cake

  • 3-4 Ripe bananas
  • 1/4 Cup Sour cream
  • 2 eggs
  • 1/2 Cup Granulated sugar
  • 1/4 Cup Dark brown sugar
  • 1 Tsp Vanilla
  • 1 1/2 Cups Brown rice flour
  • 1/4 Cup Tapioca starch
  • 2 Tsp Baking powder
  • 1/2 Tso Baking soda

Cream Cheese Frosting

  • 8 oz Cream cheese
  • 4 oz Butter
  • 2 Cups Confectioners' Sugar
  • 2 Tsp Vanilla

Additional

  • Chocolate Hazelnut Spread for in between layers (optional)

Instructions
 

Make the cake

  • Preheat the oven to 350˚F. Brush two 6" pans lightly with oil, and then dust gently with brown rice flour. Line the bottoms with parchment just in case.
  • In a small mixing bowl, combine the dry ingredients: brown rice flour, tapioca starch, baking soda, baking powder and salt. Set aside.
  • In a larger mixing bowl, mash the bananas until a puree forms.
  • Mix in the sour cream, both sugars, eggs, and vanilla to the banana mixture one at a time, and mixing between each addition. Be sure that everything thoroughly incorporates.
  • Fold in the mixture dry ingredients, and fold/mix gently until there are no more dry spots.
  • Divide the batter between two pans and bake about 50-60 minutes, or until a toothpick comes out clean. Set aside and allow the cakes to cool, about 15-20 minutes and then remove them from the pans. Allow them continue cooling on a baking rack until room temperature before frosting.

Make the cream cheese frosting

  • In a stand mixer with a whisk attachment or large mixing bowl using an electric mixer, combine the softened butter, cream cheese, sugar and vanilla. Whip until light and fluffy, about 7-8 minutes.

Assemble the cake

  • Slice each cake the horizontal way, keeping them as even in width as you can, so you have four cake rounds/layers instead of two. To create a layer cake, we'll frost the top of one cake and then stack another layer on top.
  • Using a chocolate hazelnut spread, or cream cheese frosting if you prefer, cover the entire top of one layer and then stack another layer of cake on top. Continue this until you've used all four layers of cake. If you're using chocolate hazelnut spread, do not cover the top of the final layer with it, as it will have cream cheese frosting.
  • Spread the top layer of cake and the sides with cream cheese frosting. You can use however much you prefer- I chose to make mine "naked" style, so more frosting on top, and very thin layer of frosting on the sides.
  • Using a piping bag and a circular, scoop any remaining cream cheese frosting into the bag, and round tip (or a ziploc bag with a small hole cut in one corner), squeeze and decorate small droplets of frosting along the top outer edge of the cake.
  • Enjoy! For storing, keep it in the fridge overnight. I feel it's best served at room temp, so take it out of the fridge a few hours before serving to let it warm up. Keep for about 5 days or so.
Keyword sweet, treats

Baking with Kids, Desserts, Recipes

Sea Salt Oatmeal Chocolate Chip Cookies

Nov 11, 2021 · Leave a Comment

sea salt oatmeal chocolate chip cookies

Chocolate Chip Cookie Variations

I don’t know anyone that doesn’t like chocolate chip cookies. Of course, everyone has their preferences. There are hundreds of variations of the classic chocolate chip cookie: with nuts, without nuts, tollhouse, brown butter, sea salt, gluten-free, etc. For the die-hards and obsessive perfectionists there is also the consideration of temperature, size, butter quality, and 1 cup vs. 1 1/4 cup of flour. Being somewhat neurotic, I am the latter, though it works out seeing as I have four children at home that have no qualms about cookie variations. Chocolate chip cookies are chocolate chip cookies, and even if they’re not that good they’re still pretty good. Oatmeal chocolate chip cookies have always been my personal preference. Something about the combination of oats, brown sugar, and chocolate makes for a wonderful combination. As a cook and perfectionist, I am always tweaking, analyzing and leaving room for improvement. Perfectionism is a harsh word, and with food it is always objective, but I aim for perfect and sometimes I get close. These sea salt oatmeal chocolate chip cookies are right about there. Last winter I baked many variations of chocolate chip cookies, experimenting with different ratios of brown sugar to white sugar, oats, different percentages in chocolate, and other things. These sea salt oatmeal chocolate chip cookies became the ones that were the most asked for in our house. While I do like to switch it up sometimes, these have become the go-to chocolate chip cookie recipe.

slack tide maine sea salt with sea salt oatmeal chocolate chip cookies

Slack Tide Sea Salt: Salt from the coast of Maine

How often do you use sea salt in your kitchen? I started using sea salt several years ago, after a friend brought me a box as a gift. I used to use Maldon sea salt, which was introduced to me by a friend a few years ago, and is harvested in England. This past spring, I came across Slack Tide sea salt via their Instagram and I’m so glad that I did! I am a firm believer in shopping locally whenever you can, and was instantly on board with the thought of cooking with salt straight from the coast of Maine. If you’ve ever spent any time on the coast of Maine you, too, probably understand the appeal. If you haven’t used sea salt too much, it can be used in place of regular salt when cooking, though it is usually more potent than kosher salt. It also comes in larger crystals or flakes, too. I love using sea salt as a finishing salt- so topping a salad or roasted veggies with it. Roman is being a master at fried haddock and loves sprinkling Slack Tide sea salt on the fish just before serving. It’s also great in any kind of sweets- this past summer the kids and I made a vanilla saltwater taffy with flecks of sea salt in it. Today I’m sharing a sea salt oatmeal chocolate chip cookie recipe, and I’m working on a sea salted caramel sauce to gift people for Christmas this year. If you aren’t familiar with Slack Tide– please check them out! They harvest the salt water in the deep areas off the Maine coast and then the salt is solar dried. It is a female owned business and they are absolutely wonderful!

close up of sea salt oatmeal chocolate chip cookies

Sea Salt Oatmeal Chocolate Chip Cookies

These cookies are quite simple to make. I use melted butter because I usually want to make cookies on a whim and don’t plan ahead enough to let the butter sit out and soften for a few hours. Melting the butter takes just a few minutes, so it’s easy for me suddenly be able to make cookies when I find that I have a free 30 minute window of time. Melting the butter in chocolate chip cookies also creates crispier edges and will make for slightly chewier cookies. Again, slight personal preferences in cookie making!

Step One Preheat the oven to 350˚F and prepare two cookie sheets or baking sheets with parchment paper.

Step Two Place the butter in a small pot and set the pot to low heat. Allow the butter to fully melt, and set aside to cool slightly.

Step Three In a medium sized bowl, combine the flour, salt and baking soda.

Step Four In a large bowl combine the butter, dark brown and granulated sugar, eggs, and vanilla. Whisk well until everything is fully combined.

Step Five Pour the flour, baking soda and salt mixture into the wet ingredients and mix until there are no dry spots left.

Step Six Mix in the oats and chocolate chips until they are evenly distributed throughout the cookie dough.

Step Seven Using a cookie scoop or two spoons, scoop small spoonfuls of cookie dough onto your cookie sheets- leaving about 2″ of space between each cookie. You should be able to fit about 9-12 cookies per pan.

Step Eight Sprinkle each cookie with a pinch of sea salt.

Step Nine Bake the cookies for 12 minutes, turning the pan after 6 minutes. They will look soft in the middle and slightly browned around the edges. Allow to cool for 10 minutes before removing from the pan.

A bit more about me…

Hello! My name is Amber and I’m a food photographer and recipe developer in Maine. I also work throughout the New England area, capturing various food stories, products and recipes. Thanks so much for visiting! I started my food blog, Downeats, because I love to inspire others to cook and enjoy delicious, healthy meals with their loved ones. I was raised and currently live in Maine with my (gorgeous, amazing, hardworking) high school sweetheart and our (hilarious, talented and wonderful) children. I believe in living slow and enjoying life and I love capturing shared moments. You can read more about me here. If you are looking for a food photographer or recipe developer please contact me here.

Baking with Kids, Desserts

Simple Tomato Sauce From Scratch for Lazy Nights

Nov 3, 2021 · Leave a Comment

Spaghetti with tomato sauce made from scratch

As a mom, I don’t always have it all together. While I do sometimes make larger-than-necessary affairs of our dinners, breakfasts, or maybe just meals in general, sometimes I don’t have the energy. Sometimes I let Fiona nap for too long, into the dusky ends of the fall afternoons. I curl up on the couch and read High Five Magazine to her just a little too close to dinner time, letting my hour or two for dinner prep dwindle away into picture puzzles and lazy giggles. Sometimes I let the lunch (or breakfast) dishes sit on the counter until dinnertime and don’t have enough space on the counter to cook up anything too fancy. Usually it’s a quick pureed soup with buttered toast, quesadillas, or a really quick tomato sauce from scratch. Some days I don’t have the energy, you know? Hashtag mom life?


It has been a few weeks since we came home with Isla and I’d be lying if I said the mom-of-four-transition hasn’t hit me harder than I thought it would. It’s been, as many say, a whirlwind of emotions- laughing, crying, and all the moods that the average sleep-deprived mom generally feels. A lot of joy and grace, though, too. As my body slowly shifts back into place, and I inch closer and closer out of maternity jeans, I’m happier to feel more and more like myself again. Last week was a lot of pajama, sweatpants, and bathrobe wearing. Roman, Amelia and Fiona have a new morning routine, which is running into our room to see (read: wake up) Isla just as the sun is coming up. They coo over her crib, lovingly poking her and stroking her jet black hair until she kicks and grunts and is staring wide-eyed back up at them. Then they take turns passing her back and fourth for a good 15 or so minutes until she becomes intolerant for her morning fill of milk. Then they dash up the spiral staircase to their third floor rooms, Fiona not so far behind anymore. I nurse Isla, and we start our day with tea, toast and a to-do list.

Hard days equal simple pasta nights?

Like I said, I don’t always have it all together. As a mom of now 4, how could I possibly, and (honestly) does anyone? Life happens on the daily. Toddlers throw tantrums. Kids deprive you of sleep because of pesky bad dreams. Coffee spills on your good clothes. Everyone is in a mood. Some days I have it together and things are almost IG-picture-perfect. On days where I don’t, though, I always try to show myself more grace. I rest when I’m tired. I communicate my needs. I relax on our food choices. I make things easy, simple and as stress-free as I can. One night after a difficult day of homeschool battles, and toddler tantrum-ing, I was done. Mentally and emotionally at my end, and all I wanted to do was to just sit and watch cooking videos for the evening. I had planned on roasting a chicken with a creme fraiche and herbs, with a side of roasted potatoes and carrots and a garden salad. None of that happened. I scrapped the whole meal, reserving it for another night, and made this lovely, 15-minute tomato sauce from scratch. It doesn’t sound like much, but it was so well received by the kids (Okay, I love it, too) that I’ve added it to my regular repertoire of recipes. A simple tomato sauce from scratch just for the lazy nights-how perfect, no? It’s good, simple, and quick: a simple tomato sauce, served over spaghetti. Nothing ground breaking here, but spaghetti and sauce with a sprinkle of decent parmesan is always something that is met with cheers at our table. I’ve seen several tomato sauce from scratch recipes online, and I’m sure there are thousands, if not hundreds of thousands to choose from. Mine takes about 15-20 minutes to prepare, has ingredients that you most likely already have in your home right now, and has a really good depth of flavor for something that’s so quickly put together. Oh, and did I mention the kids love it?

Usually if I have a box of mixed greens or a head of lettuce in the fridge, I can toss some into a large bowl, grate a carrot or slice some cucumbers over it and call it a salad. If you have sorbet in the freezer, or cake leftover from the weekend for dessert? Voila- a three course meal put together in 30 minutes.

How to Make a Simple Pasta Sauce from Scratch

Plate of spaghetti with sauce

Step One Start by dicing the onions, garlic and the carrot.

Step Two Add a couple of lugs of olive oil to a large pot and set on the stove to medium-low heat.

Step Three Add in the onions and garlic and saute until translucent, stirring occasionally, about 3-4 minutes.

Step Four Add the diced carrots, and saute another 6-8 minutes, stirring occasionally.

Step Five Add the oregano and thyme, and saute 1-2 minutes.

Step Six Pour in the tomatoes and mix well, turning the heat down to a low simmer. Add the sugar, salt, pepper and clove (if adding clove).

Step Seven Allow the sauce to simmer for about 10-15 minutes before serving or turning off the heat. Serve over your pasta of choice and garnish with chopped parsley or basil, and grated parmesan.

Step Eight Store in an airtight container, in the refrigerator for up to 5 days.

Simple Tomato Sauce from Scratch

This tomato sauce is perfect for those nights when you don't really know what to make and don't have a lot of ingredients on hand, but want something delicious that can be put together quickly.
Print Recipe Pin Recipe
Prep Time 10 minutes mins
Cook Time 20 minutes mins
Course Main Course
Cuisine American
Servings 6 People

Ingredients
  

  • 1 Large Yellow Onion
  • 3 Cloves Garlic
  • 1 28 oz Can Whole, Peeled Tomatoes (Diced or Crushed also work!)
  • 1 Tsp Dried Oregano
  • 1 Tsp Dried Thyme
  • 2 Tsp Sugar
  • 2-3 Tbsp Olive oil
  • Salt + Pepper (to taste)
  • 1 Medium Carrot, peeled and diced

Instructions
 

  • Pour the olive oil to a large pot and set the heat to medium-low.
  • Add in the onion and garlic and saute until the onions are translucent and the garlic is just starting to get some color- about 3-4 minutes.
  • Add the diced carrots and saute for another 6-7 minutes, stirring every couple minutes so that nothing burns.
  • Add the oregano and thyme and saute another minute or so.
  • Meanwhile, in a blender, pour the whole, peeled tomatoes and pulse until roughly pureed, about 15 seconds. If you're already using crushed tomatoes, you can skip this part!
  • Pour the tomato puree into the pot and mix well to incorporate the other vegetables and herbs. Set the heat to a low simmer.
  • Add the sugar, salt, pepper and a tiny pinch of ground clove (optional). Stir well, and allow the sauce to simmer about 10 minutes before serving.
  • Serve hot, over your choice of pasta.
  • Store in an airtight container in the refrigerator for up to 5 days.
Keyword easy, quick, sauce

Hi! I’m Amber Rogals.

Hi! I’m Amber Rogals and I am a food photographer, and recipe developer living and working in Maine. I also serve the New England area and beyond, and write and photograph regularly for my food blog, Downeats. I absolutely love cooking and developing recipes with seasonal foods, and gathering with loved ones to enjoy everything. I grew up on the coast of Maine and pretty much never left. I currently live here in Maine with my (gorgeous, amazing, hardworking) high school sweetheart and our (hilarious, talented and wonderful) three kids. I love capturing shared moments, and inspiring others to cook, eat, gather, and live slow. You can read more about me here. If you are looking for a food photographer, food stylist or recipe developer please contact me here.

Dinners, Recipes

Best Simple Fall Soups: Creamy Pumpkin Soup from Scratch

Oct 28, 2021 · Leave a Comment

Bowl of Creamy Pumpkin Soup

Fall in New England: Changing leaves & creamy pumpkin soup from scratch

It is fall in New England. This means many changes, from the plentiful pumpkin patches, to the generous apple trees. Halloween and Thanksgiving are fast approaching. The scent of one of my many pumpkin dishes (this time a creamy pumpkin soup from scratch) lingers in the stairwell. The deciduous leaves are dying and going out with a bang like they always do; from green to yellow to orange and finally red. Growing up, Ryan always commented how odd it was that death could be so beautiful, how people come from miles around just to see the dying leaves of New England. It is beautiful. The warm winds of summer are gone, and the annual gale of autumn has finally come to greet us. It robs the trees of their vibrant foliage, delicately plucking away the leaves one by one, and then directing them around our driveway in a series of beautiful pirouettes and jetés. The kids like to try to chase them, always trying to catch the leaves that are just out of their reach. With a cold and graceful playfulness comes the north wind. I love the changing seasons, but for me, it’s not about the leaves. It’s the comfort of food, scented kitchens, and gathering together. Apple picking, corn mazes, and admiring the pumpkins with the curly, wispy stems. Cozying up under the blankets with a babe or two, sharing a mug of hot cider. In fact, as I write this, I have a creamy pumpkin soup simmering on the stove downstairs and my ten-day-old newborn cuddling on my chest. In New England fall is the season of harvest, gathering and comfort.

The best fall soups are fast and simple.

Two Bowls of Pumpkin Soup

Like this soup recipe, I also titled my last soup post the “best simple fall soups”. This is for a couple different reasons. As a cook, I’ve always believed that some of the best foods are the most simple foods, and made with the best ingredients. You can easily make a wonderfully delicious soup from scratch with only 4-5 ingredients. I try to cook by keeping things simple, quality, seasonal and (when I can) local. Of course, you can make a wonderful soup with 15 ingredients or fancy techniques, too, but it’s not always necessary. The other reason is this: At this season in my life- homeschooling three children and caring for a newborn- I’m also finding that to me “best simple fall soups” or really any “best” recipe is something that is quick and simple to put together. Bonus points if it doesn’t require a lot of cleanup time or costly ingredients, too. I suppose one of the things I’m finding I have a bit less of now is time. If you’re a stay-at-home mom, or someone cooking for a large family then you can probably relate. Simple, fast, healthy and delicious? Yes, please.

How to make creamy pumpkin soup from scratch

Pumpkin Soup Ingredients

I didn’t actually roast my first pumpkin until last fall, though after realizing how simple it was I was completely hooked on the idea and went out and bought at least half a dozen. Now when I grocery shop in the fall I always buy a few- they look festive in the house and its nice to be able to always have freshly roasted pumpkin in the fall. I know that not everyone can get fresh pumpkins to roast at home. Roasting a pumpkin is incredibly simple, delicious and makes your home smell like a yummy fall side dish. To make pumpkin soup from scratch, you need only roast a pumpkin, scoop out the insides, and then blend it with a few other simple ingredients in a blender. I like to use onion, carrot, vegetable stock, and a bit of heavy cream. Served with a baguette, or even just buttered toast this soup is absolutely delicious!

Step One Start by roasting a pumpkin. Preheat your oven to 400˚F.

Step Two Slice your pumpkin in half the long way. Place each half inside a roasting pan and oil the inside and outside (No need to remove the seeds or insides of the pumpkin. We will do this after it has roasted.) Sprinkle the inside with a bit of salt. Once the pumpkin is oiled and salted, make sure each half is facing down (so you can’t see the seeds/inside) in the roasting pan and place in the oven. Set a timer for 1 hour.

Step Three After one hour you should be able to stick a fork through your pumpkin with ease. There will most likely be liquid at the bottom of your roasting pan from the pumpkin- that’s fine! Allow the pumpkin to cool off for 15-20 minutes before removing it from the roasting pan. If the pumpkin hasn’t cooked all the way through, you can put it back in for another 10 minutes, and then check it again.

Step Four Once the pumpkin has cooled completely, scoop the seeds out of it and throw away/compost. Then use a spoon to scoop out the flesh of the pumpkin- it should be soft and fairly easy to scoop out. Set it aside in a bowl, or if you’re not making the soup for a several hours, in an airtight container and then store it in the refrigerator.

Step Five When you’re ready to start the soup, roughly chop one onion and two carrots.

Step Six In a large pot, add a couple lugs of olive oil and set to medium-low heat. Add the onions and saute until translucent, about 4-5 minutes. Stir every couple minutes so the onions do not burn.

Step Seven Next you’ll add the chopped carrots. Allow the onion and carrot to saute another 7-8 minutes, stirring every so often to cook everything evenly.

Step Eight Once the vegetables have softened slightly, it’s time to blend everything together. For this you can use a blender, or a stick blender. If you’re using a blender, turn off the stove for a minute. Pour the stock, pumpkin puree, and sauteed blend of onion and carrot into the blender. Turn on high until everything is smoothly pureed together. Pour back into the pot, and turn back onto low heat. If you’re using a stick blender, simply add the stock and pumpkin into the pot and puree everything together with your stick blender until smooth.

Step Nine Add the heavy cream to the soup, the nutmeg and herbs (if using), and the salt (feel free to add more or start with less depending on your preference. Also, if your stock is store-bought keep in mind it may already have salt in it.)

Step Ten Allow the soup to simmer on low for 10 minutes or so. Feel free to add herbs, such as a small amount of finely chopped sage, rosemary or thyme. I also think freshly ground nutmeg, or a small splash of apple cider works well in this soup! Serve hot, and store any leftovers in the refrigerator in an airtight container for up to 5 days.

Creamy Pumpkin Soup from Scratch

This deliciously creamy pumpkin soup is quick to put together and perfect for those colder days!
Print Recipe Pin Recipe
Prep Time 10 minutes mins
Cook Time 30 minutes mins
Course Soup
Cuisine American

Ingredients
  

  • 1-2 Tbsp Olive oil
  • 1 Large Onion, Chopped
  • 3 Medium Carrots, Diced
  • 1 Cup Heavy Cream
  • 1 Cup Pumpkin Puree
  • 1 Liter Vegetable Stock (About 4 Cups)
  • 1 1/2 Tsp Salt
  • 1/4 Tsp Nutmeg (optional)
  • 1 teaspoon Chopped Thyme (optional)

Instructions
 

  • Set a large pot on the stove to medium heat and add the olive oil and chopped onions. Saute the onions until translucent, about 3-4 minutes.
  • Add the diced carrots, and saute another 8-10 minutes, stirring every couple minutes so nothing burns.
  • Add the vegetable stock, and allow everything to simmer for 12-15 minutes.
  • If you're using a blender, turn the heat off of the stove. Pour the stock, carrots and onion mixture into the blender. Add the pumpkin and blend on high until everything is thoroughly pureed. Pour the mixture back into the pot and turn it back onto a low simmer.
  • If you're using a stick blender, add the pumpkin directly to the pot, and blend until everything is thoroughly pureed and smooth.
  • Add the heavy cream, salt and (if using) the nutmeg and thyme.
  • Allow the soup to simmer for another 5-10 minutes, and then serve hot- ideally with a crusty loaf of bread.
  • Store in an airtight container in the refrigerator for up to 5 days.
Keyword Fall, pumpkin, quick

A little bit about me…

Hi! I’m Amber Rogals, a food photographer and recipe developer in New England.

I work as a food photographer, stylist and recipe developer throughout the New England area, capturing various food stories, products and recipes. I also write regularly on my food blog, Downeats. I love to inspire others to cook and enjoy delicious, healthy meals with their loved ones. I grew up and still live in Maine with my (gorgeous, wonderful, hardworking) high school sweetheart and our (hilarious, talented and beautiful) children. I believe in living slow and enjoying life and I love to capture shared moments. You can read more about me here. If you are looking for a food photographer or recipe developer please contact me here.

Dinners, Soups

Quick Pasta with Eggplant and Sausage

Oct 16, 2021 · Leave a Comment

Pasta with eggplant, sweet Italian sausage and tomatoes

Family dinner is one of my favorite things. It’s our family’s way of connecting, spending time together, and sharing beautiful moments together. My intention has always been creating meals that the kids will remember through the senses, and always associate them with memories of family, belonging, and love. Taste and smell can do that, so I try to use it to my advantage as best I can. On the other side of that, I am a mom of three -soon to be four- and creating meals that are time consuming, expensive or complicated isn’t usually in my repertoire. To be honest, I prefer to keep things quite basic. I truly believe (and have experienced) that some of the best foods are put together with simplicity, but with quality ingredients. Family dinner ideas are always on my mind, and I try to be creative (but again, simple) with what I’m cooking and serving, because I like exposing the kids to a wide variety of foods. Pasta is a common go-to for me when it comes to family dinner ideas, because it’s universally liked, fairly quick, inexpensive and you can get really creative with it. Last week I made a pasta with eggplant and sausage that the whole family absolutely loved. I included a little garlic, and canned tomatoes, but not much else. The kids have been asking me to make it again and again, so I knew I had to share it.

Eggplants are still plentiful at the farmers market, and it’s funny to think there was a time that I wouldn’t touch an eggplant. For a long time eggplants assumed the role of “mystery vegetable” in my life, for I never knew just how to cook them. I always dodged them at the grocery store, cherry-picking around them in efforts to dodge discomfort in my own kitchen. For years I admired the darkest of the dark purples, or scratch-pattern graffiti beauties without a clue of how to really make a decent eggplant dish. Even more so, I admired the eggplant recipes I saw in books and on restaurant menus. Home and restaurant chefs muster such know-how with these lovely aubergines: Eggplant fries with creole basil aioli, pasta with eggplant and parmesan, eggplant bruschetta… How could I, too, muster such know-how, confidence and creativity with them? Spoiler alert: just like family dinner ideas, eggplant is best when it’s done simply.

This pasta with eggplant and sausage is the a great example of convenient family dinner ideas. Of course, if you’re vegetarian you can leave out the sausage or substitute it with mushrooms. This dish is not quite a classic style tomato sauce, but more like a chunky, thick blend of vegetables, with a slight amount of sauciness to coat the pasta. The vegetables are sautéed in a generous amount of olive oil, and the canned tomatoes are strained ahead of time, so that the sauce doesn’t ever get a thin, watery consistency. The chili flakes add a bit of heat which my kids will tolerate, but if yours don’t or you prefer no to add them you can leave them out!

Pasta With Eggplant and Sausage:

1) Start by chopping the eggplant into about 1/2-1″ cubes, and set aside. Additionally, finely chop the garlic, and cut the sausage into thin rounds.

2) Take the the tomatoes out of the can one at a time. Cut or tear them in half so that any liquid inside them is released, and then place each half into a strainer. Set the strainer over a large bowl (or somewhere the tomato juice can strain out without making a huge mess of tomato juice!) for about 10-15 minutes. After the tomatoes have strained thoroughly set them on a cutting board and roughly chop them. Any amount of tomato sauce that was thick enough to be left in the strainer will also be used in the sauce, so don’t toss it!

2) Once all of ingredients are prepped you can start cooking. Set a large pot of lightly salted water to boil for the pasta (your choice, though I prefer fettuccini). Boil the pasta until al dente, and be sure to reserve 1/2 cup of pasta water before straining it.

3) Set a large pan on medium-low and add the olive oil and garlic. Saute the garlic about 2-3 minutes, then add the chili flakes. Cook for another 30 seconds, and then add the eggplant.

4) Saute the eggplant about 4-5 minutes, stirring every so often. Continue to cook for another 2-3 minutes, stirring every so often.

5) Add the chopped tomatoes, and any additional sauce that was left in the strainer. Stir well, and season with salt, pepper, and herbs, and turn down the heat to allow to allow it to simmer for a few minutes.

6) Finally add the sausage and reserved pasta water into the sauce. Allow to simmer for 2-3 more minutes, and then turn off the heat.

7) Lastly, pour the pasta into the pan of sauce and mix everything together thoroughly so that all of the pasta is lightly coated. Feel free to taste and add salt as needed.

8) Serve immediately, sprinkled with freshly grated parmesan cheese.

Eggplant Sausage Pasta

You can rarely go wrong with pasta! This is a simple, delicious dinner, and a favorite in our household.
Print Recipe Pin Recipe
Prep Time 20 minutes mins
Cook Time 20 minutes mins

Ingredients
  

  • 3 Tbsp Olive oil, plus more for cooking
  • 1 Large Eggplant, chopped into 1" cubes
  • 3-4 Cloves Garlic, finely chopped
  • 1 28 oz. Can Whole, Peeled Tomatoes, strained and chopped
  • 1/2 Lb Sweet Italian Sausage, precooked and sliced into rounds
  • 1 Lb Pasta of your choice (I used linguini for this recipe)
  • 1/2 Cup Pasta Water reserved
  • 2 tsp Dried thyme
  • 1 tsp Dried oregano
  • 1/4-1/2 tsp Dried chili flakes
  • Salt + Pepper, to taste
  • Grated parmesan for topping (optional)
  • Fresh basil for garnish (optional)

Instructions
 

For the Pasta

  • Set a large pot of water on the stove to boil, with a small handful of salt, for your 1 lb of pasta.
  • Once the pasta water is boiling, stir immediately for a minute or so and then allow to cook until al dente. Before straining, reserve 1/4 Cup of pasta water for the sauce to simmer in.
  • If you cook the pasta ahead of time, drizzle a bit of olive oil on it after straining, so that it doesn't stick together! Set aside and make the sauce.

For the Sauce

  • Open the can of tomatoes and dump the tomatoes into a strainer. Use your hands to break open each tomato, since there is also a lot of water inside the tomato. Allow the tomatoes to strain while you start cooking the rest of your vegetables.
  • In a large pan add a few lugs of olive oil, the garlic and set the heat to medium-low.
  • Saute the garlic about 2-3 minutes, stirring every so often so that it doesn't burn.
  • After the garlic has cooked 2-3 minutes add the chili flakes and allow them to cook for about 30 seconds. Then add the chopped eggplant and allow the eggplant to saute about 5-6 minutes. Stir every so often, but during the time, chop the strained tomatoes, and set aside any puree that has been left in the strainer.
  • Once the eggplant has browned slightly (about 5-6 minutes), add the tomatoes and any tomato puree/sauce leftover in the strainer, as well as the thyme, oregano, a good sprinkle of salt and pepper.
  • Add the few tablespoons of olive oil to the eggplant, tomato and garlic and turn the heat on low. Allow the tomatoes to cook and break down slightly for about 5 minutes.
  • Add the sausage and reserved 1/4 cup of pasta water, and simmer on low for an additional 3-4 minutes.
  • Once everything has cooked together into a thick, chunky, slightly saucy vegetable medley, add all of the pasta into the pan. (If you're afraid your pan won't be big enough, you can alternatively pour the pasta back into the pot after cooking and then mix the veggie sauce into the pasta instead).
  • Season with a bit more salt and pepper as needed, and mix until all of the pasta is evenly coated. Add roughly chopped basil and garnish with a generous sprinkle of parmesan.

Hi! I’m Amber Rogals, a food photographer and recipe developer in Maine.

Thanks for visiting! I also serve the New England area and beyond, and write and photograph regularly for my food blog, Downeats. I absolutely love cooking and developing recipes with seasonal foods, and gathering with loved ones to enjoy everything. I grew up on the coast of Maine and pretty much never left. I currently live here in Maine with my (gorgeous, amazing, hardworking) high school sweetheart and our (hilarious, talented and wonderful) three kids. I love capturing shared moments, and inspiring others to cook, eat, gather, and live slow. You can read more about me here. If you are looking for a food photographer, food stylist or recipe developer please contact me here.

Dinners, Featured, Recipes

New England Spiced Apple Cake

Oct 14, 2021 · 2 Comments

Apple cake slices

This morning I woke up to the sound of rain. Rainy weather in the fall is typical in New England (well, at least Maine and probably more so in the Downeast and coastal regions) We do get a bit of leftovers from the hurricanes that make their way up the east coast, but even still- it tends to be a season of grey skies, wet leaves, and plenty of puddle stomping (if you have kids). The emphatic, though ever soothing, chorus of droplets hitting the leaves of our towering canopy of a chestnut tree sets a mood in itself. Are you one of those people that is comforted by the sound of rain? The sound makes me feel at ease, and long for cozy things. One of my first thoughts as I was laying in bed this morning was that I had to make this spiced apple cake. The scent of warm apples, cinnamon and brown sugar is the epitome of fall, no? Well, at least one epitome of fall. New England recipes in the fall have always been like magic to me- they bring comfort, nourishment and delight in the cold, often blustery chill. New England food (at least in our family) has also always been defined by bringing people together- an irreplaceable feeling of community, and belonging. Of course, summer foods in Maine do this, too, but the colder months seem to lend a more intricate combination of comfort, gathering and satisfaction.

The best fall recipes offer both comfort and nourishment.

I’ve been working on this spiced apple cake recipe for a few weeks now, trying to get it just right. In my opinion, it’s pretty close to perfect. If I have the urge to write down a recipe for the sole purpose of handing it down to my children someday, I know that a recipe is good enough to stop tweaking. This is definitely scrawled into my book of heirloom recipes. I also know it’s just right when the batch doesn’t last longer than a day or two, because Ryan and the kids keep going back for more. I feel blessed to have a large family of willing taste-testers, all with a variety of developed palettes for things like this. While the kids do tire of some of my savory dishes on repeat, cakes and galettes never get old. This apple spice cake is one of the things I truly love about New England- taking locally foraged produce and turning it into something truly magical that encompasses various senses at once. Call me old fashioned, but for me it’s all about creating traditions and memories. This cake, for our family, is becoming both.

A New England Spiced Apple Cake

The ingredients needed for this cake are mostly things you probably have already. If you’ve become a regular on my blog before, you know that I like to keep my recipes simple and focus on quality ingredients instead. Most of my feature one or two seasonal ingredients and things that most people already have stocked away in their kitchen, and this spiced apple cake is no exception to that.

Step One Start by preheating the oven to 350˚F, and generously butter a loaf pan.

Step Two Mix together the dry ingredients: flour, baking powder, baking soda, salt, and all of the spices except for 1 teaspoon of cinnamon.

Step Three Melt the butter in a small saucepan on low heat and allow it to cool for a few minutes. While it cools, grate the apples. Set the grated bits in a strainer and squeeze out any excess water for a minute or two.

Step Four In a separate, smaller bowl, combine the brown sugar and additional teaspoon of cinnamon, and whisk until evenly incorporated.

Step Five In a large mixing bowl, combine the granulated sugar, melted butter, eggs, sour cream and vanilla and whisk thoroughly.

Step Six Fold in the dry ingredient mixture until there are no dry spots, but don’t over mix.

Step Seven Fold in the grated apples- again don’t over mix!

Step Eight Lastly, pour in the mix of brown sugar and cinnamon. Fold in just a few times, no more than 3-4 times. You want there to be “pockets” of brown sugar and cinnamon, instead of having it evenly distributed, so folding it in just a few times and leaving it mostly unmixed is important here. Keep in mind that it will become even more mixed in as you scoop the batter into the pan, too.

Step Nine Gently scoop the batter into the pan, spreading evenly, but mixing or working with the batter as little as possible.

Step Ten Place in the oven and bake 75 minutes, until the edges start to pull away from the sides of the pan and a toothpick can be stuck in the center and removed quite clean.

New England Spiced Apple Cake

This cake is deliciously moist, sticky and full of comforting fall flavor. We often eat it as-is, but it's delicious served warm with a small scoop of vanilla ice cream, or with a drizzle of caramel.
Print Recipe Pin Recipe
Prep Time 20 minutes mins
Cook Time 1 hour hr 15 minutes mins
Servings 8 Pieces

Ingredients
  

  • 4 Medium Apples, peeled and grated
  • 1 Cup All-purpose flour
  • 1 Tsp Baking powder
  • 1/2 Tsp Baking soda
  • 1/2 Tsp Salt
  • 2 Tsp Cinnamon (divided)
  • 1/2 Tsp Ground Ginger
  • 1/2 Tsp Nutmeg
  • 1/2 Tsp Cardamom
  • 8 Tbsp Butter, melted and slightly cooled
  • 1/2 Cup Granulated Sugar
  • 2 Eggs
  • 1/4 Cup Sour Cream
  • 1 Tsp Vanilla
  • 1/2 Cup Dark Brown Sugar

Instructions
 

  • Preheat the oven to 350˚F.
  • Place the butter in a small sauce pan and set on the stove at low heat. Once the butter is fully melted, allow to cool for 5-10 minutes.
  • While the butter melts, peel and grate the apples using a cheese grater. Set the grated apples into a strainer and squeeze gently to remove excess water. Set the apples aside.
  • In a medium sized mixing bowl, combine the dry ingredients: flour, baking powder, baking soda, salt, ginger, nutmeg, cardamom, and 1 teaspoon of the cinnamon. Whisk gently to blend them all together.
  • In a smaller, separate bowl measure out the brown sugar and the other teaspoon of cinnamon and set aside.
  • In a separate, larger mixing bowl whisk together the sugar and melted (but slightly cooled) butter.
  • Whisk in the eggs, sour cream and vanilla.
  • Pour the bowl of dry ingredients into the bowl of wet ingredients all at once. Using a rubber spatula, gently fold in the dry ingredients until fully combined, but take care not to over mix. The batter will be very thick, almost like a dough.
  • Once there are no dry spots of flour, gently fold in the grated apples until they are evenly distributed throughout the batter.
  • Finally pour in the brown sugar/cinnamon mixture. Fold in gently and only fold about 5-7 times total. To create distinct "swirls" of brown sugar, you don't want to fully incorporate the brown sugar.
  • Gently scoop the batter into your loaf pan, spreading it evenly on the top, but handling it as little as possible.
  • Set in the oven to bake 1 hour and 15 minutes- until a toothpick comes out clean when poked through the center.
  • Allow to cool at least 20 minutes before removing from the pan and cutting into slices.
  • Serve with a small scoop of vanilla ice cream, a drizzle of caramel syrup, or enjoy as-is!

Hi! I’m Amber, a New England food photographer and recipe developer.

Hi! I’m Amber Rogals and I am a food photographer, and recipe developer living and working in Maine. I also serve the New England area and beyond, and write and photograph regularly for my food blog, Downeats. I absolutely love cooking and developing recipes with seasonal foods, and gathering with loved ones to enjoy everything. I grew up on the coast of Maine and pretty much never left. I currently live here in Maine with my (gorgeous, amazing, hardworking) high school sweetheart and our (hilarious, talented and wonderful) three kids. I love capturing shared moments, and inspiring others to cook, eat, gather, and live slow. You can read more about me here. If you are looking for a food photographer, food stylist or recipe developer please contact me here.

Baking with Kids, Desserts, Recipes

Best Simple Fall Soups: Curry and Roasted Carrot Soup

Oct 11, 2021 · Leave a Comment

roasted curry and carrot soup with cilantro

How are you enjoying fall so far? In case you’re wondering, I’ve been spending this fall dreaming up pumpkin recipes, apple recipes and soup recipes. Fall foods are my favorite and, like most Americans, I’m an avid fan of pumpkin spice. Have you noticed that the hype around pumpkin spice has seemed to have been reduced to a mere simmer this year? Alternatively, the hype around soup seems to be at every turn. There have been quite a few memes floating around in celebration of soup season and leaving pumpkin spice in the September dust. Don’t get me wrong-I absolutely love pumpkin everything, with the (rather ironical) exception of pumpkin spice lattes. However, I love soup just as much, so hype around soup instead of pumpkin spice is something I can get on board with. Creating the best fall soups is a delicious endeavor. In New England (at least in Maine) it’s somewhat of a joke that summer ends on Labor Day-the very beginning of September. I suppose the joke is always on us because summer does seem to end just after labor day, like clockwork. Suddenly the sardine-packed restaurants and bustling sidewalks become eerily quiet, bare and chilly. Hour-long waits for a table where the waves kiss the decks are long gone within a mere 24-hour period. Labor day in New England is natures Post-it to count your fleeces and flannels, stock up on squashes and spices, and make sure you have enough firewood in the barn. Labor Day- the annual omen of cold things to come- has come and gone, but now leaves us in the midst of soup season. Today I’m sharing a newly adapted favorite- a curry and roasted carrot soup.

The Best Fall Soups

Soup season comes at a perfect time for me, as I’ve been trying to include a lot more soup-eating in our meals. In general, I’ve been aiming to add one more course to our family dinners and I feel that soup fits in the best. Eating in courses is something we’ve adopted over the years and it’s grown on me. From my experience, Americans generally eat just one “course” at dinner-which can be a few different things (such as rice, veggies and a meat) or one thing (such as spaghetti and meatballs), instead of having a starter, main dish and then end course or dessert, one after the other. Sometimes multiple dishes will be on the table at once (such as spaghetti and meatballs, a salad, and garlic bread), for everyone to grab and eat as they please. A lot of our family meals were like this for me growing up, and I do serve dinner this way sometimes.

What do your family meals generally look like? Usually we start with some type of salad or cold vegetable starter. My go-to salad is mixed greens with sliced cucumbers and grated carrot. Sometimes I add avocado, halved cherry tomatoes, sliced red onion, or fresh herbs. I always serve this with a basic homemade balsamic vinaigrette (Roman and I prefer this), and then ranch (Amelia and Ryan prefer this). I have yet to make a homemade ranch dressing, but it’s on my list. Fiona usually eats her veggies without greens and without dressing. She’ll grow into salads, I’m sure. Eating in courses has its benefits. It extends our family time, which I love, but it also offers the opportunity for more variety of nutrients at mealtimes. From my experience, some of the best fall soups are made with seasonal ingredients. Yes, it is a bit more dishes, clean up and preparation, but I’ve been working on making it as efficient as possible, and so far it hasn’t been too bad. Pureed soups have really caught my eye this season because (again!) of their efficiency. Usually you can create a pureed soup with just a few ingredients, and you don’t have to do very much. If you have a blender or stick blender, it’s really a matter of chopping a few vegetables and tossing them in the oven for an hour or so. This curry and roasted carrot soup has only a few simple veggies (carrots, onion and garlic). So this season, I’m thinking the best fall soups are the quick, pureed ones.

Curry and Roasted Carrot Soup

Curry and Roasted Carrot Soup

Print Recipe Pin Recipe
Prep Time 15 minutes mins
Cook Time 1 hour hr
Course Soup
Servings 6 People

Ingredients
  

For the Roasted Vegetables

  • 2 lbs Carrots
  • 1 Large Yellow Onion
  • 2-3 Tbsp Olive Oil
  • 2 1/2 Tsp Curry Powder
  • Black pepper
  • 1 Tsp Salt

For the Soup

  • 3 Cloves Garlic, roughly chopped
  • 1 Quart Chicken or Vegetable stock (about 4 Cups)
  • 1 14 Oz Can Coconut Milk
  • 1 Tsp Curry Powder (optional)
  • Salt and Pepper (to taste)

Instructions
 

Roast the Vegetables

  • Preheat the oven to 400˚F.
  • Prepare your vegetables by peeling your carrots and cutting off the ends, as well as with the onion- peel and cut off each end.
  • Quarter the onion, and then set both the carrots and onion in a large roasting pan. Drizzle oil all over and sprinkle the curry powder and salt on top of the vegetables. Roll the carrots around so they get evenly coated in oil, curry and salt. Lightly sprinkle everything with black pepper.
  • Roast the vegetables for about 45 minutes- until the carrots start to brown and you can easily get a fork through the thickest carrot. Set aside and allow to cool.

Make the Soup

  • Prepare the garlic by peeling it, and roughly chopping. (Remember this soup will be pureed so there is no need to chop too much since it will all be blended.)
  • Set a large pot on the stove with a tablespoon of olive oil and set to low heat.
  • Add the garlic and saute 3-4 minutes, stirring every so often so it doesn't burn.
  • Pour in the stock and let it warm up, but not come to a boil.
  • Once the roasted vegetables have cooled, pour the garlic/stock, carrots and onion into a blender. Turn on high about 20-30 seconds to puree completely, then pour everything back into the pot. (If using a stick blender, put the carrots and onion into the pot of stock and use the stick blender until everything is fully pureed)
  • Set the pot back to low heat to keep on a simmer.
  • Add the coconut milk, and additional salt/pepper to taste. If you prefer the flavor to be more spicy, you can add an extra 1/2-1 teaspoon of curry powder.
  • Serve hot, with fresh bread if you have it! Store in an airtight container in the refrigerator for up to 5 days, or freeze up to 3 months.

Notes

*Please note that curry powders vary from brand to brand- some tend to be more spicy and some tend to be more mild. If you don’t like your flavors too strong, just add a little bit of curry to your soup at a time, tasting as you go, so that you don’t accidentally overdo it!*
I absolutely love and highly recommend spices from Gneiss Spice. You can find their curry powder here. If you’d like something with a similar flavor but less spicy you can also use their ras el hanout or garam masala. If you want to try something with a bit more heat, you have to try the berbere!
Keyword Carrots, vegetables, roasted, quick, simple

A little more about me…

My name is Amber Rogals! I’m a food photographer, food stylist and recipe developer in Portland, Maine. I also work throughout Maine, and the New England area. I started my food blog, Downeats, as I love to inspire others to cook and enjoy delicious, healthy meals with their loved ones. I grew up and live in Maine with my (gorgeous, amazing, hardworking) high school sweetheart and our (hilarious, talented and wonderful) kiddos. I believe in living slow, enjoying life and love capturing those moments. You can read more about me here. If you are looking for a food photographer, food stylist or recipe developer please contact me here.

Dinners, Recipes, Soups

Crispy Oven Fries with Seaweed: A New England Recipe

Oct 8, 2021 · Leave a Comment

Crispy oven fries with seaweed sprinkles and kombu

It’s officially fall but it’s been fairly warm and I’m rather impatient in waiting for the cold weather to arrive. Not necessarily cold like classic New England cold, but chilly. Perhaps it’s because being nine months pregnant makes 70 degree weather feel more like 90 degree weather. It could also be that I’m just craving those brisk Maine mornings that always make me want to drink spiced tea, eat all the comforting foods (ahem, these crispy oven fries) and frivolously buy school supplies. I’m eager to slip into my Hunter boots, wool tights and flannel button-ups, and longing for gray, drizzly mornings where the fiery leaves from our chestnut tree stick to my car windows. I’m anxious to finally hold this wiggly little babe in my arms. Roman and Amelia are both spring babes, and Fiona turned three in mid-August. This will be our first fall baby!

Most of my time has been spent in the kitchen (always), or trying to get comfortable in bed. Every few days I do get hit with a severe burst of energy -lovingly referred to as “nesting” in pregnancy- and I spend a good 6-8 hours organizing and reorganizing a cluttered space in our house. It’s coming along nicely, slowly, surely. In time for baby? Only time will tell. The kids are waist deep in Greek Mythology, basics of bread baking, and lots of daily math exercises at home. We’re picking up French again next week. While Fiona spends a lot of her time doing puzzles, art projects, and following Amelia and Roman around, she loves the crisp, orange leaves falling off the trees and likes to watch the squirrels running around hoarding chestnuts and acorns. The boats are slowly starting to clear out of the harbor, leaving a vast, open view. The markets finally are aplenty with squash, dahlias and massive bouquets of kale, and I’m also working on my own perfect pie crust. Fall in Maine has finally arrived.

I could probably wax poetic about fall in New England all season long, but I’d also like to talk about potatoes. These Maine crispy oven fries, actually. Maine is actually quite known for russet potatoes and supplies much of the east coast. Oven fries are absolutely delicious when done right. Sometimes getting them truly crispy can be challenge and I’ve gone through several batches before coming up with this recipe. Well worth it, though! I love to make these for the kids every now and then as a late afternoon snack or a side to go with dinner. Roman and Amelia love them with mayo- Fiona is (of course) team ketchup. To be honest, they’re really good as-is, too. New England food, in my opinion, is at its peak in the fall, and oven roasted french fries are a nice bit of comfort to munch on on a breezy fall afternoon.

These crispy oven fries are actually made with one of my new favorite go-to ingredients in the kitchen- seaweed! Having grown up on the ocean, I’m really passionate -and try to stay as informed as I can- about the health of our oceans. Seaweed plays a big role in keeping filtering harmful toxins out of the ocean. Additionally, seaweed offers a delicious salty/umami flavor to various dishes when used right! It’s also really healthy, so a lot of wins here. For these crispy oven fries I’ve used a seaweed sprinkle from a Maine company called Ocean’s Balance. Ocean’s Balance has a wonderful variety of seaweed products- from tomato sauce to various dried seaweeds. I love the sprinkle because it’s delicious and incredibly easy. For this recipe, Ocean’s Balance seaweed sprinkle gives the fries a more in-depth, umami like flavor-especially if you dip them in ketchup or an Alabama white sauce type of thing. I also garnished these fries with thin strips of kombu.

Crispy oven fries with seaweed

Crispy Oven Fries- New England Style

1) First cut the potatoes into long, french fry style strips. This is easier if you have a mandolin, but you can use a knife, too. Be sure to make them roughly the same size and thickness so that they cook evenly.

2) Put the fries into a large pot and fill with water-just enough to cover the fries. Set the pot onto the stove on high heat for ten minutes. The water should not boil before the ten minutes is up (if it does, set it to low heat).

3) While the fries are parboiling, set your dried kombu (or dulse) into a bowl of water to begin rehydrating it.

3) Strain the potatoes and give them a few minutes to cool off. Spread them onto a towel to dry them as best you can.

4) Preheat the oven to 400˚F.

5) Once the fries are semi/mostly dry, toss them into a large bowl with olive oil and salt so they are all evenly coated.

6) Lay the fries out on a baking sheet. Don’t pile any on top of each other or have them set too close to each other. If they are too close together, they will steam instead of roast and then you will have soggy fries! It may be helpful two divide them between two pans depending on how many you have.

7) Set the fries into the oven and set a timer for 15 minutes.

8) While the fries are cooking, your kombu should be rehydrated enough to cut into strips. Remove it from the water, gently towel it off, and cut into thin, string-like strips for garnishing the fries with. Since this is just a garnish, you can cut as much or as little as you prefer!

7) After 15 minutes take the fries out to flip them with a spatula, so they cook evenly on all sides and set them back in the oven for 5 minutes. After another 5 minutes, repeat this process, flipping with a spatula and then setting them back in the oven for a final 3-5 minutes.They are ready when they are golden brown, after about 22-25 minutes. (Keep in mind that if you have cut your fries very skinny, such as shoe-string style they may cook a little faster than this!)

8) Remove from the oven, sprinkle with a little more salt, and Ocean’s Balance shiitake seaweed sprinkle or spicy seaweed sprinkle. Garnish with a few thing strands of rehydrated kombu or dulse, and serve with ketchup, mayo or your favorite condiment!

More About Me. . .

Hi! I’m Amber Rogals and I work as a food photographer, stylist and recipe developer throughout the New England area, capturing various food stories, products and recipes. I also write regularly on my food blog, Downeats. I love to inspire others to cook and enjoy delicious, nourishing meals with their loved ones. I grew up and still live in Maine with my (gorgeous, wonderful, hardworking) high school sweetheart and our (hilarious, talented and beautiful) children. I believe in living slow and enjoying life and I love to capture shared moments. You can read more about me here. If you are looking for a food photographer or recipe developer please contact me here.

Cooking with Kids, Food, Sides

How to Make This Easy, No Knead Focaccia Recipe

Aug 31, 2021 · Leave a Comment

focaccia with shallots, feta and parsley

It’s the end of August and the mornings are colder, quieter, and more still. The 4:30 sunrises have delayed to near 6am sunrises. The songbirds sleep a little longer, thus so does our house. The evenings are cooler, and the warm glow of the falling sun sets the stage for roasting marshmallows on our patio out back. Fall hasn’t quite arrived, but there are small signs that it’s coming, which means that comfort foods are occasionally making their way onto our dining table again. Chili and rice. Pastas dressed in cream based sauces. And a personal favorite: fresh bread. Baguettes, focaccia and pizza dough make an almost nightly appearance in our home when the weather cools off. Focaccia has become much appreciated in our house over the past year- the simplicity of making it and the versatility never cease to amaze me. The kids will eat it regardless of what it is topped with (Amelia will even eat it with tomatoes), and in a pinch, it can make last minute dinner seem not so last minute. While I find kneading dough to be very therapeutic, I truly appreciate the convenience of this no knead focaccia on the days I’m a bit more booked up.

Focaccia doesn’t usually fall under the umbrella of “comfort food”- at least not in America -but with careful consideration, everything about it is deliciously comforting. It’s soft, airy, salty, and filling all in one. The fact that you can top it with a variety of veggies, cheeses, herbs or even some fruits make it all the better. I’ve said this before but, perhaps it bears mentioning again: my mother was a baker when I was growing up. I spent much of my young childhood munching on focaccia for breakfast before we would head out to deliver it all. The focaccia she made was brushed with olive oil and topped with chopped tomatoes and finely grated parmesan. They were round in shape- more like pizza-and she always cut them into wedges for my sister and I to share. The parmesan would always brown slightly around the edges in her industrial sized oven, but it gave a wonderful saltiness to the bread that I haven’t forgotten- even years later.

While I’m not generally a fan of no knead focaccia (or most no knead breads), this recipe is delicious and wonderfully convenient. You really can let time and yeast do all the work, and the hardest part is having the patience to wait. No breaking a sweat to get this bread on the table. With that said it may take a little bit of planning ahead, as this dough is made one day, and baked the next and the majority of your waiting time is overnight while you’re sleeping. I try to get into the habit of making this focaccia dough every other day or so because it’s nice to have on hand and be able to quickly have fresh bread. If you start in the afternoon one day, the next day when you wake up you’ll have fresh dough you can pop right into the oven. If you don’t use the dough, within 24 hours, you can easily toss it in the refrigerator for up to 3 days and it will taste fine (actually, the flavor develops more the longer is sits!) Additionally, you can top this no knead focaccia recipe with pretty much anything you like. You can even turn it into a pizza night and go classic sauce, cheese and basil. I have a special fondness for caramalized shallots, feta and parsley, but I’ve included a variety of seasonal focaccia topping ideas/flavor combinations below.

No Knead Focaccia, Steps & Tips

focaccia with shallots, feta and parsley

1) Measure the warm water into a large mixing bowl, and sprinkle in the yeast. The yeast should soften and dissolve within a couple minutes when you mix or whisk it. If it doesn’t (this happens sometimes) your yeast might be too old, which means it’s no longer active, so start again with new yeast.

2) Add the flour, olive oil, and then the salt.

3) Use a spoon to mix, until it forms a wet, sticky dough, with no dry spots. Cover the bowl with cling wrap or a clean, dry recycled plastic bag and let it sit at room temperature for about 12 hours, or up to 24 hours.

4) Once the dough has risen (it will have expanded in size, with lots of air bubbles in it), generously oil a large baking sheet.

5) Scoop/pour the dough onto the pan and spread it out to the length and width of the pan. The dough will be sticky, so it helps if your hands also have a little bit of olive oil on them, too.

6) Allow the dough to sit for about one hour. Meanwhile, pre-chop any toppings and about 45 minutes into the hour of rest time preheat the oven to 450˚.

7) Drizzle olive oil all over the surface of the dough, then use your fingertips to dimple though dough. The indentations should go about halfway through the thickness of the dough.

8) Sprinkle on toppings evenly, including salt.

9) Bake for about 30 minutes, until the crust has a nice golden brown.

10) Sprinkle on any fresh herbs while the focaccia is still hot and allow the focaccia to cool for about 20 minutes before cutting into slices.

My Favorite No Knead Focaccia Topping Combinations

Fall

Roasted corn, parmesan and pumpkin
Parsley and onion
Pear, blue cheese and caramalized onion

Winter

Kale, sausage and parsley
Rosemary and shallots
Butternut squash, ricotta and sage

Spring

Asparagus, parmesan and chervil
Kalamata olives, feta and spinach
Scallion and Ricotta

Summer

Heirloom tomatoes and parmesan
Roasted peppers, ricotta and parsley
Zucchini, caramalized onion and thyme

A little about me…

Hi! I’m Amber I’m a food photographer and recipe developer, living in Maine.

I also work throughout the New England area, capturing various food stories, products and recipes. Thanks so much for visiting! I started my food blog, Downeats, because I love to inspire others to cook and enjoy delicious, healthy meals with their loved ones. I was raised and currently live in Maine with my (gorgeous, amazing, hardworking) high school sweetheart and our (hilarious, talented and wonderful) children. I believe in living slow and enjoying life and I love capturing shared moments. You can read more about me here. If you are looking for a food photographer or recipe developer please contact me here.

Baking with Kids, Bread, Recipes

A Traditional Wild Maine Blueberry Pie Recipe

Aug 20, 2021 · Leave a Comment

Maine blueberry pie with whipped cream

In Maine blueberries are the last hurrah of summer. They are plentiful in the beginning and middle of August, and then wind down along with the heat of summer. The days here are still hot, but the nights are chilly and the mornings even more so. The kids still swim in the ocean and the pond near our house, blissfully ignorant of their chattering teeth and the goosebumps they acquire from the creeping northerly wind. The farmers market is still crowded and beautiful, but a seasonal shift in the flowers, produce and air is approaching. Tomatoes, zucchini and eggplants are still deliciously bountiful, but it’s only a matter of time before we start seeing Cortlands, MacIntosh, and Fujis taking over the market barrels. The sunlight appears more golden in hue and is, of course, more welcome in the brisk mornings. I’ve even started turning on the oven every now and then, too, welcoming back homemade bread and weekend cakes. Soup has been on my mind, but we’re not quite there, yet- that comes in September. August is the time for Maine blueberry pie.

Maines culinary notoriety is lobster and blueberries, and while this may just be my pride talking, we’re superlative in both. I’m not the biggest lobster fan- boiling them alive traumatized me as a child -but blueberries I look forward to every year. Maine blueberries are a special variety, meant to be eaten by the handful, along with the odd stem here and there. I’ve written before about the work that goes into harvesting blueberries (it’s not for the faint of heart), so I carry a special place in my heart for the workers that do it. I do love incorporating blueberries into a variety of summer recipes (see here and here), though they are just as good on their own or sprinkled on granola in the mornings. Maine blueberry pie is one of those foods that are well known, you know, like Philly steak & cheese, or New York Bagels. You’ll find it in just about every Maine restaurant from York to Lubec, and every version is just as delicious as the next if you ask me.

My version of Maine blueberry pie is a classic recipe, though I’ve taken away the top crust and replaced it with a mountainous dollop of freshly whipped cream. Blueberries and cream is a personal favorite of mine (though to be fair, you can’t go wrong with any type of berries with cream, right?!) This Maine blueberry pie recipe also has a beautiful kick of cinnamon, and a deliciously flaky crust. If you have a plethora of blueberries on your hands (or are just craving a traditional Maine blueberry pie) then this recipe is perfect.


Traditional Wild Maine Blueberry Pie

maine blueberry pie

1) The first step for blueberry pie (or any pie) is to make the crust. Measure the flour and salt into a large mixing bowl and cut in the butter in small pieces. Make sure the butter is cold, just out of the fridge.

2) Using your fingertips, crush the butter into the flour into small, pea-sized pieces so that you have an even, crumbly mixture of flour and butter. Alternatively, you can use a food processor and pulse the butter into small pieces to save time and energy.

3) Using a spoon, mix in the cold water until a slightly sticky dough starts to form together with no dry spots.

4) Roll the dough into ball and wrap it in cling wrap or clean, dry recycled plastic bag. Flatten the ball into a disc after wrapping and then place in the fridge for at least 2 hours.

5) Meanwhile, prepare the blueberry filling. Pour half of your blueberries into a pot, along with the sugar, cornstarch, cold water and cinnamon. Turn the stove on medium-low heat and let the blueberries cook about 10 or so minutes, until some of them start to break down, and the mixture all starts to thicken from the sugar and cornstarch. After it’s thick and saucy, turn off the heat, and set the blueberry filling aside to cool for a few minutes.

6) Once the blueberry filling has is slightly warm, mix in the other half of the fresh blueberries. If you’re still waiting on your pie crust, you can set this blueberry filling aside at room temperature.

7) Once your pie crust has had at least two hours in the refrigerator, you can start rolling it- but first- preheat your oven.

8) Sprinkle a generous amount of flour on a dry countertop, and with a rolling pin, begin to roll your pie dough into a flat, round shape. It should roll to about 1/4″ thickness, and drape over all sides of your pie pan when placed inside.

9) Lay the rolled out pie dough into the pie pan and fold excess dough around the edges of the pan to form a thick crust. Use the index finger of one hand and your thumb and index finger of your other hand to create a “pinch pie” or “crimped” crust.

10) Use a fork to perforate the bottom of the crust several times, so that it doesn’t rise up while baking. You can also fill the pie crust with pie weights, or dried beans (in tin foil) to avoid the crust rising during the baking process.

11) Bake the crust about 20-25 minutes, until golden brown. Set aside to cool off slightly. Once the crust is warm to touch, pour in the blueberry filling, spreading evenly. Refrigerate at least two hours.

12) Just before serving, top the pie with freshly whipped cream and a sprinkle of cinnamon! Store in the fridge, covered with cling wrap up to 5 days.’

A bit more about me…

Hello! I’m a food photographer in New England.

Hi! I’m Amber Rogals and I work as a food photographer, stylist and recipe developer throughout the New England area, capturing various food stories, products and recipes. I also write regularly on my food blog, Downeats. I love to inspire others to cook and enjoy delicious, healthy meals with their loved ones. I grew up and still live in Maine with my (gorgeous, wonderful, hardworking) high school sweetheart and our (hilarious, talented and beautiful) children. I believe in living slow and enjoying life and I love to capture shared moments. You can read more about me here. If you are looking for a food photographer or recipe developer please contact me here.

Desserts, Recipes

How to Make Ratatouille: A Perfect Summer Stew

Aug 14, 2021 · Leave a Comment

Summer in Maine is a thing. Okay, obviously it’s a thing… a yearly thing… but it’s also a thing. A thing that keeps you as busy as the Swans Honey bees. A thing that keeps you awake at night around a bonfire on rocky beaches, mosquitos be damned. A thing that makes you want to snag all the plentiful produce at all the cunning little farm stands and turn it into bakes, boils or barbecues (or in my case, into a beautiful ratatouille). In fact, “Summer in Maine” is a phrase you hear thrown around a lot when you’re here. It can really be the answer to many questions you might ask someone. For example:

“How’s it going? How have you been?”
“Oh, you know. It’s summer in Maine.”

Or, perhaps:

“What is with all this traffic?!”
“Summer in Maine.”

It’s a way of saying things are busy and hot and beautiful and crowded and enjoyable all at the same time. Mainers know what summer in Maine is like, so the phrase is understood without much explanation. To me summer in Maine means frigid salt water swimming, humid evenings looking for fireflies with the kids, and lots of farmers market visits. The days are packed and the season always ends too fast, slipping through our blueberry stained fingers and leading us into an equally vibrant (but seemingly shorter) autumn. Plentiful are the Maine blueberries, heirloom tomatoes and oversized zucchini, and come mid-July my fridge is overflowing with all of them. Flourishing bouquets of herbs and dahlias also make a regular appearance in my kitchen. Lately I’ve taken up a particular fondness for zucchini. Last summer I discovered the not-so-mysterious simplicity in how to make ratatouille with the plethora of summer veggies I had collected one weekend. Classic New England recipes are just as commonplace in my kitchen: fried haddock, Maine blueberry pie, pretty much anything with potatoes. Ratatouille was intriguing to me, but not only had I never made it -I had never even tasted it. Turns out, it was much easier than I thought. One year later I’ve finally perfected my version of it. Needless to say, if you’ve been wondering how to make ratatouille, please read on.

Ratatouille is anything but part of the repertoire of native New England recipes. It’s originally a French dish, though I think that many people started wondering how to make ratatouille when the Pixar movie was released several years ago. I think it’s quite common now. It’s now one of my favorite things to make for dinner, because it’s simple, healthy and tastes delicious. It’s also great during the summer when you have lots of seasonal produce that you want to use. You can also serve it over rice, pasta, or alongside a baguette… so there is a bit of versatility there, too. If you’ve seen the movie, don’t be intimidated. The recipe that follows does not include fancy cooking or plating techniques. At it’s most simple (and in my opinion, best) ratatouille is roasted veggies that are then cooked on a stovetop into a summer stew. Zucchini, summer squash, tomatoes and eggplant are traditional, though red peppers can also make an appearance. I like to make mine with a shallots or onion, and plenty of garlic.

How to Make Ratatouille: A Perfect Summer Stew


1) Prepare all of your vegetables. I like to cut the eggplant, zucchini, summer squash and tomatoes into approximate 1″ cubes or so. I cut the red pepper and onion into smaller, diced pieces. The garlic should be chopped quite small.

2) Saute the onion on medium-low heat, stirring occasionally, until translucent- about 2-3 minutes -then add the garlic.

3) Allow the garlic and onion to cook together about 2 minutes, then add in the eggplant.

4) Saute the eggplant for about 5-6 minutes, then add the zucchini, squash and bell pepper. Saute everything for another 7-8 minutes.

5) Add in the chopped tomatoes and thyme, mix everything well, and sprinkle generously with sea salt.

6) Turn the heat to a low simmer and allow the vegetables to all cook together for about 8-10 minutes, stirring every couple minutes. This gives the tomatoes time to break down into a more sauce-like stew.

7) About a minute before turning off the heat, add in the freshly chopped basil.

8) Serve immediately over rice, pasta, or alongside a fresh baguette. The kids and I always top ours with a sprinkle of parmesan cheese, and fresh parsley.

Hi! I’m Amber Rogals, a food photographer, food stylist and recipe developer in Maine.

Hello! I’m Amber and I’m food photographer, food stylist and recipe developer living in Maine. I work throughout the New England area and beyond! I am the writer behind, Downeats, my food blog that aims to inspires others to cook and find connection through food. I live on the coast of Maine with my (amazing, wonderful, supportive) high school sweetheart and our (equally as wonderful and amazing) three children. I love connecting with others, capturing shared moments, creating recipes, and cooking with seasonal foods. You can read more about me here. If you are looking for a food photographer, food stylist or recipe developer please contact me here.

Dinners, Food, Recipes

Classic New England Recipe: Easy and Healthy Potato Salad

Aug 14, 2021 · Leave a Comment

healthy potato salad

Has it been hot where you are? This past week has been a tidal wave of heat, humidity, a relentless sun, and it’s perfect for days spent in the ocean. We Mainers spend most of our lives in the bitter cold, longing for a spark of warmth. Yet when the heat comes, we can not help but crave the cold. We toughen the soles of our feet against the rocky, barnacle-speckled beaches just to reach the frigid, salty waters and escape the heavy heat for a short while. Humid Maine summers are squired by cold, salty dips into the ocean and a lingering appetite for cold foods. Classic summery things like popsicles, cold and juicy watermelon, and as much fresh lemonade as I can squeeze. I love to experiment with things I can truly make my own, and a healthy potato salad has been my go-to for years.

Potato salad can be so many different things. It seems everyone, everywhere has their own version. I’ve seen Japanese potato salads, potato salads with curry, vegan, no mayo, with bacon and vinegar, and many more variations. Then of course there is that classic, less than healthy potato salad that is a bit like eating spoonfuls of mayo, but it’s still kind of good. I consider my own version to be a bit rustic, and packed full of veggies without feeling too vegetable heavy. It’s satisfying and full of flavor. It’s also perfect for hot days when you can’t bear to turn on the stove, or if you’re headed out and want to toss it into a cooler.

We’ve been spending a lot of time down at the pond and on the ocean. I do tend to overpack on our outings now (perhaps it comes with the territory of being a mom…? I don’t know.) and this healthy potato salad usually tags along with us. My kids all love it, and rarely tire of it. My oldest daughter Amelia, who tends to turn up her nose at most vegetables, would eat this every day if I were to serve it to her. She’s more of the aforementioned mayo-heavy potato salad enthusiast. But a healthy potato salad? I’ve actually come downstairs to find her eating it for breakfast some mornings. For a girl who I’d assume would love the mayo-heavy version, this one really knocked it out of the park.

Steps and Tips to Make A Healthy Potato Salad

healthy potato salad

1) The first step is to prep all of the vegetables. For this potato salad I like to use:

  • Red potatoes
  • Dill pickles
  • Celery
  • Carrot
  • Red Onion
  • Dill
  • Parsley

2) While this healthy potato salad does have a nice array of veggies in them, I like to keep them fairly subtle by chopping them vert small and keeping the potatoes larger in size. Cut the potatoes into approximately 1″ cubes, and everything else can be diced quite small. For the carrots, I like to grate them using a cheese grater (or you can use a food processor), and then chop up the grated carrot into even smaller pieces. The herbs can be roughly chopped.

3) Once all of your vegetables are prepped, most of the work is already done! Next, blanch the potatoes. Blanching sounds like a fancy cooking to term, but it’s really just boiling something and then as soon as it’s done you plunge it into cold water to stop at from cooking any further. Potatoes hold a lot of heat and when you strain them there is a lot of steam, so they will continue to cook and soften if you leave them sitting in a strainer after boiling. Since we don’t want our potatoes too mushy, I recommend boiling about 8-10 minutes. To be sure, you can poke a fork through one piece of potato and see how soft it is. You want it to be tender, but not falling apart. Once they are tender, strain them and dump them into a larger pot of cold water, or quickly rinse them off with cold water until they have cooled. Set them aside for a few minutes to dry.

4) Once the potatoes have cooled off to at least room temperature, it’s time to mix everything together. Combine all of the ingredients into a large mixing bowl and mix well until everything is nicely distributed and lightly coated with mayonnaise.

5) Finish by adding salt and pepper to taste.

Healthy New England Potato Salad

This potato salad is satisfying and filling- packed with veggies and only a light amount of mayo.
Print Recipe Pin Recipe
Prep Time 30 minutes mins
Cook Time 10 minutes mins
Servings 6 People

Ingredients
  

  • 3 Lbs Red Potatoes, chopped into one inch cubes
  • 4-5 Pickle spears, diced
  • 2-3 Stalks Celery, diced
  • 1/4 Cup Red Onion, diced
  • 2-3 Carrots, grated and then chopped
  • 1/4 Cup Mayonnaise
  • 1 Large Handful Fresh Dill
  • 1 Large Handful Fresh Parsley
  • Salt + Pepper

Instructions
 

  • Blanch the potatoes by boiling them about 7-10 minutes (until just tender, but don't overcook them so they fall apart) and immediately rinse with cold water or plunge into a pot of cold water after straining. Allow them to cool.
  • Meanwhile, prepare the additional vegetables as listed above. Most of these vegetables are diced. For the carrots, grate them with a cheese grater or food processor, and then roughly chop into smaller pieces.
  • Chop the fresh dill and parsley, and set aside.
  • Once the potatoes have cooled to at least room temperature, combine all of vegetables and herbs in a large mixing bowl. Add the mayonnaise and mix well to coat everything lightly with mayo.
  • Add salt and pepper to taste (I start with approximately 2-3 tsp salt, and several good shakes of pepper)
  • Serve immediately, or store in the fridge for up to 5 days.

A Little About Me…

Hi! I’m Amber, a food photographer and recipe developer in Maine.

I work as a food photographer, stylist and recipe developer throughout the New England area, capturing various food stories, products and recipes. I also write regularly on my food blog, Downeats. I love to inspire others to cook and enjoy delicious, healthy meals with their loved ones. I grew up and still live in Maine with my (gorgeous, wonderful, hardworking) high school sweetheart and our (hilarious, talented and beautiful) children. I believe in living slow and enjoying life and I love to capture shared moments. You can read more about me here. If you are looking for a food photographer or recipe developer please contact me here.

Featured, Food, Recipes, Sides

  • Page 1
  • Page 2
  • Go to Next Page »

Primary Sidebar

Welcome!

Amber Rogals with daughter

Downeats is a journal that shares food stories and recipes, and photography. It is devoted to home cooking, gathering with loved ones, living slow and imperfectly. The name Downeats is a foodie play on the Downeast region of the coast of Maine- so everything is New England inspired.

Learn More >>

Slow Living & Family Recipes
Once a week emails to support your home cooking and slow living lifestyle. Want to join the community?
Welcome! I'm so excited for you to join our community. Keep an eye on your inbox :)
  • Instagram
  • Pinterest

Recently

  • French Crepes Recipe (Easy and Classic Crêpes!)
  • Buckwheat Flour Banana Bread
  • Gluten free Potato Soup
  • Gluten Free Shortcrust Pastry (No Xanthan Gum)
  • Banana Buckwheat Pancakes (Gluten Free)

Archives

  • May 2023
  • January 2023
  • November 2022
  • September 2022
  • May 2022
  • April 2022
  • March 2022
  • November 2021
  • October 2021
  • August 2021
  • July 2021
  • March 2021
  • February 2021
  • November 2020
Here’s a question: Why does carrot cake always s Here’s a question: Why does carrot cake always seems to make an appearance in the spring? It has always mystified me seeing bloggers often post about carrot cake recipes come March or April. Doesn’t carrot cake seem like it would fit in so much better with the fall season? 

Carrots aren’t seasonally harvested in the spring, and also- they’re orange so I feel they would fit in so well with autumn, no? Not only that but the classic carrot cake is usually made with typical fall “warming spices” like cinnamon and ginger and allspice. I’m not complaining- I’ll take carrot cake any time of the year- it’s just something that I’ve always wondered about. What cake do you feel really represents spring?

If I had to choose, I think something light and vibrant like a citrus cake, with a little whipped cream or dusted sugar. Or perhaps a simple butter cake with a flower essence added, like rose or lavender?

In any case, these carrot cupcakes are delicious and are made with spices from @gneissspice and the most perfectly whipped cream cheese frosting. Nothing fancy. Just simple and delicious. My recipe is getting sent out to my #substack subscribers this afternoon as my Sunday’s Cake Column. Tap the link in my bio to get it!

#carrotcake #carrotcakerecipe #cardamom #cakerecipe #baking #cakerecipe #bakersgonnabake #f52community #maine #dessertfirst #cakes #cakeinspiration #yummy #dessertreel #foodreel #recipeoftheday #recipeshare #carrotcakecupcakes
In April, Maine is always in this spring limbo, wh In April, Maine is always in this spring limbo, where we are no longer coveting the rich, wintery squashes and comforting roasts, but the spring darlings are only just starting to peek out of the ground. This time of year I rely on eggs and herbs quite a bit, with omelettes and quiche as my go-to. I made a beautiful (and so delicious!) quiche recently that the kids really enjoyed: asparagus, ricotta and leek.

I’ll be sending out the recipe to my community later this afternoon, so tap the link in my bio and hop on the list if you’re interested!

#recipeshare #recipeoftheday #quiche #recipes #eggrecipes #quicherecipe #frenchcooking #maine #maineeats #familycooking #familydinnerideas #asparagus #f52community #foodie
My number one tip for productivity? Keep a fairly My number one tip for productivity? Keep a fairly solid routine, with a couple rituals peppered in, as well.

We’ve been back from NYC for a few days now and I’m just starting to get back into routines and rituals. I have a fairly solid routine which includes daily exercise, work and photography, late afternoon coffee/tea (or more recently this cacao maca latte from @isles_co ) journaling, and family dinner.

NYC was amazing (I may or may not be secretly plotting to one day move there), and it’s nice to have a break from the usual, but it’s also nice to get back into the swing of things.

For me routines and rituals:

-keep me focused
-help me stay organized
-reduce stress
-remind me to slow down
-maximize productivity

What’s one thing that helps you make the most of your time?? 👇
This year for Valentines Day I bought myself a few This year for Valentines Day I bought myself a few bars of newly discovered chocolate and 🤩🤩🤩 

I’ve always been on the side of supporting local, organic, sustainable, but I now find myself actively seeking out brands that are bringing more good into the world. Sometimes it feels like the world is spiraling out of control, and supporting the brands that are doing good makes me feel good and grounded. I like discovering brands that have a strong belief system, a good story, and a moral compass (like, who doesn’t, am I right??) when you do the research, sometimes you discover those brands are just a stones throw away, like @goodsamfoods 

Also, this is my first stop motion! What do you think? It’s just a tiny start. As I start to slowly shift (or rather, grow) into more of a marketing agency model, there will still be photography shared here, but more creative projects and behind the scenes. Video, foodie collabs, marketing chatter, etc. etc. Oh, and I rebranded. I hope you enjoy this new iteration 🥑 

#dogoodfeelgood #dobetter #sustainability #chocolate #chocolatelover #stopmotion
Anyone else missing summer right about now? 🙋‍♀️

Looking through these fun images and reminiscing about warmer weather, graze boards on the patio, veggie potato salad, hot sand, and all my favorite frozen treats. ☀️ 

In the meantime? It’s the perfect time to be busy with work- which I am. New projects, diving further into social media management and marketing, and lots more video going on BTS. More to come 🥑 

#summer #summervibes #foodphotography #yum
Sourdough is basically my life now 🔥 #bakery # Sourdough is basically my life now 🔥

#bakery #bakerylife #sourdough #sourdoughbread #crumb #crumbshot #sourdoughlove #bakersgonnabake #baking #bakinglove #bakebakebake #bakefromscratch #fromscratch #madewithlove #maine
Instagram post 17994221297273346 Instagram post 17994221297273346
Life this week: Lots of simple joys. Rainy days, Life this week:

Lots of simple joys. Rainy days, sopping boots, silly faces. Chocolate meringues. Peeling potatoes. Warm cuddles, new books, Yuyu Hakusho, and resolutions, of course.

Are you subscribed to Downeats? I sent out three new recipes this morning:

Chocolate Meringues
Potato Leek soup
Kale & Brussels salad

Link in bio if you want them 😊

#kalesalad #meringues #momlife #mommyhood #familytime #familygoals #lazyweekend #yum #foodie #substack #maine #newengland #potatoleeksoup #recipeshare #recipeoftheday #recipes #familycooking #dinnerideas

Copyright © 2025