• Skip to primary navigation
  • Skip to main content
  • Skip to primary sidebar
Downeats logo
  • My Story
  • Recipes
  • Work With Me
  • Contact
  • Learn
    • Freebies
    • Mini Photo Course
    • Curated Resources

Oat Flour Pancakes Recipe

Apr 1, 2022 · Leave a Comment

pouring maple syrup on oat flour pancakes

Oat flour pancakes have become quite commonplace in our house since I’ve integrated a lot more non-gluten grains into our household. Mealtimes are quite a ritual in our house, and even though breakfast isn’t as big of an affair, we still usually reserve 1-2 mornings a week to have a family breakfast together. Pancakes, crepes, or waffles have always been in my repertoire. These oat flour pancakes are a newer recipe of mine, but becoming a fast favorite of the kids.

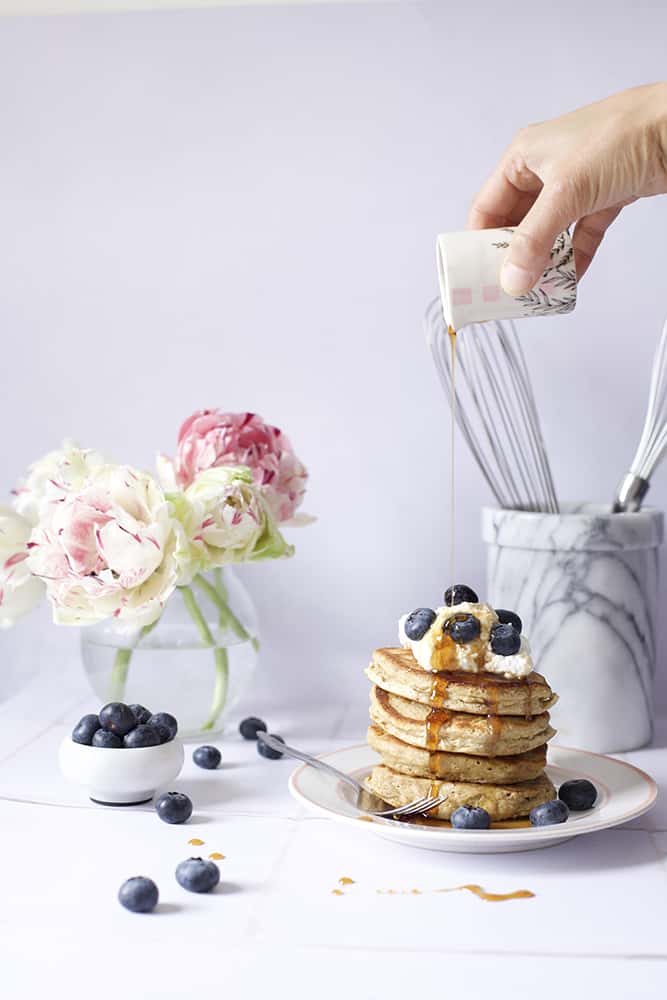
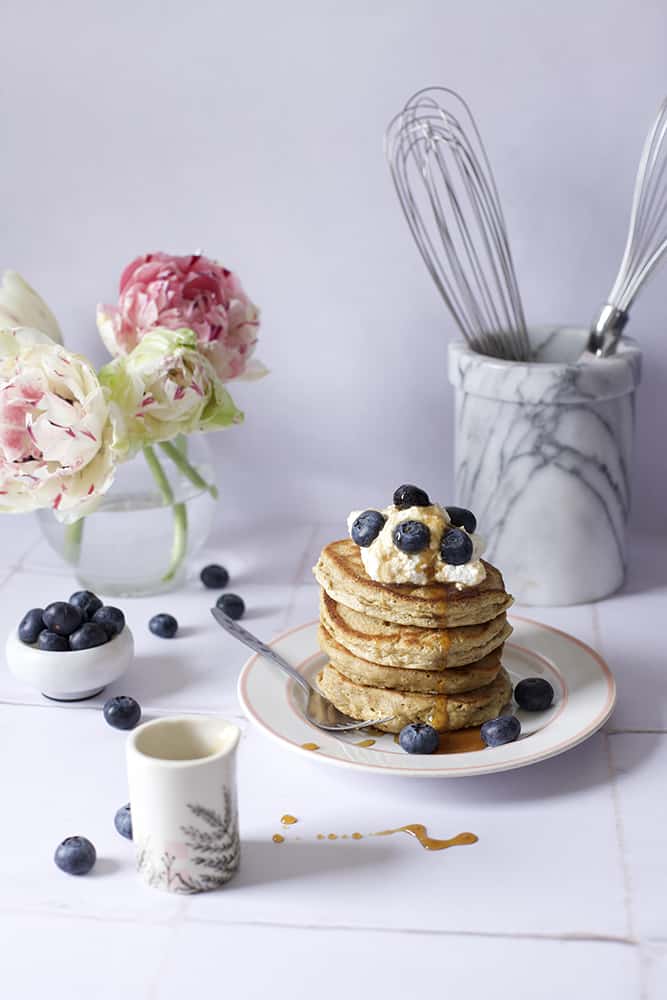
I’ve made these oat flour pancakes several different times, the first few times being with a slight variation. Now I’ve finally settled on the recipe and they pretty much always coming out delicious. The kids absolutely love them (though, let’s be honest, the kids will love anything that’s covered in maple syrup!). Personally, I like to serve these with fresh berries, whipped cream and maple syrup.

oat flour pancakes with blueberries and maple syrup

Oat Flour Pancakes Ingredients

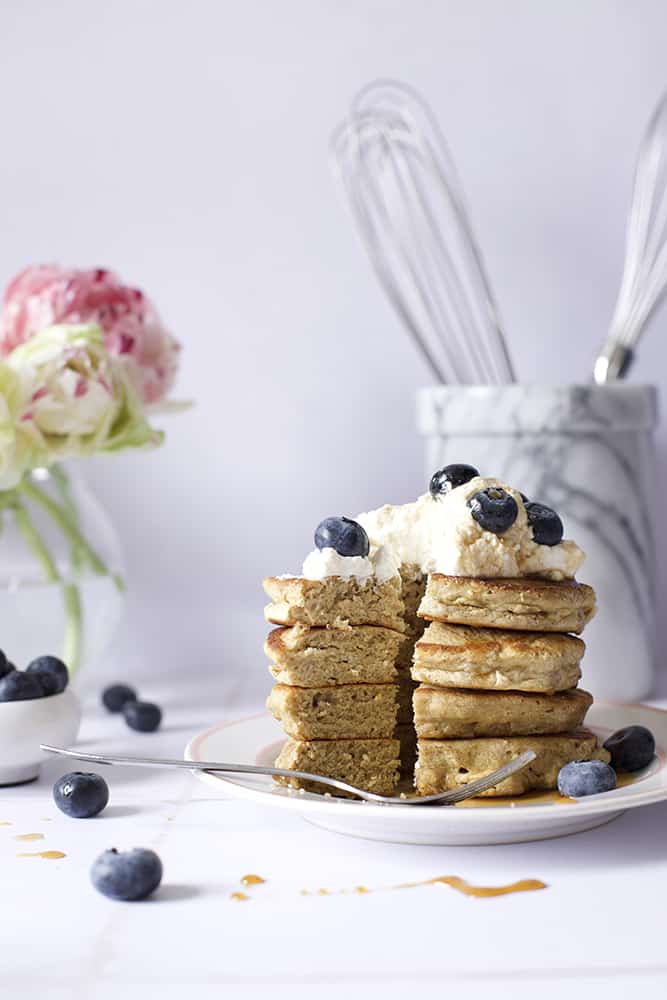
Oat Flour– If you’ve never used oat flour, it does tend to absorb liquid a bit more than wheat flour does. This holds true for most gluten-free flours that I’ve used thus far. The texture of these are also a little bit more grainy than wheat pancakes, but they also have a delicious, wholesome, oat like flavor. I almost always keep this brand handy because it’s certified gluten free (it’s also great for pie crust, and gluten free oatmeal cookies). I like to use this brand of oat flour, because it’s specifically gluten free and I do feel that Bob’s Red Mill are tried and true products.

Eggs– Because oat flour is a bit heavier than wheat flour, oat flour pancakes can end up being a little bit dense, which isn’t ideal. To combat that, I separate the eggs, adding the yolks directly to the pancake batter and then whipping the egg whites to stiff peaks and folding them in at the end. It is one extra step, but it’s so worth it.

Milk– I like to use whole, local milk, but you can absolutely use oat milk or almond milk for these pancakes, too!

Sugar– Just a little bit, and it’s optional.

Salt– A pinch, for flavor.

Vanilla– Vanilla complements the oat flour flavor really nicely, and just works in pancakes.

Toppings– You can top these pancakes with anything you’d like- fresh fruit, whipped cream, maple syrup, peanut butter, honey- it’s up to you!

oat flour pancakes
oat flour pancakes with blueberries and whipped cream

Oat Flour Pancakes

These oat flour pancakes are gluten free, and absolutely delicious!
Print Recipe Pin Recipe
Prep Time 15 minutes mins
Cook Time 15 minutes mins
Servings: 4
Course: Breakfast
Cuisine: American
Ingredients Method

Ingredients
  

  • 2 Cups Gluten Free Oat Flour
  • 1 Cup Milk (Feel free to use your choice of milk)
  • 3 Eggs, Separated
  • 1 Tsp Vanilla
  • 1 Tbsp Sugar
  • 2 Tsp Baking Powder
  • 1/2 Tsp Baking Soda
  • 1/2 Tsp Salt
  • Butter, non-dairy butter or vegetable oil (for cooking)

Method
 

  1. In a large mixing bowl combine the oat flour, baking powder, baking soda, salt and sugar and whisk until everything is thoroughly combined.
  2. Using a second mixing bowl, separate the eggs- place the egg yolks into the bowl with the dry ingredients, and the whites into the additional bowl.
  3. Mix the eggs yolks into the dry ingredients until they clump together, then whisk in the milk in 3-4 separate additions, mixing well between each addition. Adding the milk a little at a time, instead of all at once, helps prevent lumps of flour in your batter.
  4. Using a handheld or stand mixer, whip the egg whites until stiff peaks form, about 3-4 minutes on high speed.
  5. Gently fold the egg whites into the batter, taking care to not over mix. Once the egg whites are fully incorporated into the batter, set a large pan or skillet over medium low heat.
  6. Once the pan has heated, add a pat of butter (non-dairy if you prefer) or splash of olive oil to the pan to prevent the pancakes from sticking. Let the butter melt and warm up for a minute.
  7. Add a large spoonful of batter to the pan and let it spread out to form a pancake. The batter will be thick and move quite slowly. Repeat this step with however many pancakes will fit in your pan (generally I can cook 3-4 at a time, but it depends on the size of your pan, and how large you make your pancakes.)
  8. Allow the pancakes to cook for about 3 or so minutes, until golden brown on the bottom. The edges and top looking a bit dry are a good indicator it's time to flip them!
  9. Flip the pancakes and allow them to cook on the opposite side, another 3 or so minutes.
  10. Serve warm with maple syrup, whipped cream, fresh fruit and your favorite toppings!

breakfast, Cooking with Kids, Recipes

Reader Interactions

Leave a Reply Cancel reply

Your email address will not be published. Required fields are marked *

Recipe Rating


Primary Sidebar

Welcome!

Amber Rogals with daughter

Downeats is a journal that shares food stories and recipes, and photography. It is devoted to home cooking, gathering with loved ones, living slow and imperfectly. The name Downeats is a foodie play on the Downeast region of the coast of Maine- so everything is New England inspired.

Learn More >>

Slow Living & Family Recipes
Once a week emails to support your home cooking and slow living lifestyle. Want to join the community?
Welcome! I'm so excited for you to join our community. Keep an eye on your inbox :)
  • Instagram
  • Pinterest

Recently

  • French Crepes Recipe (Easy and Classic Crêpes!)
  • Buckwheat Flour Banana Bread
  • Gluten free Potato Soup
  • Gluten Free Shortcrust Pastry (No Xanthan Gum)
  • Banana Buckwheat Pancakes (Gluten Free)

Archives

  • May 2023
  • January 2023
  • November 2022
  • September 2022
  • May 2022
  • April 2022
  • March 2022
  • November 2021
  • October 2021
  • August 2021
  • July 2021
  • March 2021
  • February 2021
  • November 2020
Whoopie Pies aren’t my favorite, but it’s fun Whoopie Pies aren’t my favorite, but it’s fun to make them 1-2 times a year. However, the kids love them and they are, after all, the official dessert of Maine (along with blueberry pie, which I much prefer!)

These are super simple to make, and yes, I even opted for the traditional marshmallow fluff to incorporate into the buttercream frosting. I’m most certain my micro bakery would (will) not have these in the regular repertoire, except on special occasions, so here’s the recipe in case you’d like to make them at home:

Whoopie Pie Dry Ingredients
1 1/2 Cups flour
3/4 Cups Baking Cocoa
1 1/2 Tsp. Baking Soda
1/2 Tsp Salt

Whoopie Pie Wet Ingredients:
1 Cup Loosely packed light brown sugar
1 Stick butter (about 15 Tbsp), softened
1 1/4 Cups Buttermilk (Or 1 1/4 Cups milk + 1 Tsp of an acid, lemon juice or vinegar will work)
1 Egg
1 Tsp Vanilla

Icing

2 sticks Sticks butter (about 1 cup) softened
1 Cup Powdered sugar
7 Oz. Marshmallow fluff
1/4 tsp. Salt

1. Preheat the oven to 375 F.
2. In a small mixing bowl, whisk together the dry ingredients, and set aside.
3. In a larger mixing bowl, whip together the butter, sugar, egg and vanilla. 
4. Add the flour and milk to the butter and sugar mixture 1/3 at a time, alternating between additions. (Add 1/3 of the dry mixture, then 1/3 of the milk mixture, then mix until incorporated. Continue until there you’ve used all the dry mixture, and milk)You should have a fairly thick batter.
5. Use a spoon to scoop tablespoon size dollops onto the baking sheet, about 2” apart from each other. I try to make them about 2” in diameter, but you can make them bigger if you want larger whoopie pies.
6. Bake for 11 minutes and allow to cool completely. 
7. To make the frosting, whip together the butter, sugar, and marshmallow fluff, and salt until fluffy and fully blended together, about 3 minutes on high speed.
8. To sandwich them together, scoop about 1-1 1/2 tbsp of filling onto the flat side of one cake, then gently squish the flat side of another cake on top to form a sandwich.
9. Enjoy!

#maine #portlandmaine #bakersgonnabake #baking #sweets #bakersofinstagram #whoopiepie #whoopiepies #sweeeeets #recipeshare #recipeoftheday
Let’s be honest: there is nothing “lazy” abo Let’s be honest: there is nothing “lazy” about making croissants. They are one of the most laborious, meticulous, finicky things I’ve ever made (besides children) but it makes me love them all the more. And if you know me well, you probably know that my idea of a “lazy” day is obsessively perfecting some type of craft or other. 

I’m still perfecting recipes but was quite pleased with how these turned out! They are on the small side, as you can see, because I’m doing half batches while I test. 

I’ve had a few messages already about when/where to get my baked items. I do appreciate it so much and am thinking about putting together a small lineup of my best (Demi baguettes, croissants, olive bread, batard, maybe cookies) for whomever is close by and wants some!

#croissant #croisssnts  #baking #sourdough #naturallyleavened #bakersgonnabake #pastry #bakersofinstagram #handrolled #baking  #portlandmaine #maine #microbakery
Should I, though? 😏✨ #maine #sourdough #mic Should I, though? 😏✨ 

#maine #sourdough #microbakery #bakersgonnabake #portlandmaine #baking #naturallyleavened #bakersofinstagram #sourdoughclub #crumbshot #bakebakebake #wildyeast
Did you know that scoring your dough isn’t just Did you know that scoring your dough isn’t just for decoration? Scoring bread allows you to control where the gases in your dough will escape from when it rises while baking. If you didn’t score your bread at all, the gases would escape from the weakest point causing your bread to tear while baking. Scoring allows you to control where this happens.

Okay I guess, technically, that is sort of an aesthetic reason, though, isn’t it? 😂

#sourdough #sourdoughbread #microbakery #wildyeast #naturallyfermented #bakersgonnabake #portlandmaine #maine #scoring #naturallyleavened #sourdoughclub #bread #breadbaking #bakersofinstagram
BB= Brown Butter chocolate chip cookies 🍪 If BB= Brown Butter chocolate chip cookies 🍪 

If I owned a bakery, these would most definitely be on the menu. I’ve tried many chocolate chip recipe variations, and the truth is they are all really good. Best chocolate chip cookie comes down to a matter of preference. I love the caramel-like sweetness of brown butter, large chunks of dark chocolate that pool into melty puddles, and slightly crisp edges that get chewy towards the middle, and then finally soft in the center.

What’s your ideal chocolate chip cookie? Flake salt on top? Thin and crispy? Cakey or chewy?

#chocolatechipcookies #cookies #cookiefix #chocolate #chocolatelover #microbakery #sweettooth #dessertfirst #baking #pastry #bakersgonnabake #homebaker #chocolatechipcookie #portlandmaine #maine #bakersofinstagram
Sourdough morning buns with a hint of orange zest, Sourdough morning buns with a hint of orange zest, dipped in sugar. I haven’t made these in a while, and forgot how delicious they are (and how good they smell!). 

I’ve been spending a lot more time in the kitchen, tending to a new sourdough starter and testing out cookie and croissant recipes. I actually haven’t baked since we moved, but it’s really nice to be back to it. 

#sourdough #buns #naturallyleavened #portlandmaine #sweets #eatmaine #sourdoughbuns #baking #bakersgonnabake #morningbuns
Who wants a loaf? 😏🥖 #maine #portlandmaine Who wants a loaf? 😏🥖 

#maine #portlandmaine #sourdough #sourdoughbread #naturallyleavened #crumbshot #breadmaking #sourdoughbaker #bakersgonnabake #microbakery
Strawberry rhubarb with a buckwheat crust 💕 Bec Strawberry rhubarb with a buckwheat crust 💕 Because seasonal tarts-both sweet and savory-are such a treat! 

#baking #bakersofinstagram #bakersgonnabake #bakedwithlove❤️ #strawberryrhubarb #rhubarb #tarts #galette #maine #portlandmaine #dessertfirst #sweeeeets #fromscratch #pastry

Copyright © 2025